If you haven’t already done so, please read the FFY Introduction.
October Farm Tasks Overview
Here’s a breakdown of what we’re covering in May:
- Fall Cleanup
- Reflection
- Ordering
- Harvesting
- Digging & Storing Dahlias
- Bulbs, Corms, & Peonies
- High Tunnel
- Business & Taxes: Keeping up with bookkeeping

Fall Cleanup
I completely dread fall cleanup, but there is no better feeling when it’s done! While we won’t deal with perennials until November, annual beds have any support structures taken down, water lines removed, mowed down, and put to rest. Fall is an excellent time to take soil tests. If there are any brand-new areas we will be planting in spring, we’ll till and put down a cover crop (I like Johnny’s mix).
We also will get the cooler and shop cleaned up for fall bulbs, shipping, and dahlia storage (in fact, the majority of October is dedicated to labeling dahlias before frost and then digging and storing: much more details below).
Reflection
Fall is the perfect time for reflection on the past season, because it’s fresh in your mind. We humans think we’ll remember, but we won’t. Whether your season was a home run or strikeout, try and get some of those thoughts out so you can revisit them this winter during planning. I don’t overcomplicate this by trying to capture EVERYTHING, these are just some informal notes to self I record in Evernote. It’s labeled “Dear Diary” because it makes me laugh. A few of my own notes look something like:
- First year we were able to offer flowers EVERY week from April through October, stick to the plan, whoop!
- Order two trays less of lisianthus due to timing/space
- Did not grow as many dried florals as I planned this year, and I kind of missed it
- That said, it’s surprising the amount of beautiful flowers you can make with fewer ingredients (consider cutting a few things versus sacrificing later because you ran out of time)
- Scoop Scabiosa was $ but came on at a time where I really needed ingredients, definitely grow again (also bloomed like crazy)
- Bells of Ireland plugs were a home run
- Overwintered feverfew was the best feverfew we’ve ever grown, what else could be overwintered?
- Need better weeding system for high tunnel (and in general); smarter not harder
- Need a plan for snow barricading high tunnel (water??)
- Roses were a surprise win, all made it overwinter and customers really enjoyed them
- Lost some peonies in storage, switch up storing method to wrapping in kraft papers vs stacked in bulb crates
- If moving peonies, move to single-row system for easier maintenance (like at Pettinger)
- Grow more pumpkins
- Flower pop-ups were surprisingly fun
- Order more bouquet stickers, wraps, and floral food for next year (super low)
Ordering
While I haven’t ordered any dahlias yet, some growers are already starting to have their tuber sales. Be sure to check dahliaaddict.com for upcoming sales.
Farmer Bailey Plugs are also currently available for spring shipping. I’ve placed orders for lisianthus, bells of ireland, scoop scabiosa, veronica.
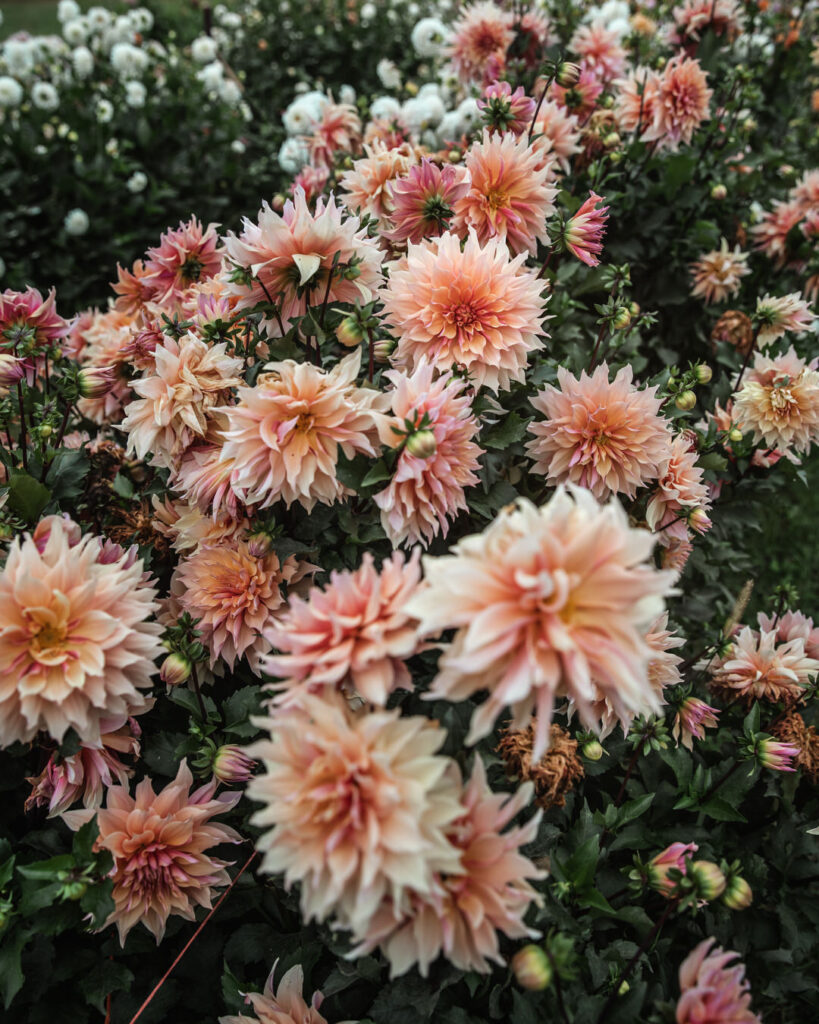
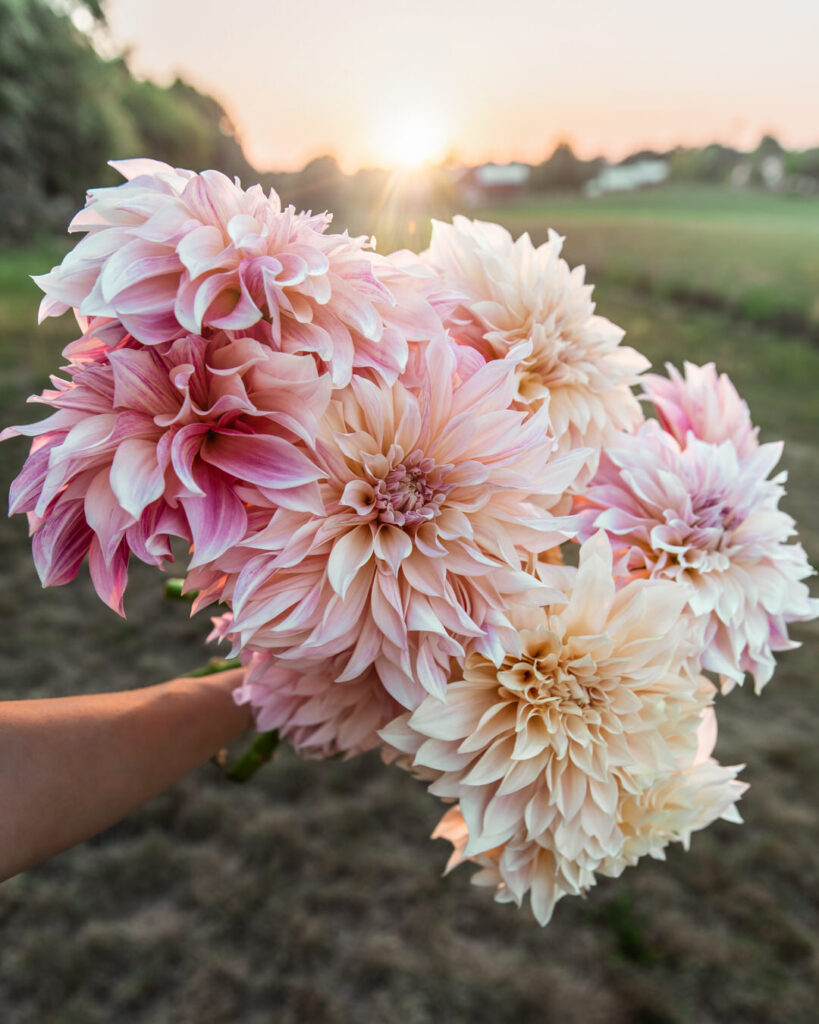
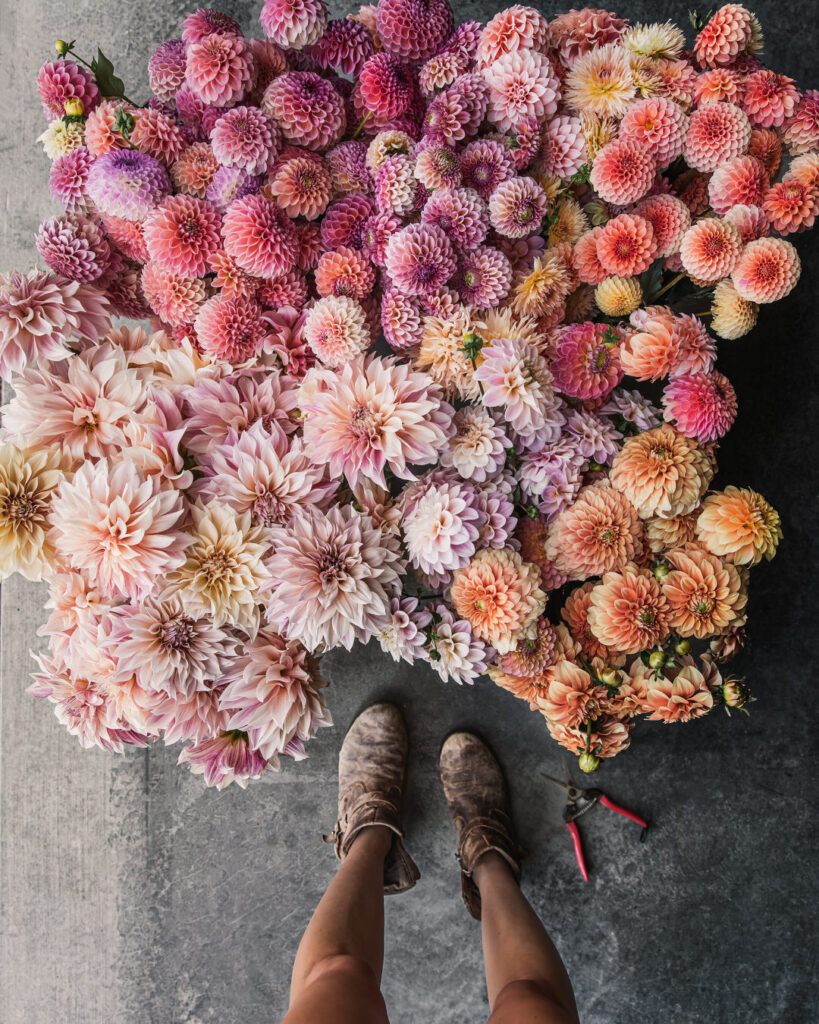
Harvest
We had our first killing frost October 18, but until then harvests were focused on dahlias, sunflowers, amaranth, grasses, and whatever else I can manage (lisianthus, zinnias, and cosmos started to fade out in October).

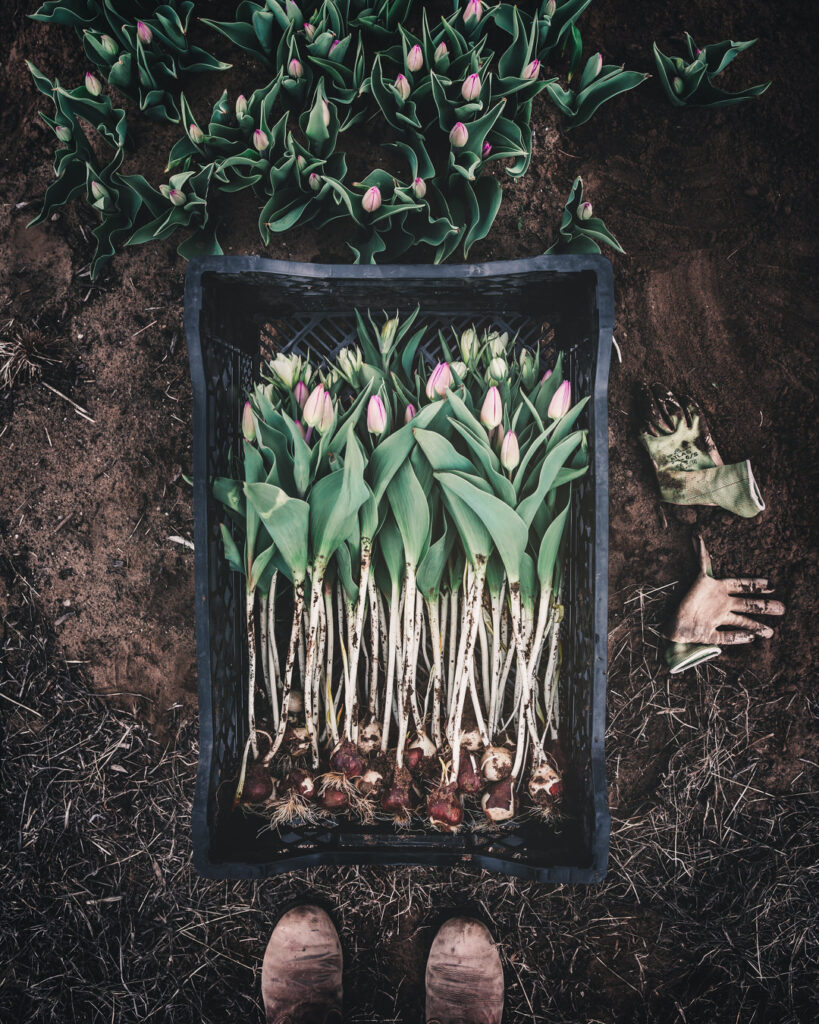
Dahlias
Late October through early November is when we embark on the monumental task of lifting the dahlias for their long winter storage. Perfecting dahlia storage is tricky business. There are different schools of thoughts on when to dig and divide, and even more ways on how to store them. Methods are highly dependent on climate, environment, and what works best for each grower. While I’ll share exactly what we do, I’ve also. listed below a few schools of thought from leading growers in the industry, including links to the more in-depth articles and practices.
General Information
The American Dahlia Society (ADS) provides the following pictorial guide of digging and diving, as well as an in-depth article on digging, dividing, and storage.
Johnny’s Seeds makes the following recommendation: In the fall, after plants have died back but before the ground freezes, cut plants back to 2-4″ above the soil line and carefully dig tubers and remove excess soil. Let tubers cure for 1-3 days in warm location with some humidity, out of direct sunlight with ample air flow. Pack tubers in peat or vermiculite inside perforated plastic bags, boxes or crates.
Ultimately
While everyone seems to have their own tricks (and superstitions, ha), virtually all growers are aiming to store tubers between 40–50F (4.4–10C) at proper humidity. Huber recommends mimicking a root cellar, with stable temperatures in the 40s and humidity at 80-90%.
While temperature is a bit more precise and easy to capture, what constitutes as “proper” humidity has a lot to do with the surrounding environment and the containers and medium in which the tubers are being stored. In other words, a sealed plastic container may have different humidity than the surrounding room.
Ultimately, if tubers are too wet, they will mold and possibly rot, and if they are stored too dry, they will shrivel and possibly desiccate/die. Virtually all growers agree that a little shriveling is perfectly normal and that no matter the storage method, tubers should be inspected periodically (at least monthly) to ensure proper storage.
Here are a few things to consider:
Things to Consider: When and How to Cut Back?
Before digging, most growers recommend cutting back plants to 2–4 inches above the soil line, so digging is more manageable. While some growers recommend cutting back after frost and allowing to sit 10–14 days, others state this can promote rot if conditions are wet as moisture can collect in the hollow stems. The ADS recommends dipping cutting tools in a solution of one part bleach to ten parts of water before switching between one plant and the next to avoid spreading virus.
Things to Consider: When to Dig?
While Erin Benzakein notes that it’s important to let tubers “cure” properly before digging, recommending waiting to dig after a hard frost or two, which toughens the skin on tubers, Kristine Albrecht claims that frost has no effect on maturing tubers. She maintains that maturation of tubers starts at the solar equinox in June, requiring 90 to 100 days from the June 20 Equinox. She notes that while frost has become a convenient placeholder in the calendar, it’s not the frost, it’s the passage of time after the summer equinox. However, Benzakein notes that tubers dug without proper curing had a higher rate of shriveling and seemed more susceptible to rot in her experience. She maintains that while tubers need to properly cure, they do need to come out of ground before the ground freezes or they won’t survive.
Things to Consider: When to Divide?
How one stores also depends on when one chooses to divide their tubers. Some growers wash and divide tubers right away, while many growers, like Erin Benzakein and LeeAnn Huber, store right away until they have time to divide. Benzakein recommends leaving a light layer of soil on clumps rather than washing right away. Huber overwinters in a root cellar in open crates lined with paper, kept at 42F, and filled pine shavings because she has moisture. She recommends 80–90% humidity. Huber also mentions utilizing a cooler in her basement for dividing.
Proper Labeling
All growers stress the importance of proper labeling, often recommending double or triple labeling systems (tubers are easy to mix up!!).
Digging and Storage at PBF
Over the years, here is what we’ve found works best for us.
Digging
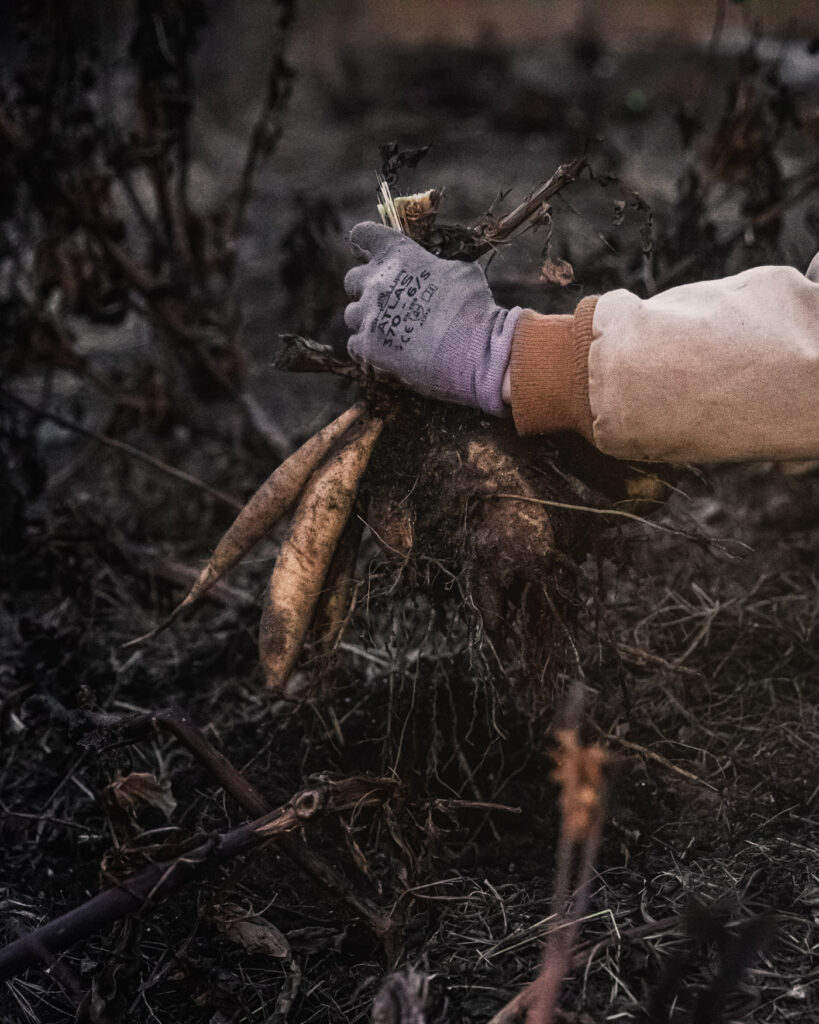
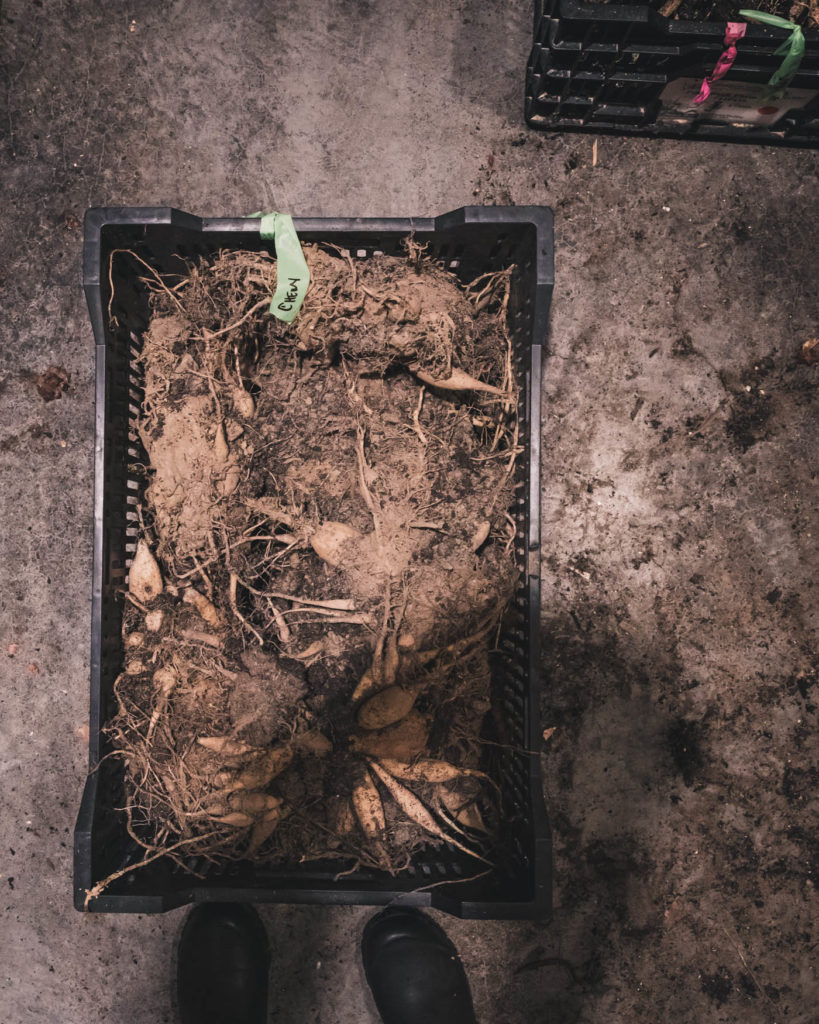
Prior to digging and before a killing frost, I verify all plants are labeled correctly by adding a triple label. Because we sell our tubers, we like to take this extra step. Once frost hits, there’s no going back. I also flag plants with green labels for potential sellers and pink labels for keeping back (there are a lot of reasons for this, but some are: wanting to build stock, new seedling, a plant that may be displaying genetic mutation). These flags and labels follow the plants throughout the entire process.
We dig our dahlias after at least one hard frost, often times two, not because I know whether or not they need to cure for certain, but because we are extremely busy in the fall. During this same time of year, we are shipping for our fall sale, as well as preparing for fall planting of our own. Our season is far too short to dig before frost, and I cannot imagine a scenario in which we would do this.
While we cut stalks first and then dig, how long they sit really depends on what we have going on. Sometimes, they’ll sit for a few days, other times we dig them right away. Either way, they can collect moisture, so I always tip them upside down to remove and pooled moisture, and try and place them this way into the bulb crates.
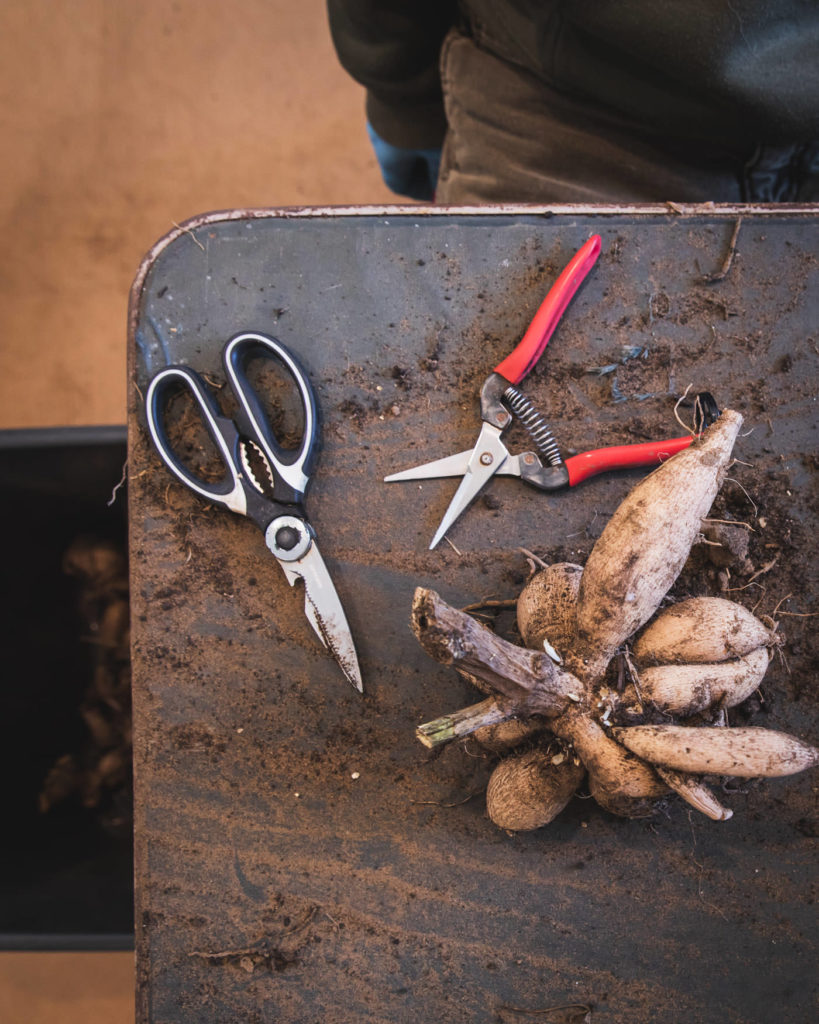
Per ADS recommendations, we do keep multiple loppers in a bucket with 10% bleach solution and switch loppers between cuts. We’ve used both forks and shovels for lifting, both work, I’d say the favorite is sturdy forks. Once lifted, we shake a little bit of the dirt off, but maintain quite a bit as I find this is better for storage. They go into black bulb crates, and as noted, if it seems like the stem has a lot of moisture (sometimes frozen), I’ll set them upside down in the crate.
Like many flower farmers, we divide much later in the winter (January/February). This is not only due to time constraints, but tubers have historically stored well for us in clumps with dirt attached. For this reason, the tubers go into the crates, and straight into storage. They only sit out for as long as it takes us to get the crates from the field to the shop.
Between digging and storage, I want to avoid letting the tubers get too dry. I know some growers recommend letting them dry out, and perhaps you want to do this if you’re washing them, or working with a really humid environment, but my goal is to get them into storage. Especially avoid setting them on concrete, which can suck up moisture.
Storage Prior to Dividing
Crates are stacked in our walk-in cooler, which is converted to a heater for our cold climate. In the summer, the cooler runs on a CoolBot system connected to an air conditioner. Most growers simply connect their CoolBot to a heater over the winter for this purpose. We actually use a heater set at 44F, but this is simply because we received this heater as a gift and it’s super efficient. However, it’s expensive, and if it hadn’t been gifted to us, we’d have just connected an inexpensive heater to our CoolBot system.
P.S., if you want a coupon for $25 off a CoolBot system, use this link.
While the heater is set to maintain 44F in the cooler, we also have this thermometer which measures the high and low temperature and humidity for the past 24 hours. During winter, our cooler stays at about 70% humidity, which has historically been just fine for us. If it dips, we’ll put a bucket of melted snow in there. I do have a backup humidifier with an automatic controller, but we haven’t felt the need to use it yet.
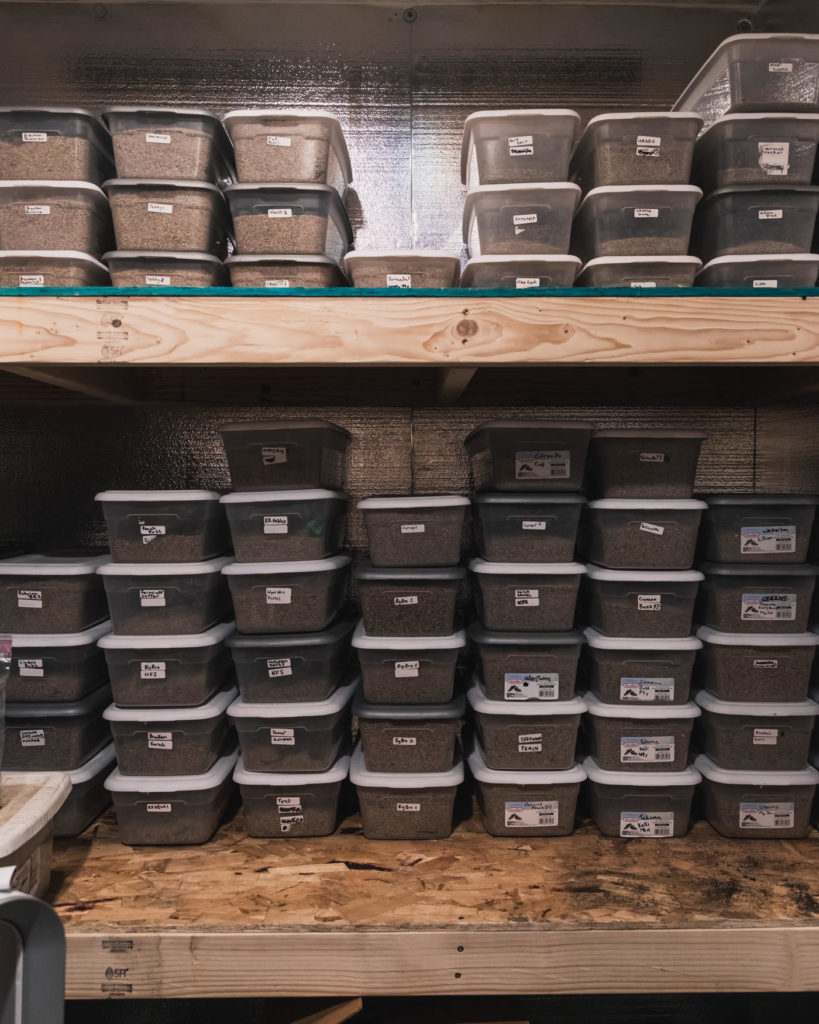
Eventually, in late winter, we’ll begin dividing and then transfer to plastic shoeboxes.
P.S., we inevitably run out of crates every year, in which case we use cardboard boxes (but we do prefer the crates for stacking and storage).
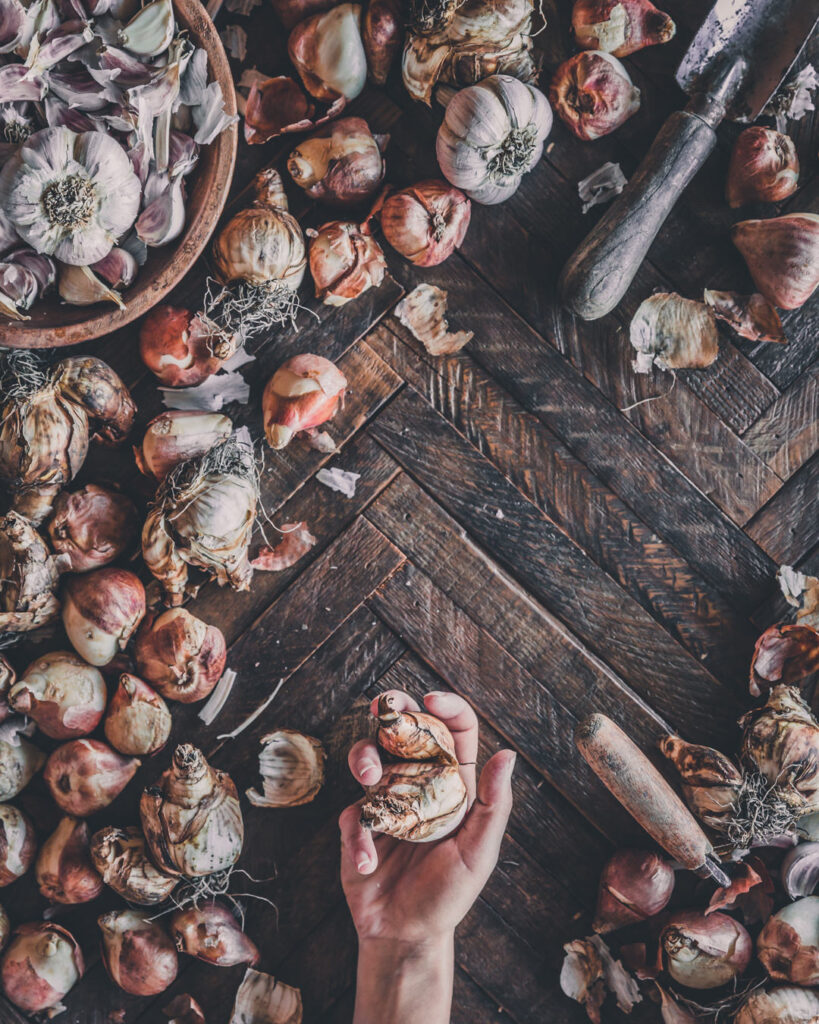

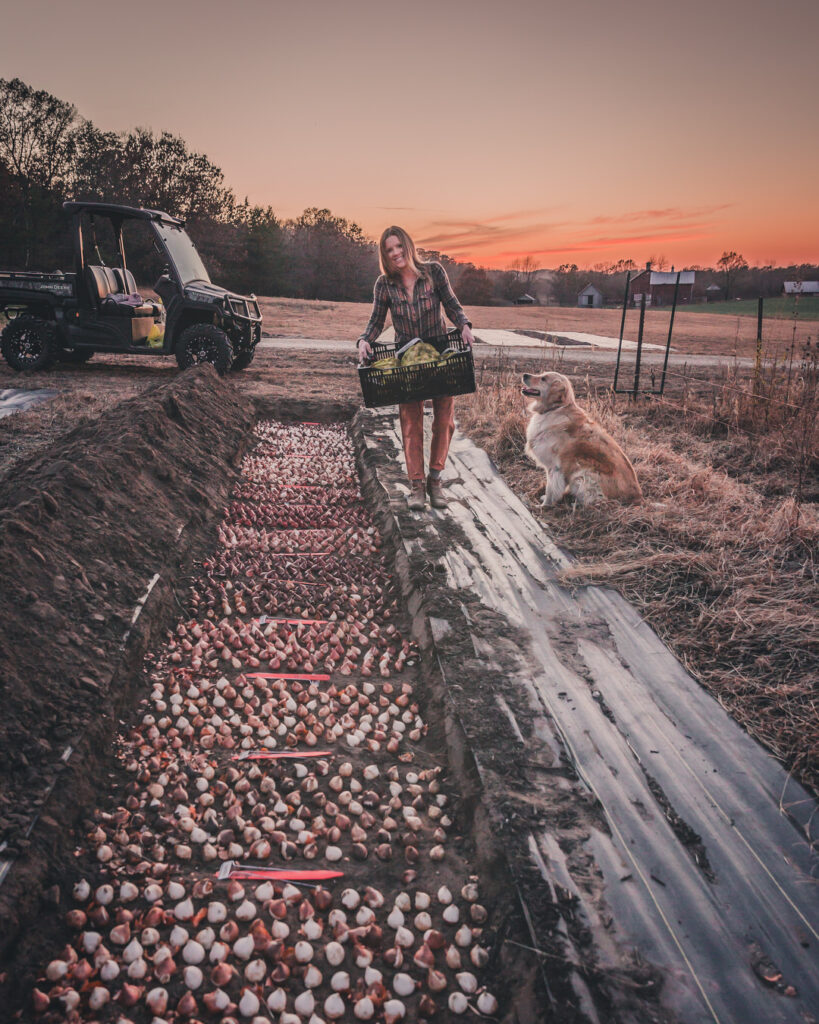
Bulbs, Corms, & Peonies
All of our fall bulbs, corms, and bare roots are being shipped from the wholesalers. Once they get here, they are immediately inspected and then stored in our cooler. Our main focus for October is shipping bulbs/corms/peonies to our customers and lifting dahlias, so our fall planting does not typically happen until November. That said, we may start prepping the ground if time allows. This usually means mowing down beds, tilling if necessary, and adding amendments. We’re considering moving our entire peony production over to the AirBnB. This will be a big undertaking, but we think it will be better in the long run for the health of the plants and for AirBnB guests!! We’ll see how shipping goes 🙂
And if you’re in a cooler climate like me, you might be surprised how late you can plant bulbs and peonies. Now, I don’t want anyone to do anything risky on my recommendation alone; but here in our Zone 4 Wisconsin, we’ve planted as late as late November, and so far, just fine 🙂
If you are looking for bulbs, corms, or bare root peonies, I got you! Check out what we have available here and use code FFY for 20% off 🙂
High Tunnel
In October, we turn the beds over in the high tunnel for fall planting. Things definitely got a bit overgrown in there, so this task was more difficult than it needed to be. Due to an intense work schedule for me, Matt took on this project and I am beyond grateful. He removed all the supports, mowed down the beds, removed the fabric, and gave everything a light till. Woowhoo!
Business & Taxes
I originally removed this so as not to be redundant each month, but I’m thinking it’s important to keep it in:
Every month, I review our income and expenses and apply the profit first method (at least, that’s my goal). If you haven’t read the book, I highly suggest it, but basically for everything that comes in (revenue) you are making target allocation percentages for things like profit, owner’s comp, taxes, and expenses.
Table example:

It’s actually recommended to do this twice a month, but I honestly consider it a win if I do it once and bonus twice. If those terms are foreign, that’s OK (they were for me too). He breaks it all down in a simple (and even entertaining) way. My only regret with this method is not starting it sooner. It’s given me more confidence as a business owner, especially as I do not come from an entrepreneurial family. If you’re not ready to dive on into the book, it’s important to understand your income and expenses. I don’t even use a fancy system like quickbooks, just a spreadsheet!
Wrap Up
OK, my friend, that is IT for October. What do you think? Did you find some useful nuggets? Is there anything that’s unclear or you wish I would have covered?
This link will be live until the end of next month, at which point you’ll get a PDF copy, so you can always refer back it. You can also use the buttons below to save this as a PDF or print at any time.
Tip: use the find shortcut (Ctrl+F on a PC or Command+F on a Mac to search for any word or term either online or in PDF format).
Have any questions or something you want to share with me or others? I know I say this ad nauseam, but I truly believe in the power of the collective and that we all have something unique and powerful to share, so please leave a question or share a comment below. We’re all better for it, and I thank you in advance!
Cheers pal!


cLICK FOR Comments +