Plant Profiles dive deep on one plant variety each month. They are meant to provide you with enough information to make good growing decisions. A desire to grow gorgeous flowers is one thing. However, discerning if a particular plant is right for you and your climate is a whole other ballgame.
My intention here is to give you as much practical information to make these decisions. However, I’m going one step further and taking you completely behind the scenes to share exactly what has worked for us as well. For this reason, Plant Profiles are broken up into what I’m calling the “Nuts and Bolts (N&B)” and “Behind the Scenes (BTS).”
If you haven’t already, please be sure to read the FFY Introduction to learn more about how Plant Profiles are organized.
Before we dive in, you should know that dahlias hold a special place in my heart. I hope you can see that in this month’s Plant Profile, along with the years of research and labor I’ve dedicated to this plant. I don’t hold back, but that also means it’s jam-packed . . . even more than usual 🙂
If you’re new to dahlias, I tried to make the information encompassing but also accessible. I included some more-advanced topics, but as my Great Grandma Marge used to say, “eat what you can and we’ll can what you can’t.”
You can always revisit these later, but they are things I wish I would have at least been aware of when I started, so I hope they’re helpful. If you have questions, you’re likely not alone, so hit up the comments.
(P.S., Be sure to hit the plus sign in the Comments section to view/respond to comments. February Farm Tasks had some awesome questions, so be sure to check that out too!)
And if you’re experienced with dahlias, I’m curious what you think of this month’s Plant Profile, and I’d love it if you’d be willing to share your experience and wisdom!
P.P.S., A few have asked about a social space to connect, and I love this idea, but I’m also not very educated on the options. I’m basically inept at Facebook😅, but it’s all I know of. Though I can barely sign in, I’m open to it (just don’t tell my best friend Alix, she thinks I ignore it on purpose🤣), but also curious if there are other options that are of interest??
OK, let’s get on with it already.
Primary Sources
The primary sources for the N&B portion come from:
- Postharvest Handling of Cut Flowers and Greens: A Practical Guide for Commercial Growers, Wholesalers & Retailers (Dole, Stamps, Carlson, et al)
- Specialty Cut Flowers, 2nd Edition, Revised & Enlarged (SCF): Industry standard for both new and experienced growers on the production of annuals, perennials, bulbs, and woody plants for fresh and dried cut flowers (Allan M. Amritage and Judy M. Laushman)
- Johnny’s Selected Seeds (Johnny’s): Johnny’s has been in the business for 50 years, with a research farm dedicated to finding the best seeds and tools for farmers and gardeners
- Dahlia Breeding for the Farmer-Florist and the Home Gardener: A Step by Step Guide to Hybridizing New Dahlia Varieties from Seed (Albrecht)
- Floret Farm’s Discovering Dahlias: A Guide to Growing and Arranging Magnificent Blooms (Benzakein)
- Jennie Love’s Website: Love-N-Fresh Flowers
- Kristine Albrecht’s Website: Santa Cruz Dahlias
- Tackling the three challenges of dahlia production: bloom timing, nutrient management, and disease. Association of Specialty Cut Flower Growers Research Foundation
- The American Dahlia Society
- The No-Till Flowers Podcast: LeeAnn Huber – Coseytown Flowers (The Dahlia Episode!)
- The No-Till Flowers Podcast: BONUS – Dahlia Pest Management with LeeAnn Huber of Coseytown Flowers
- The Principles of Floriculture (White)
- The Sustainable Flowers Podcast: Dahlia Breeding and Genetics with Dr. Keith Hammett: Part 1
- The Sustainable Flowers Podcast: Dahlia Breeding and Genetics with Dr. Hammett Part 2
Zone Considerations
- Dr. Keith Hammett is located in Auckland, New Zealand (I believe Zone 10)
- Erin Benzakein’s Farm, Floret Farm, is located in Washington’s Skagit Valley (I believe Zone 8b)
- Jennie Love’s farm, Love n Fresh Flowers, is located in Zone 6B/7 Philadelphia
- Johnny’s Selected Seeds research farm is located in Zone 5a Maine
- Kristine Albrecht’s farm, Santa Cruz Dahlias, is located in Santa Cruz, California (Zones 9/10)
- LeeAnn Huber’s farm, Coseytown Flowers, is located in Greencastle, PA, Zone 6B
- My farm, Petal Back Farm, is located in Zone 4b Wisconsin
General Information: N&B
Latin Name Name: Today’s cultivars, all hybrids, originally resulted from crosses of Dahlia pinnata and Dahlia coccinea
Common Name: Dahlia
Origin: Mexico (hybrids from their hybrid origin)
Days to Maturity: Dependent on variety
Life Cycle: Perennial in warmer climates, grown as annuals in colder climates
Height: 2–5′
Native of high, sandy plains of Mexico, where it was discovered by Humboldt around 1815, growing as a single form, five thousand feet above sea level. The dahlia was introduced into Europe around 1875. Native species are single, while the double forms are the result of breeding (TPF).
General Information: BTS
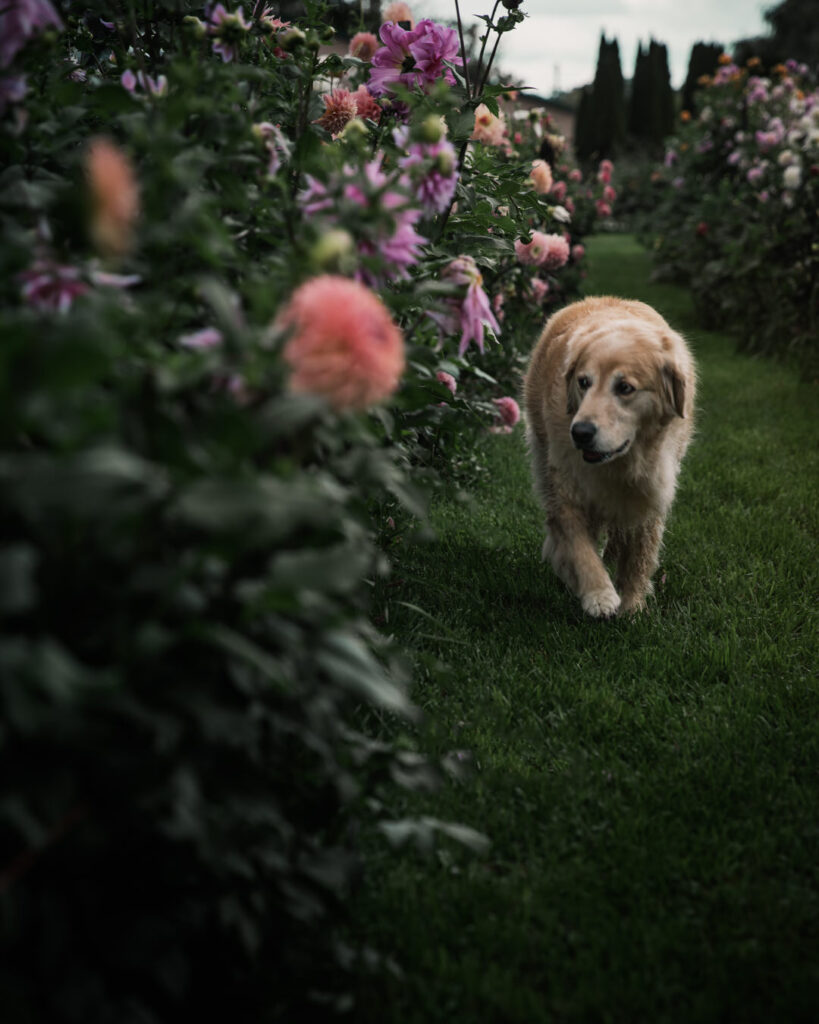
Dr. Keith Hammett has referred to dahlias as the dogs of the flower world, because different cultivars are about as similar as a Chihuahua is to a Great Dane. This is hilariously true, and I also think that growing dahlias is much like beekeeping: Ask several growers how they grow dahlias, and you’ll get a different answer every time. There is a lot of information out there, some of it contradictory, but these contradictions aren’t necessarily wrong. As with growing anything, best practices are highly dependent on the grower’s unique situation (environment, goals, stock, etc).
As we’ll see, there are virtually endless possibilities for dahlia varieties, and each variety can express itself in various ways due to a number of factors. Regarding goals, Plant Profiles are focused on growing for cut-flower production. For this reason, this was written with cut-flower production in mind versus growing dahlias for show flowers. Similarly, while we’ll touch on genetics and dive deep on storing/dividing/propagating tubers for the purpose of growing cut flowers, this will not be an in-depth breakdown on breeding or producing tubers for sale. Though I touch on both.
Although there are virtually endless sources of information for dahlias, those included in this discussion are those I believe to be industry leaders in cut flower production, as well as research supported by The American Dahlia Society and The Association of Specialty Cut Flower Growers (with some sprinkled in wisdom from Dr. Keith Hammett, whose breeding and show knowledge is vast).
In my humble opinion, the one thing we should bring with us when growing dahlias is: Grace. And you’ll notice, that’s going to be a theme throughout this Plant Profile.
Grace with those willing to share information, grace for the hard work that goes into producing and selling tubers, grace with ourselves as growers.
The reason why I’ve chose grace is because although dahlias are so rewarding, they come with a lot of emotion. From the rare varieties, to the frenetic sales (at least here in the US), to the myriad of growing information and things that can go wrong, to the stress of rot or desiccation, pests and disease, from babysitting those precious tubers through winter (whether in the ground or storage), to producing cuttings, and back again into the ground.
It’s amazing how quickly you can go from feeling like you won the lottery snagging that rare variety to losing it without seeing one bloom (experienced growers lose varieties all the time, including me). It’s a lot, but it’s damn magical when they work out. So please, please have grace with yourself, grace with others, and if I may, grace with me.

Ok, here we go!
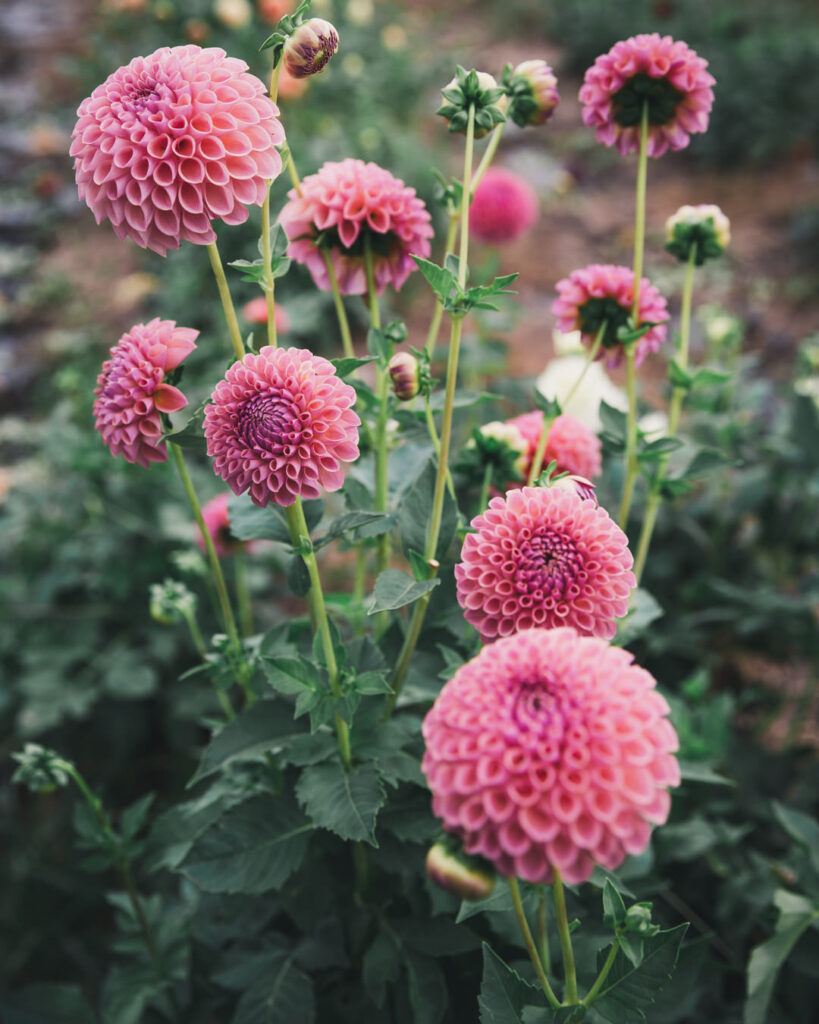
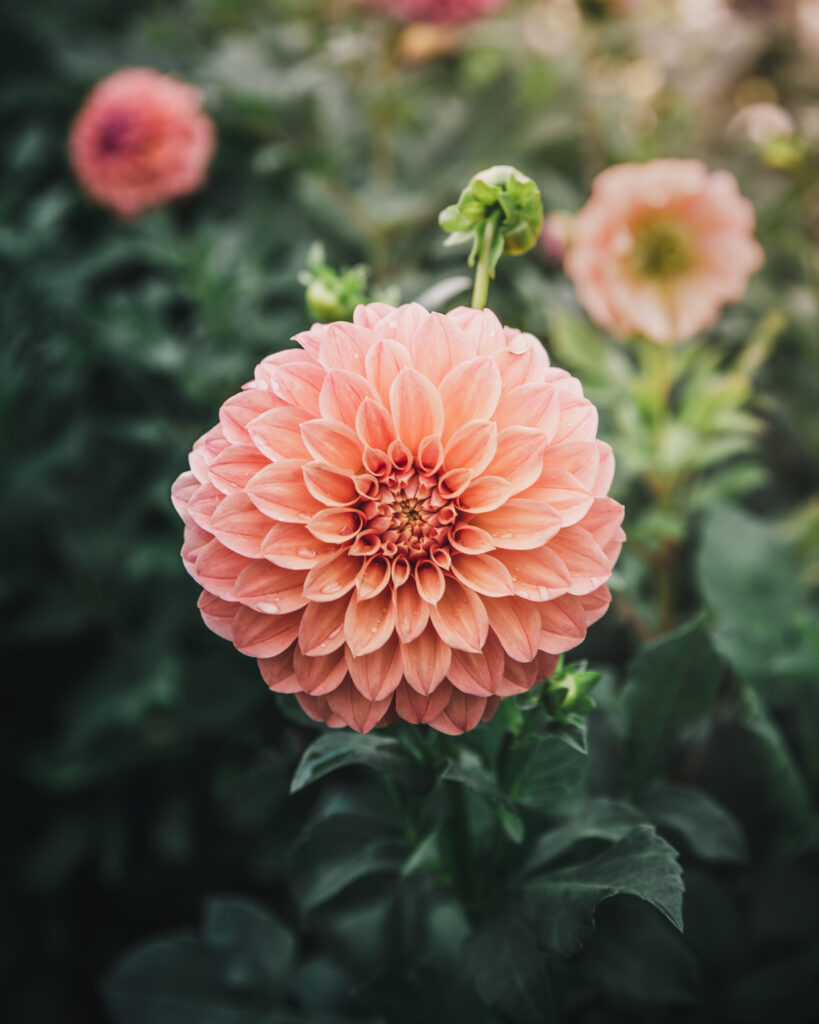
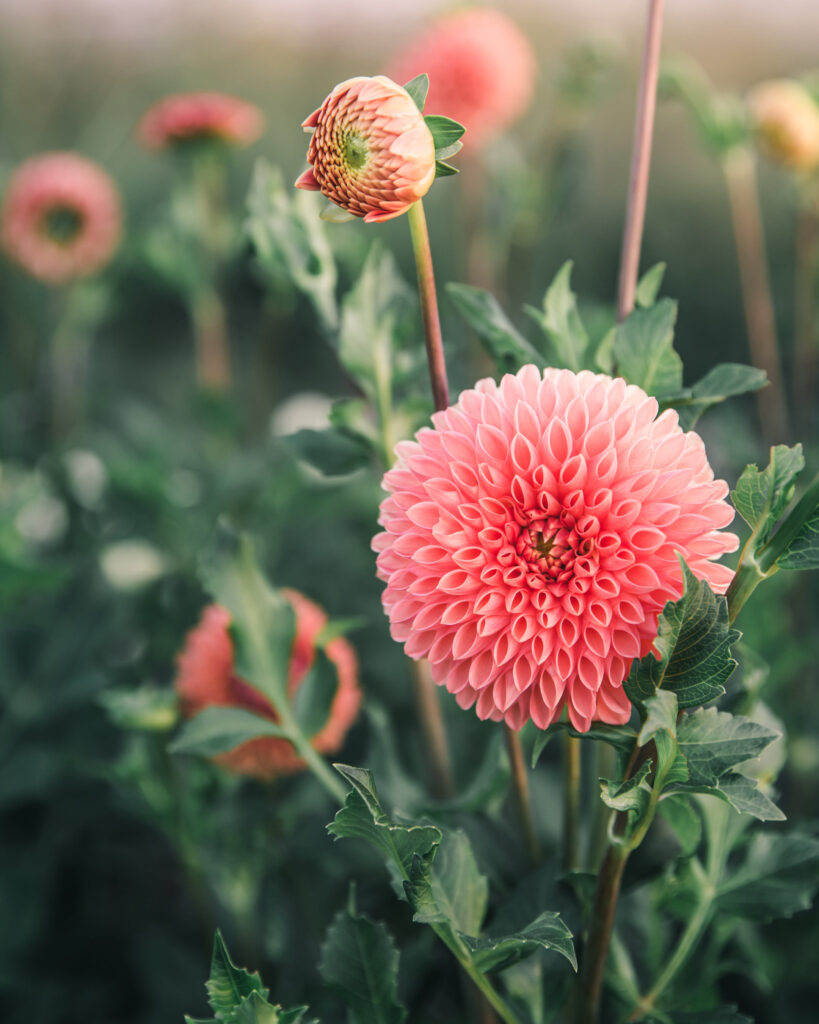
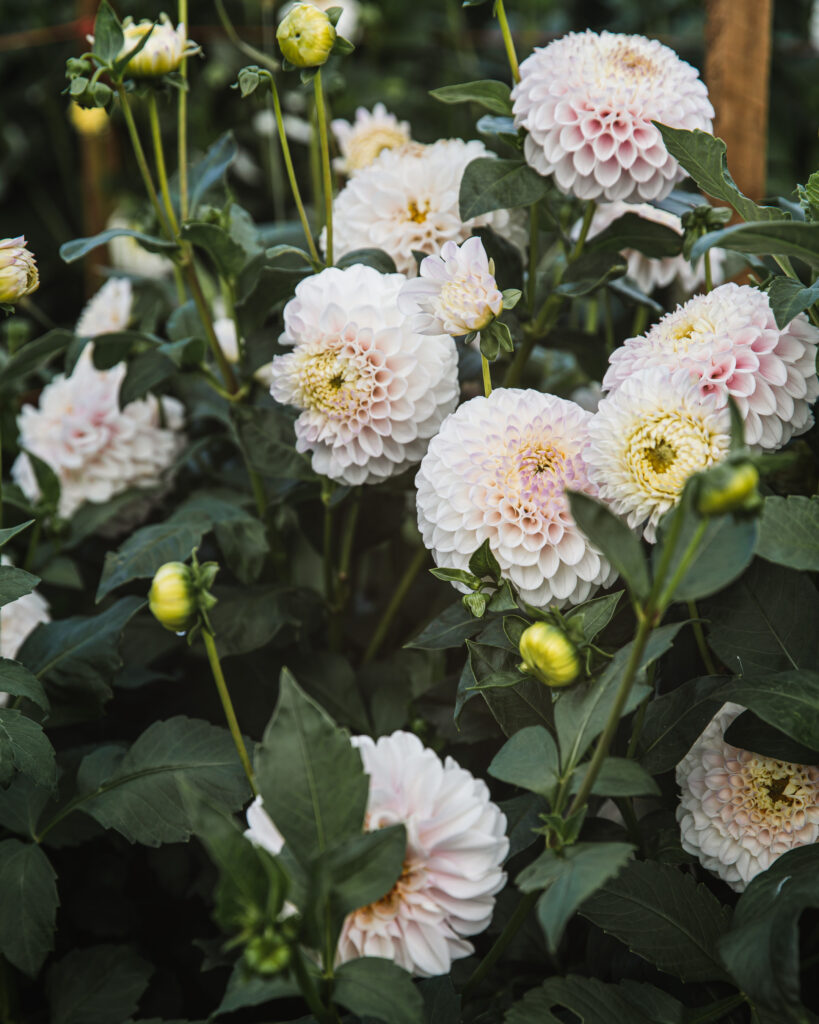
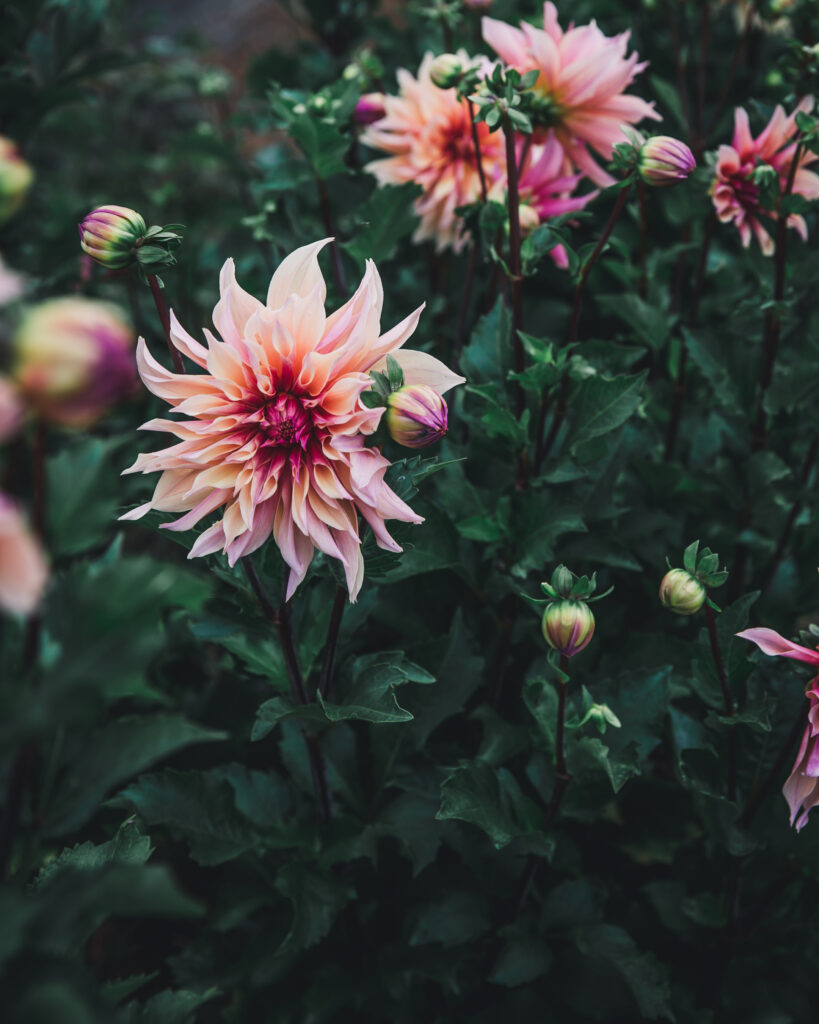
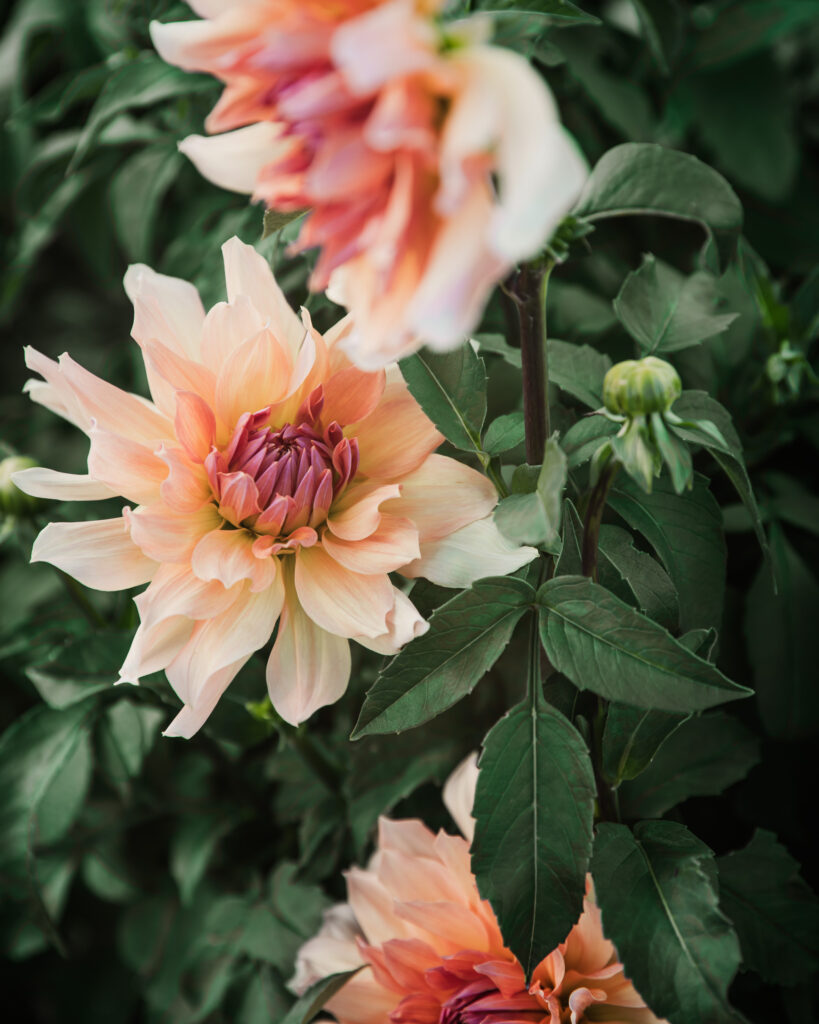
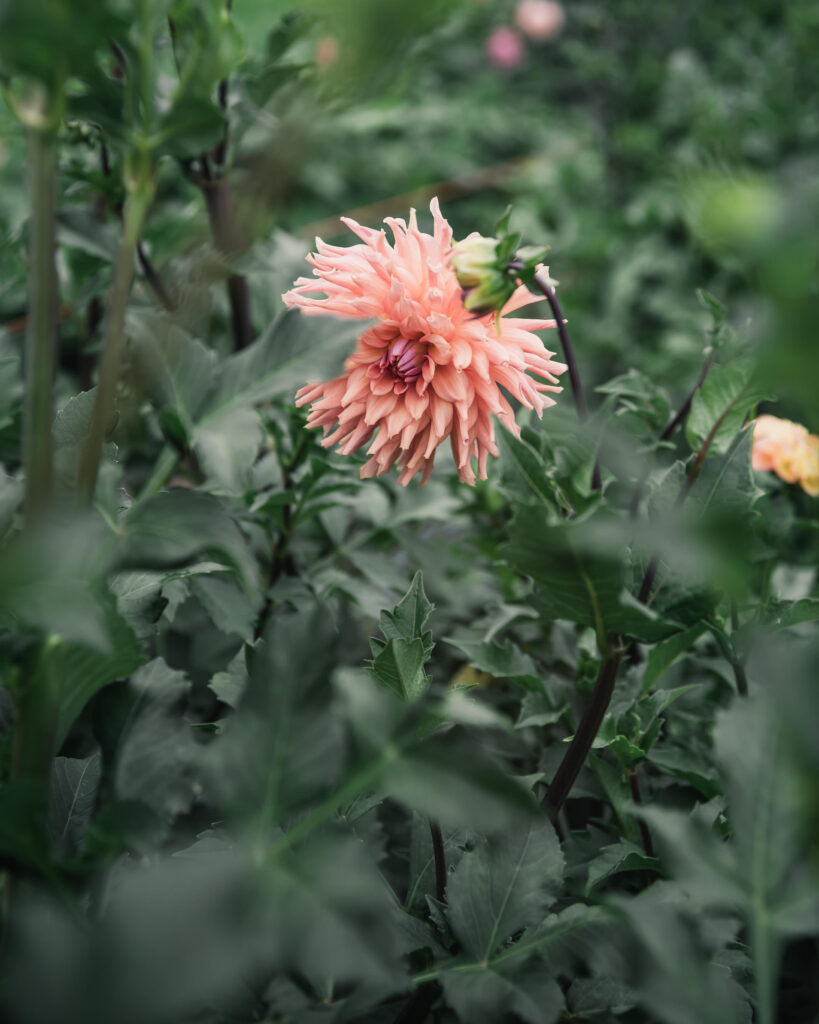
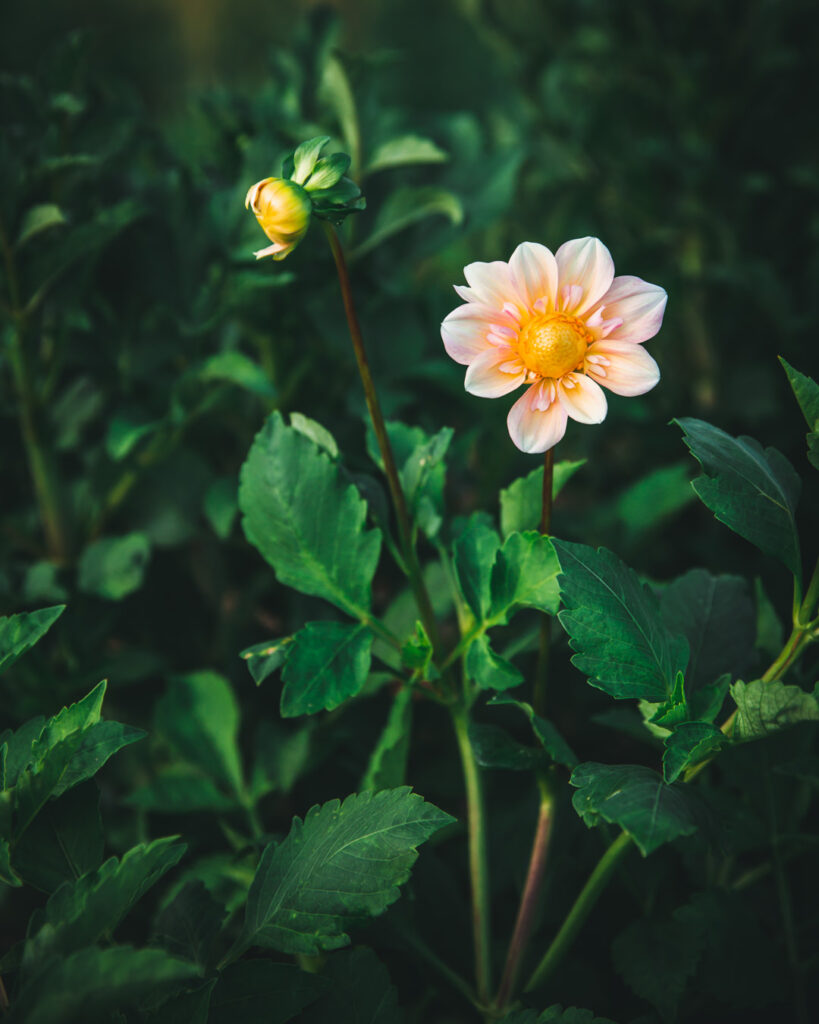
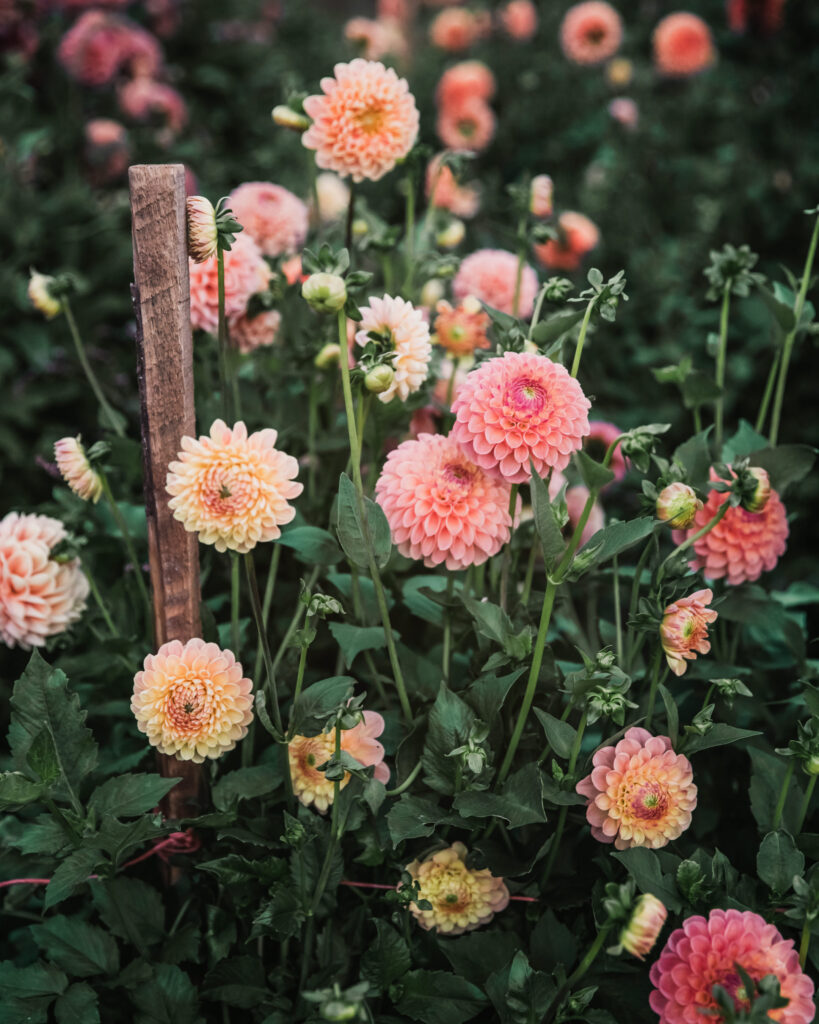
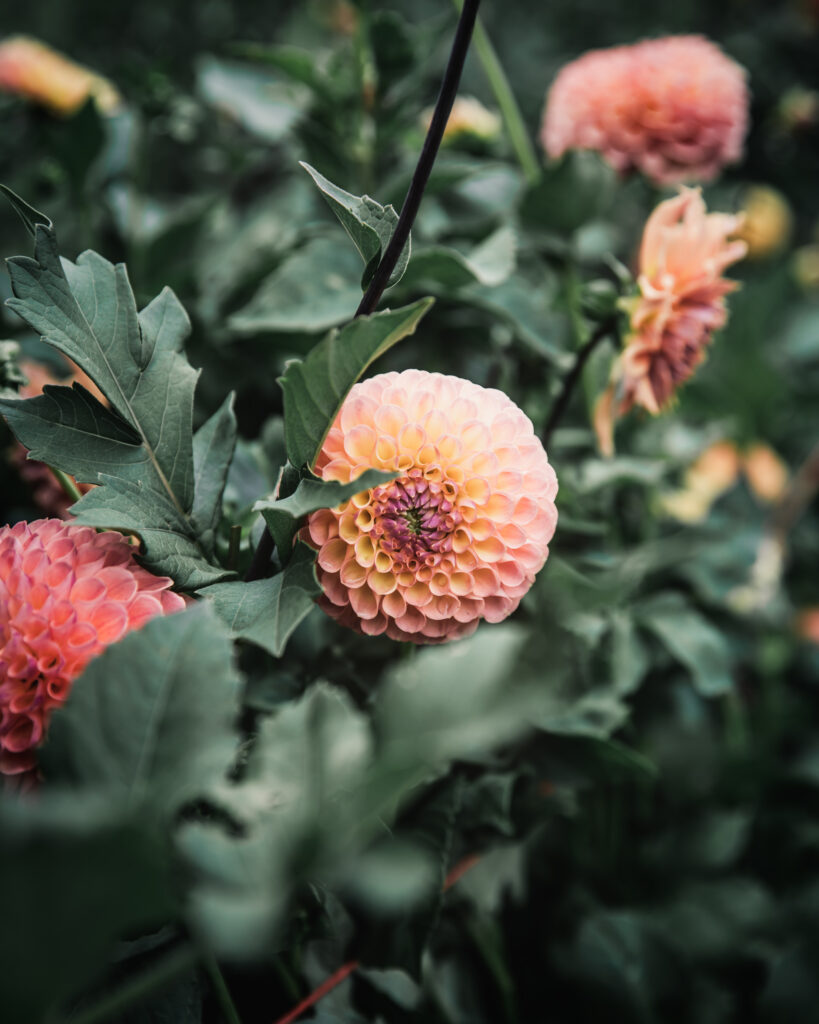
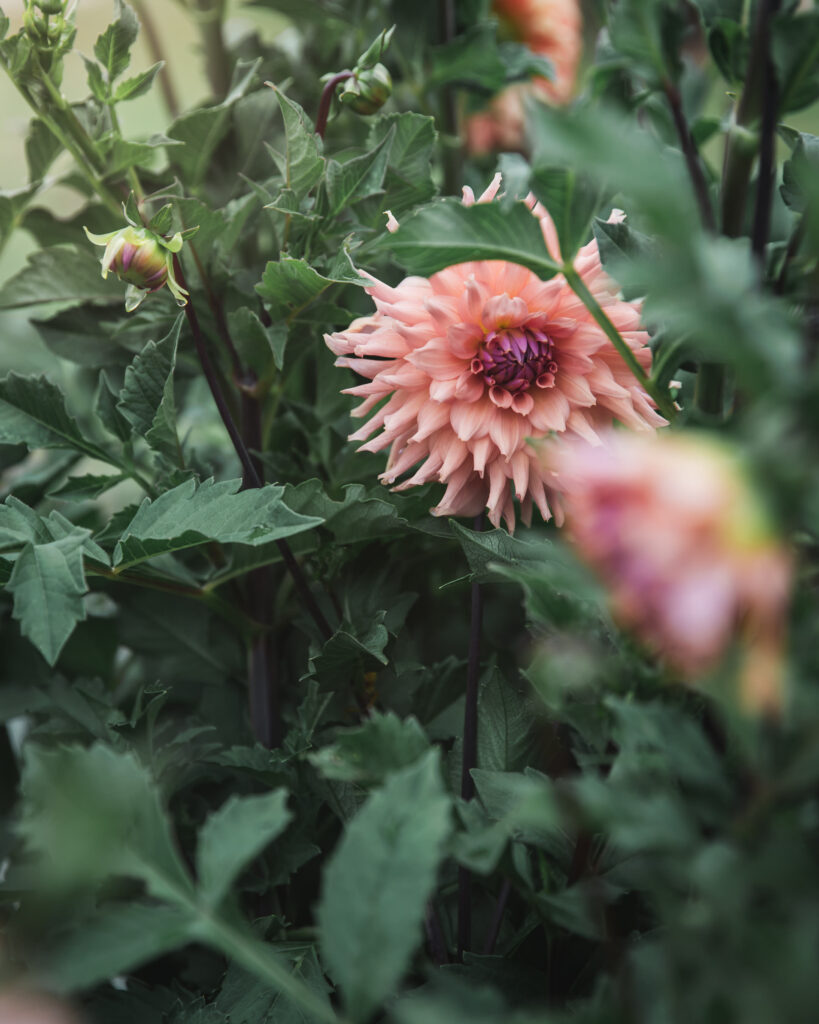
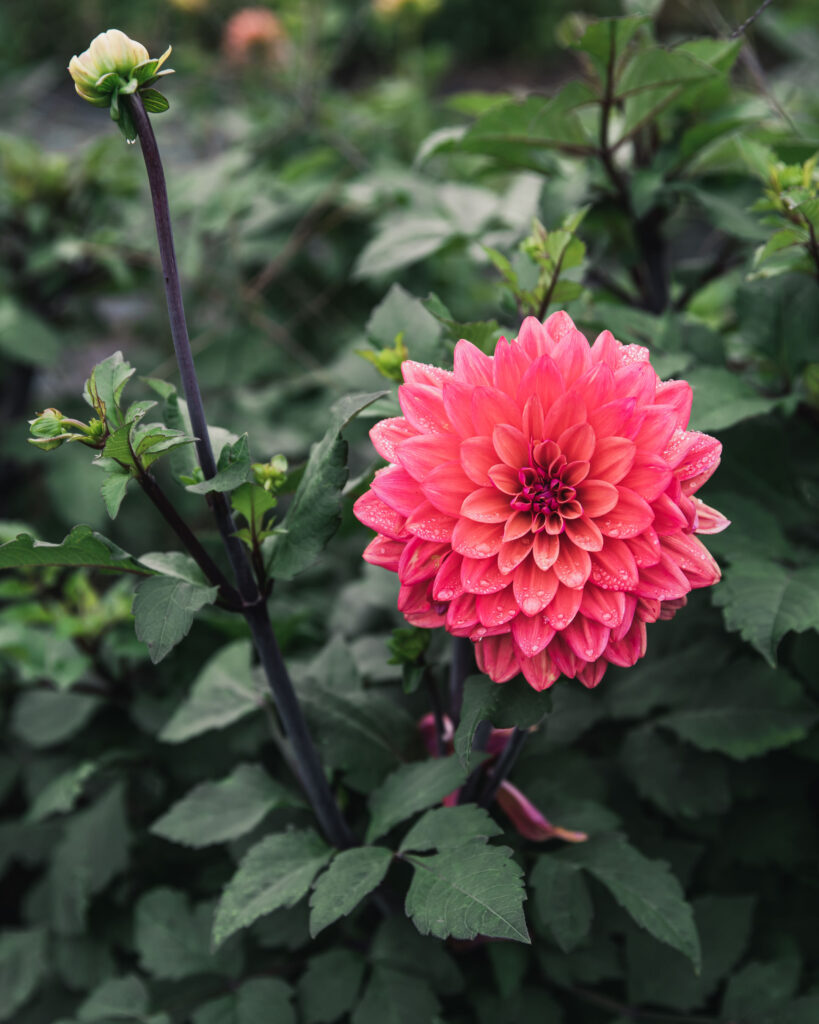
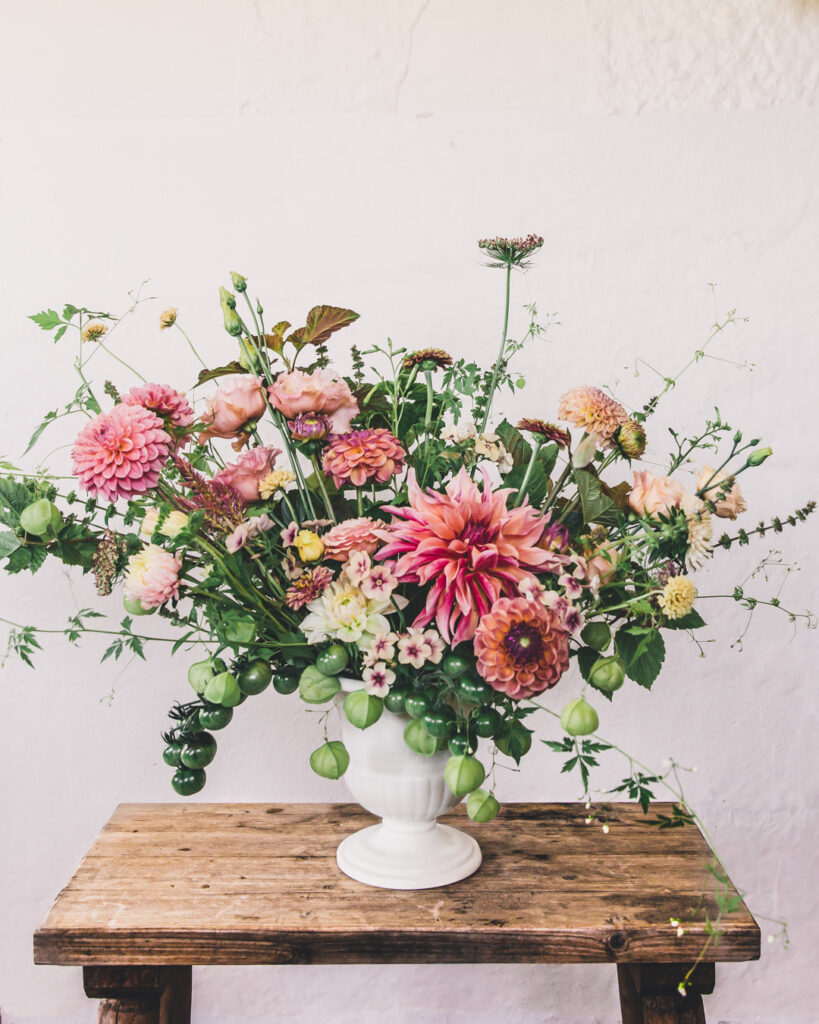
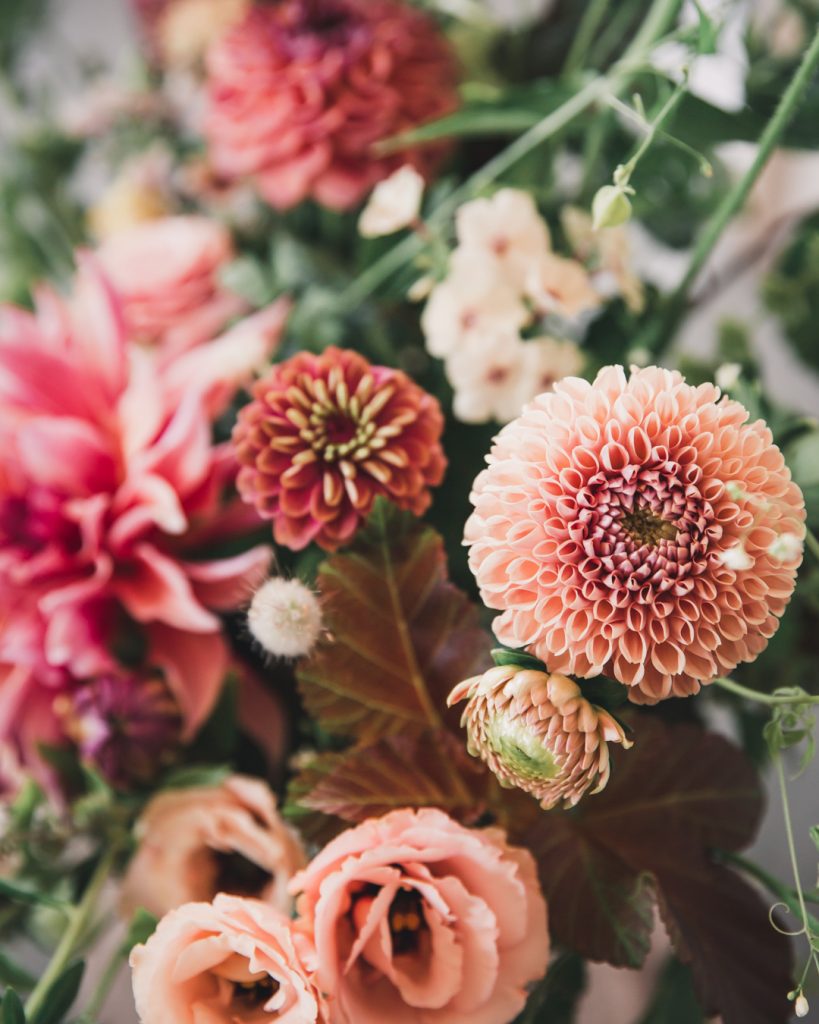
It should come as no surprise that I am utterly smitten with dahlias. What I love most about dahlias as a cut flower:
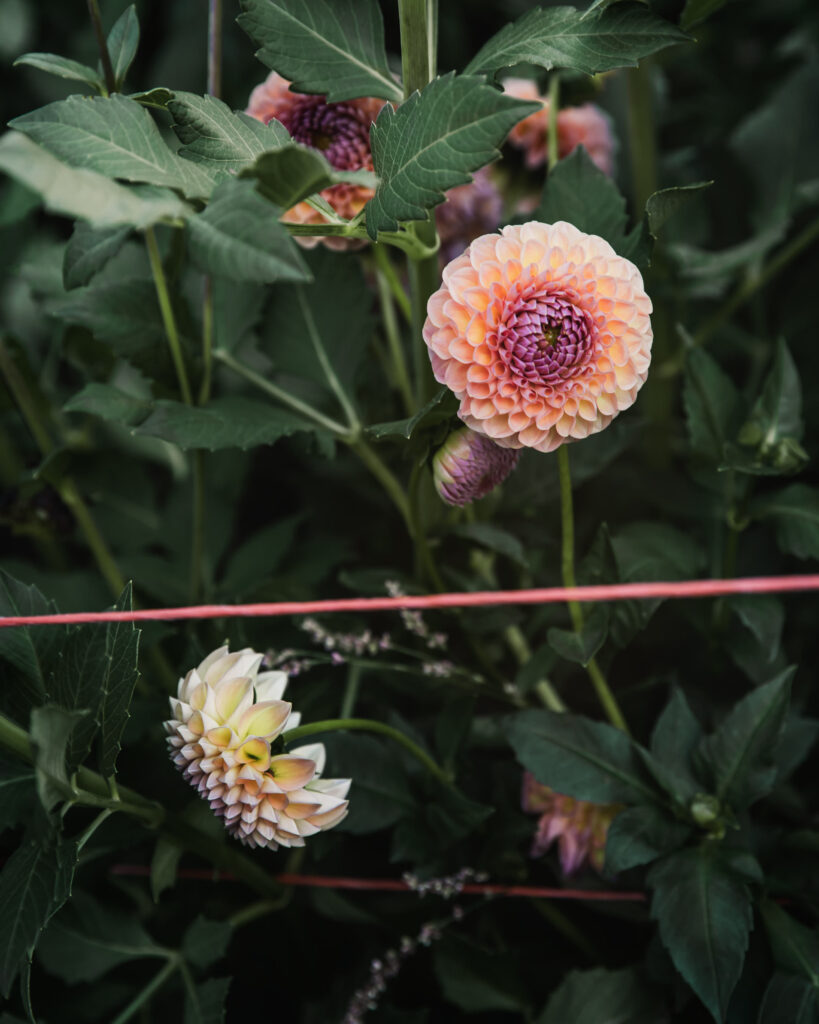
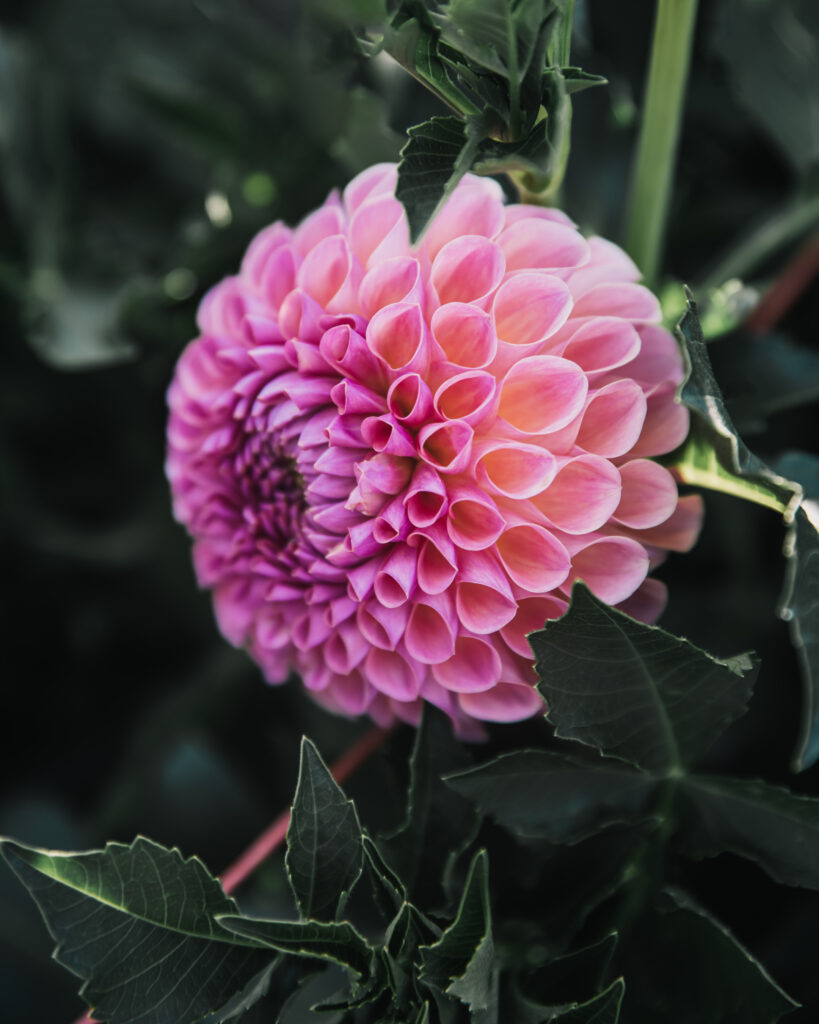
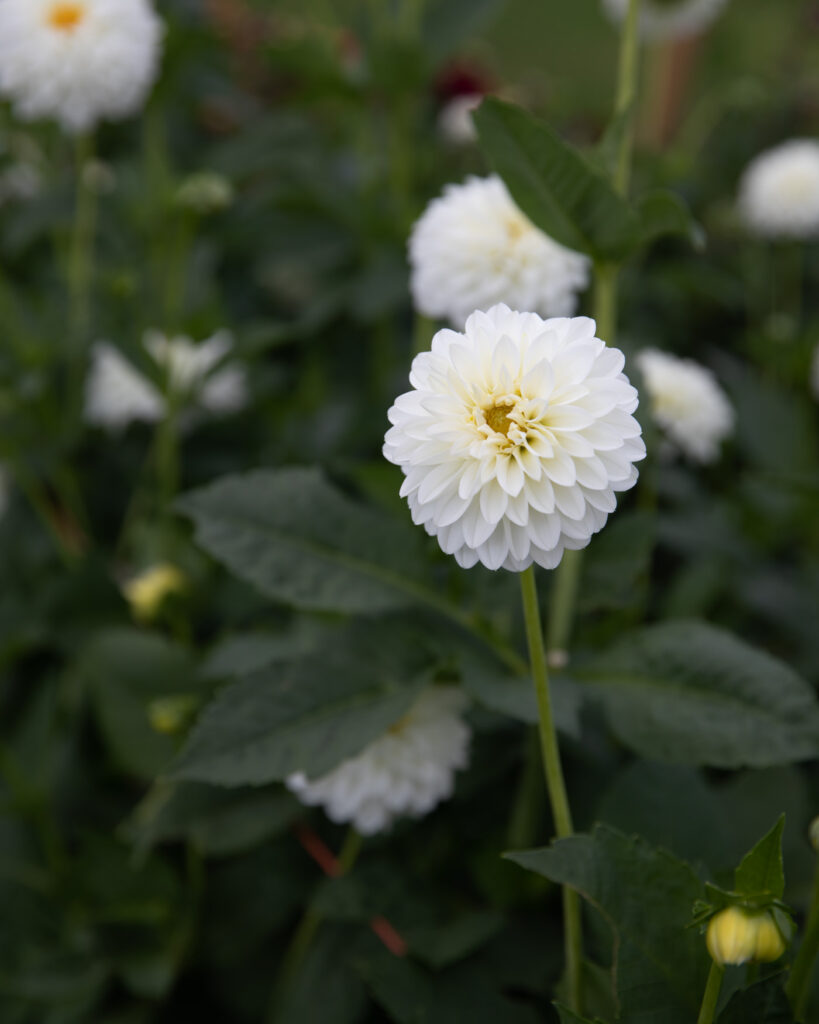
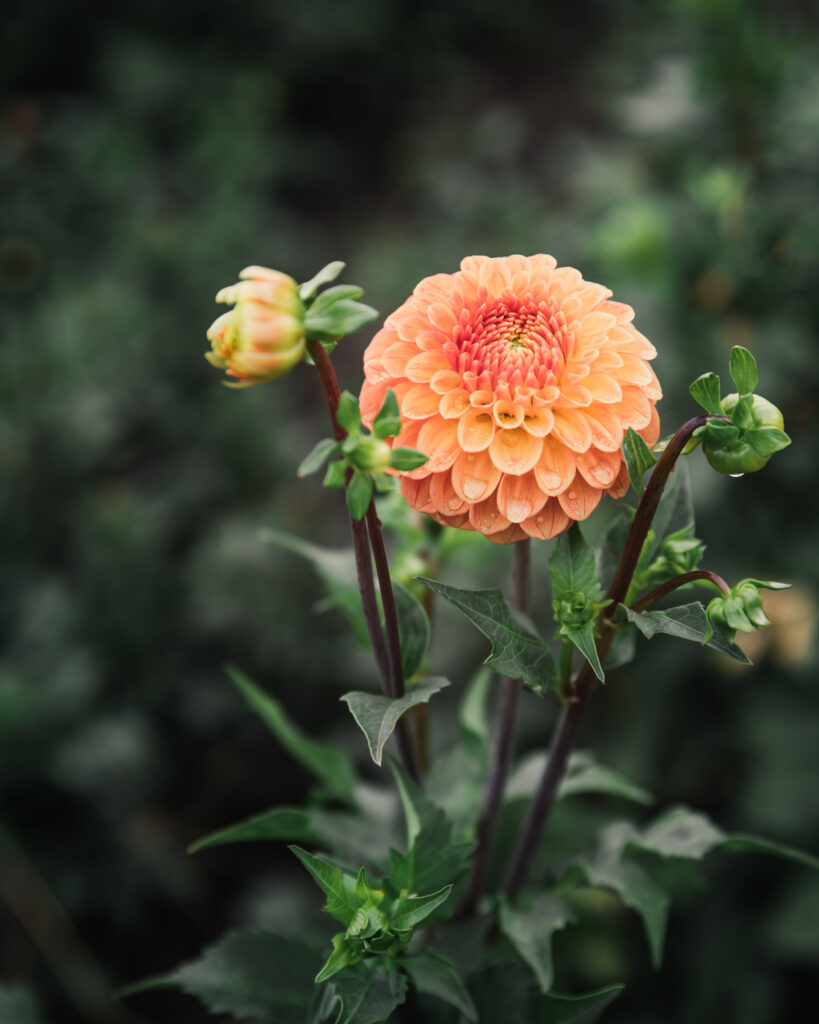
- Spectacularly wide range of sizes, forms, and colors
- Once blooming, continuously bloom until frost (prolific varieties can throw 10 stems per week, though this is highly dependent on variety/growing environment)
- Can increase stock quickly
- Popular with florists (don’t ship well, meaning a competitive advantage for locally grown)
- Popular with *some* retail customers (in my market, those who love dahlias, love dahlias; those who don’t really know about dahlias prefer flowers with longer vase life)
- High price per stem
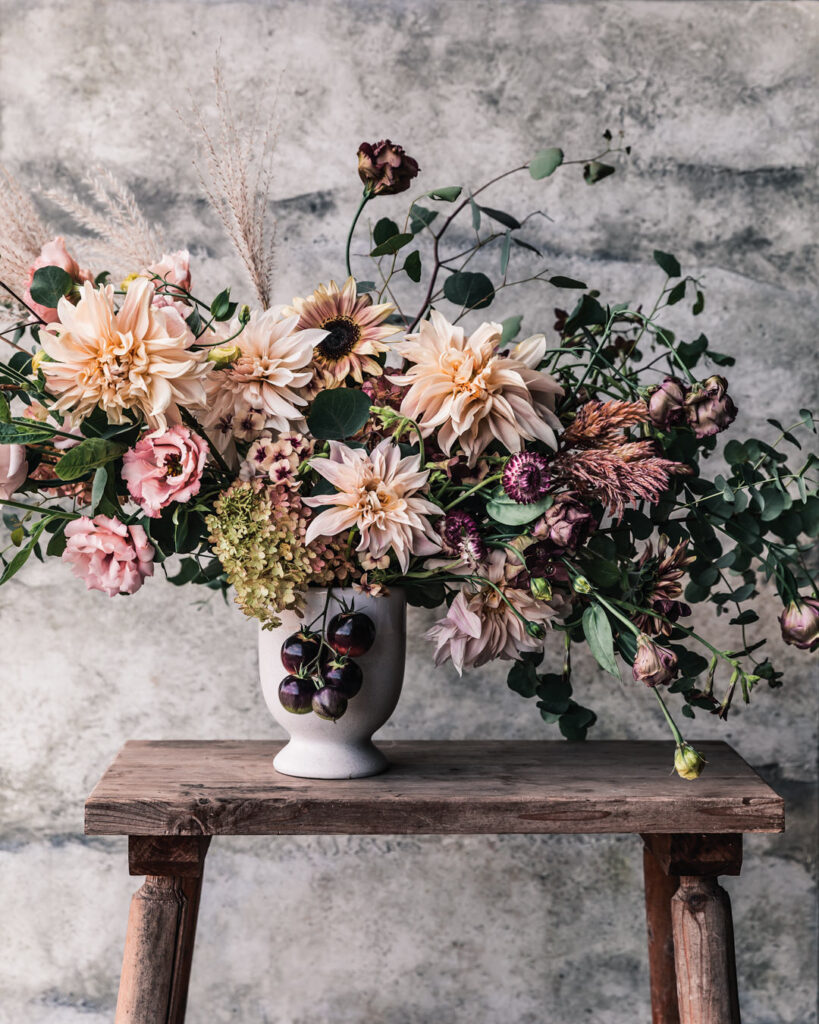
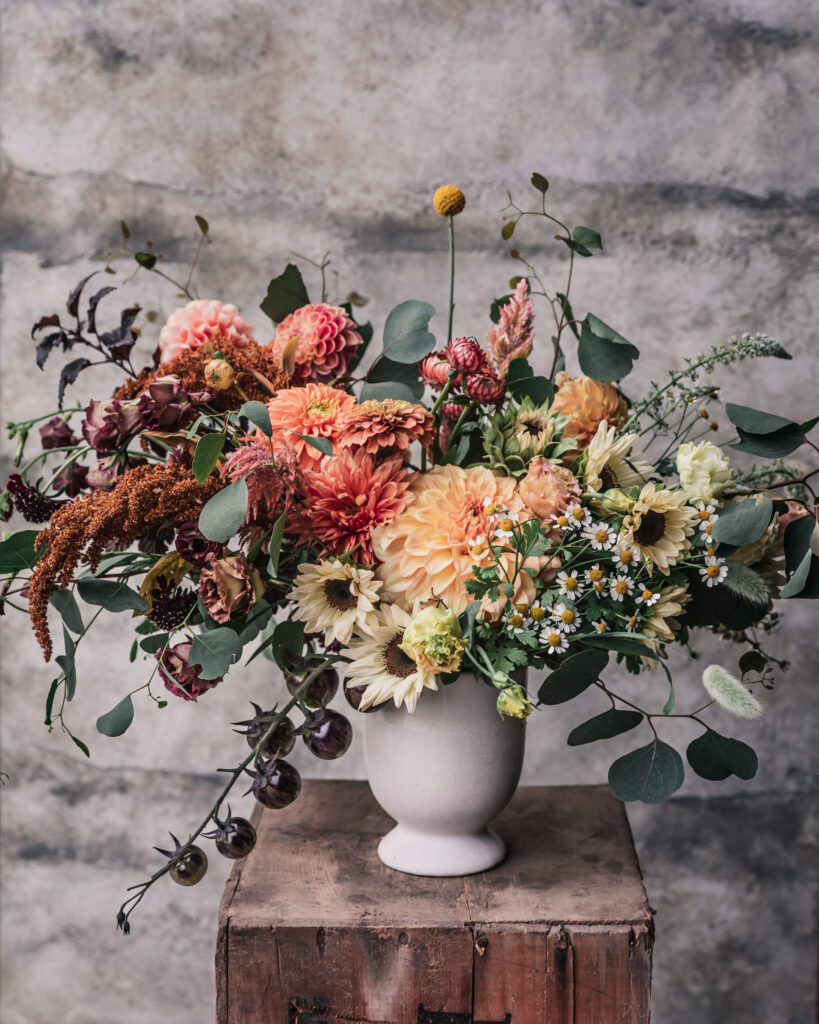
- Fabulous for design
- Favorite for events and weddings
- Extremely photographic and popular (great for marketing, social media, workshops, merch, prints, etc.)
- Multiple revenue streams for our farm (retail, florist, event, tubers, workshops, photography)
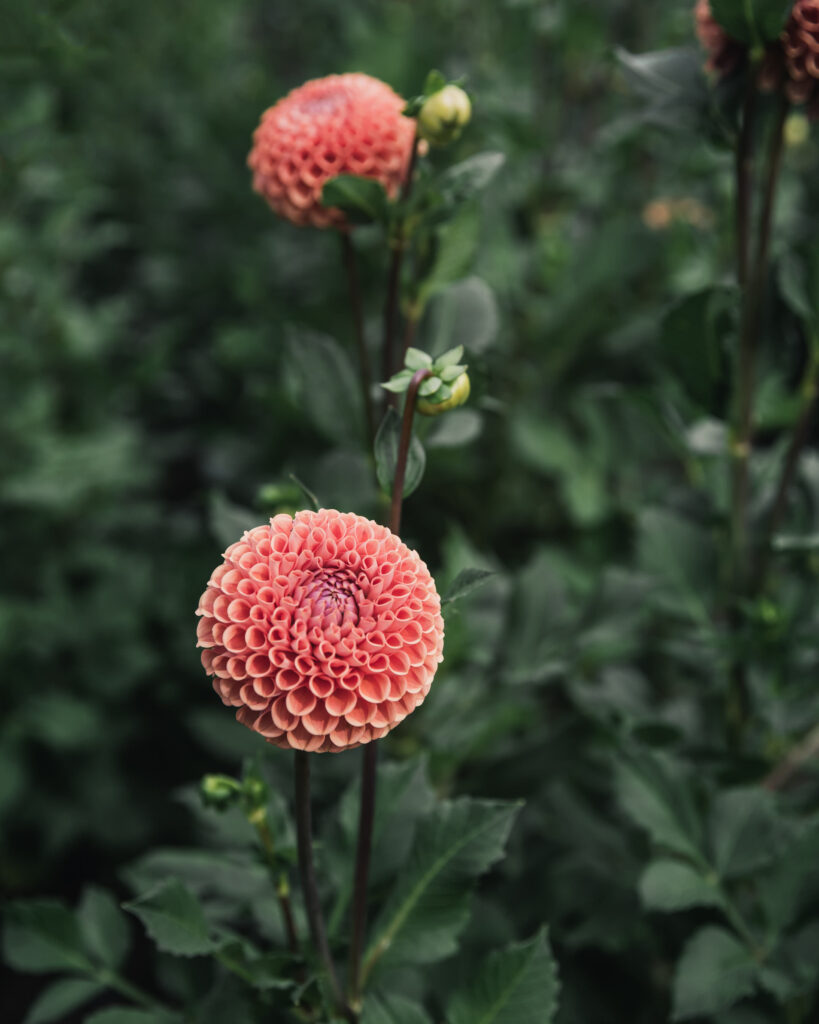
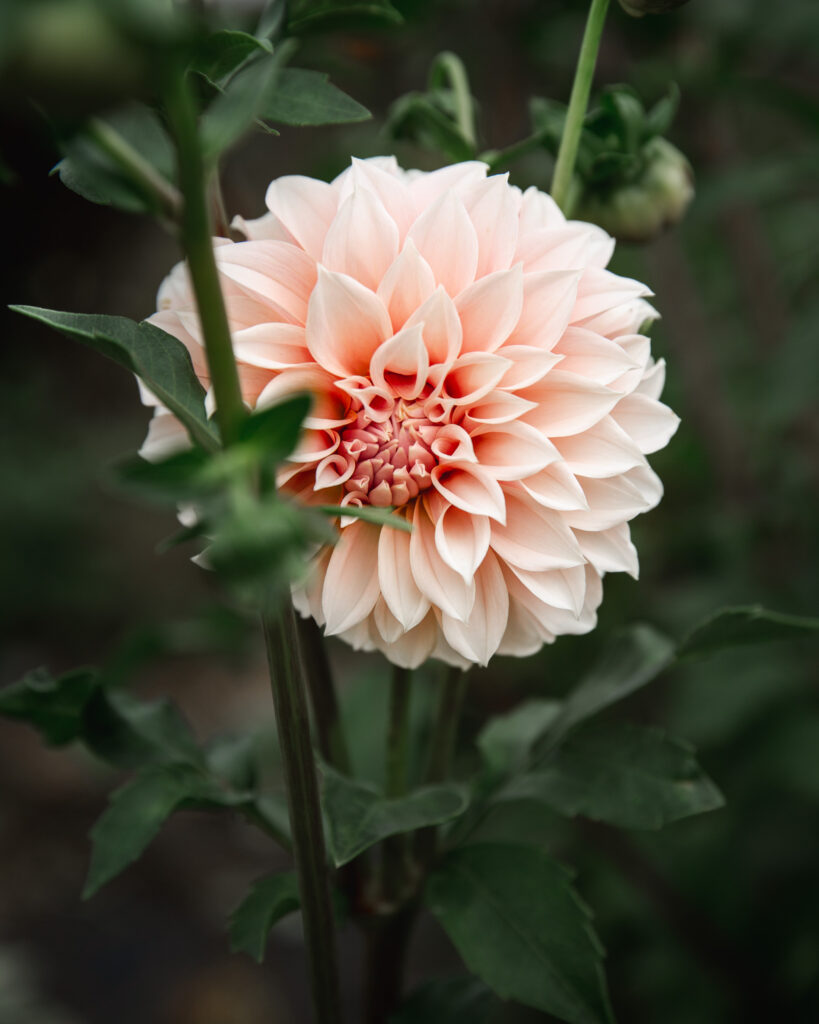
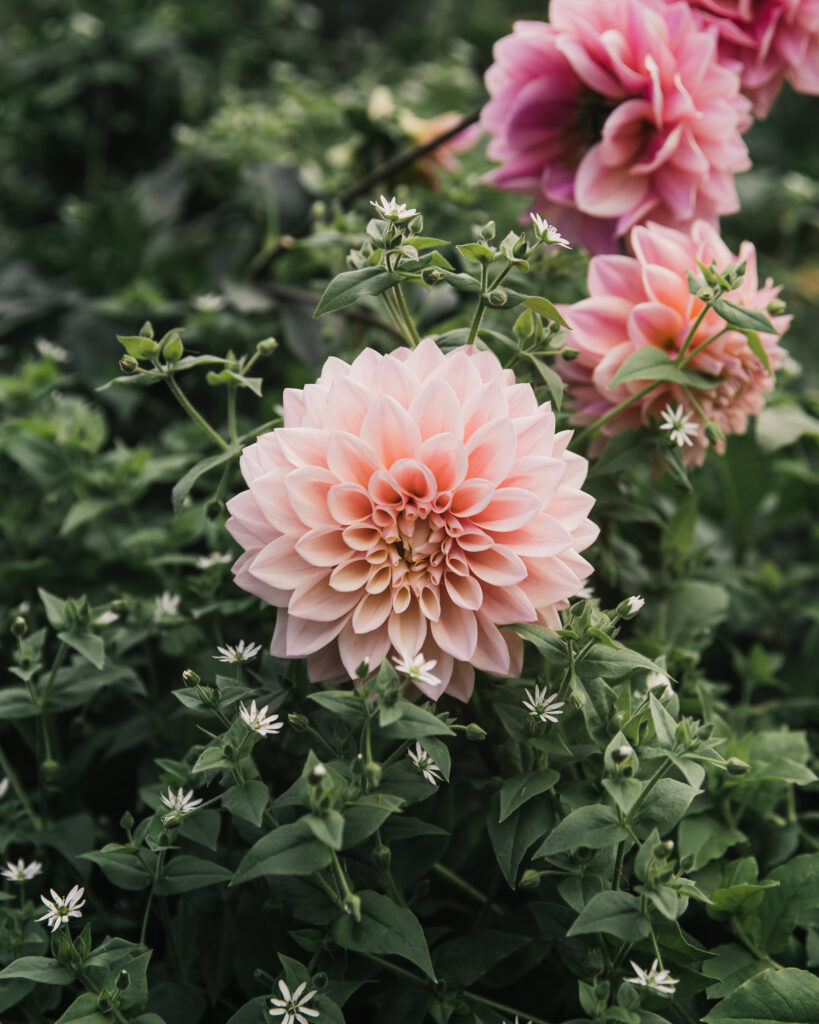
- Honestly, they’re just magical (a dahlia will stop you dead in your tracks on a busy day and take your breath away)
Although Plant Profiles are focused on cut flower production, many of you know that I’m also interested in herbalism, and I love that many of the flowers we grow for cuts are also medicinal (some I even like to include in bouquets for those purposes alone). Anyway, maybe as this space grows and if there’s interest, I’ll add sections on medicinal properties, but I just had to call one out regarding dahlias. Special attention has been given to the study and consumption of the tubers, because they’ve been shown to regulate blood glucose levels and lower cholesterol and triglycerides. Currently, 29 species are now in the National Center for Genetic Resources. Cool, right?
But every rose has its thorn. Potential shortcomings:
- In my local retail market, they are not as popular with *some* customers, especially those who value longer vase life (we have a *strong* lisianthus and sunflower market)
- Variation in color can make communication with *some* florists a little challenging (the florists are not challenging, mine are actually wonderful, but I feel like the colors are sometimes hard to convey)
- Not as long of vase life compared to flowers like lisianthus
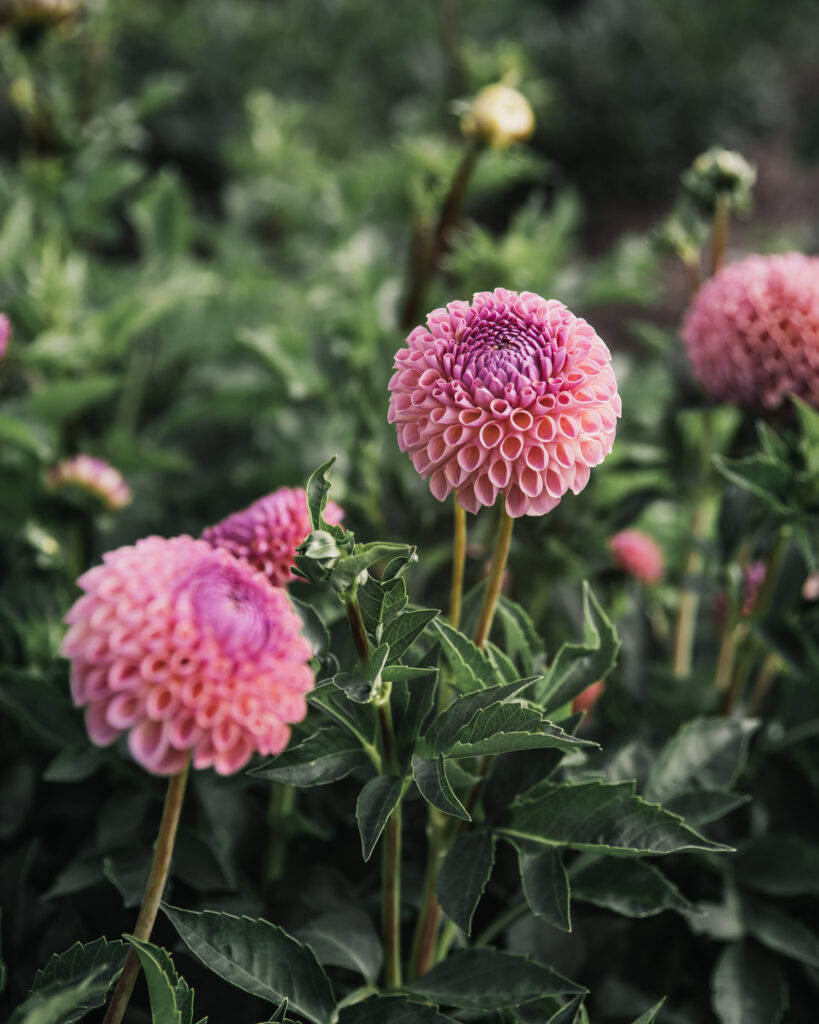
- Only some varieties (like balls) are suitable for grocery
- Most not suitable for shipping (which is an advantage in local markets), but worth noting for those who are interested in shipping
- Dinnerplates may not last as long and usually have delicate blooms
- Little to no fragrance
- Prone to pests and incurable disease
- More labor involved than with other flowers
- No long-term storage like tulips, peonies, etc., though prolific varieties can give you up to 10 stems per week according to some growers
Once we’re interested in a particular plant, it’s important to understand its native habitat when considering if we can or should grow it on our farm. TPF notes that it was originally difficult to get plants to bloom in the northern United states, but that breeders have overcome this with early-flowering characteristics (and this is an old book, though an awesome one, recommended by Farmer Bailey).

Because their are numerous cultivars, I think one can find dahlias that will tolerate most climates, perhaps with the exception of extremely hot or extremely short growing seasons.
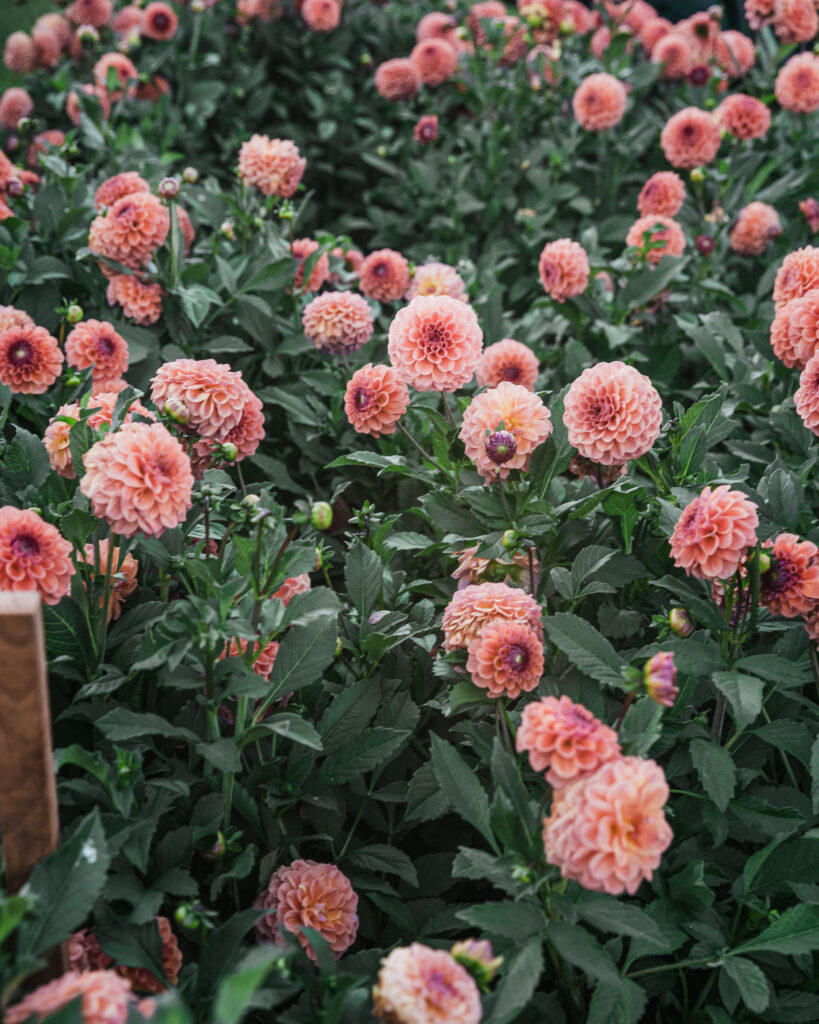
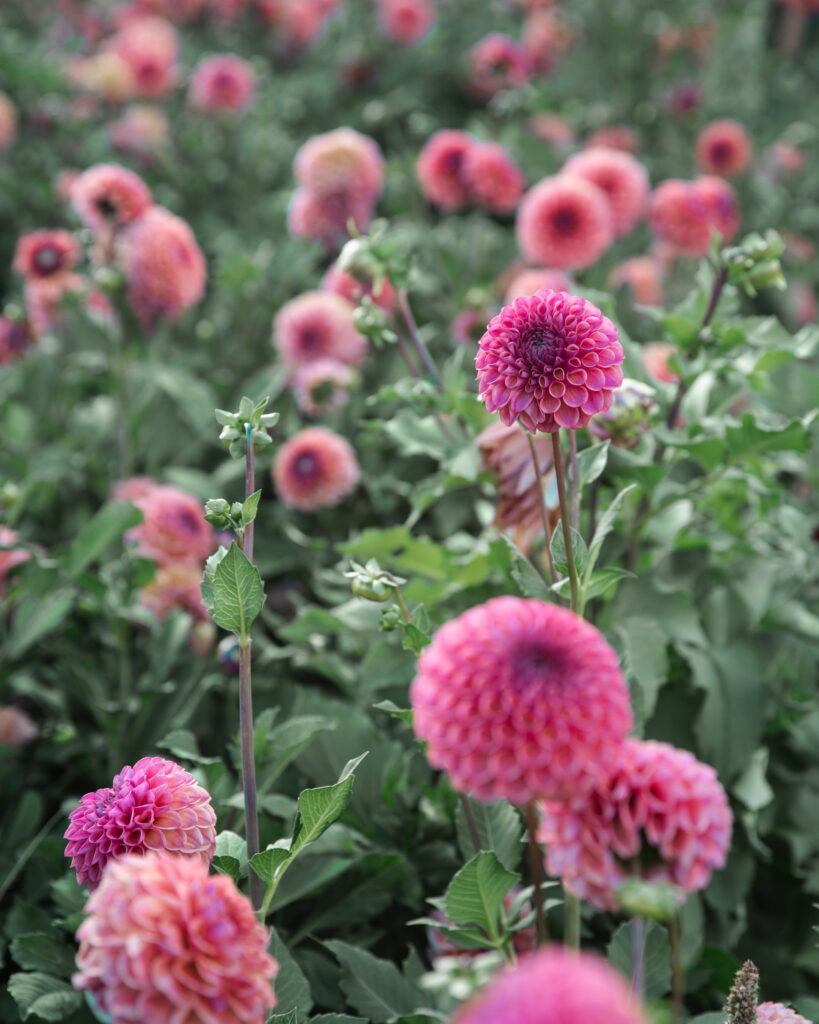
I sometimes hear that dahlias are difficult to grow in the midwest. While that might be partially true when we have record days in the 90s, for the most part, they do well. And this is evidenced by the large dahlia fields in my community (they are popular amongst vegetable growers going to farmers’ markets here). If you’re not sure, it’s always a good bet to see what others are successfully growing in your area.
Propagation: N&B
Dahlias may be propagated by seed, tubers, or cuttings (SCF). One important difference between these is that plants grown from tubers and cuttings will be clones and true to variety, while plants from seed will be entirely unique. Tubers allow growers to select the exact variety and grow it year after year, without variation (unless the stock starts to decline genetically). Similarly, growers take cuttings to increase their stock faster. In other words, a ‘Labyrinth’ tuber or a ‘Labyrinth’ cutting will always produce a ‘Labyrinth’ plant with ‘Labyrinth’ blooms.
However, dahlia seeds are different. A ‘Labyrinth’ seed will not produce a ‘Labyrinth’ plant with ‘Labyrinth’ blooms. Seeds hold a unique combination of genetic traits from both the seed parent and the pollen parent.
According to Albrecht, “There are literally millions, if not billions, of different combinations of traits that can be generated from seed, producing entirely new varieties.” She goes on to explain that a naturally-pollinated dahlia bloom can produce 50 or more distinct seeds that are all genetically different. Every seed is unique and unrepeatable, meaning that a dahlia plant frown from seed will create a new variety that has never been grown before (this is why dahlias grown from seed may not look like what’s on the seed packet).
Seeds
For seed germination, maintain temperatures of 65-70°F (18-21°C). Sow 4-5 weeks before last frost. Cover seed with growing medium and keep soil surface moist until emergence. When seedlings have true leaves, transplant into larger cell packs. To maintain healthy seedlings, do not allow plants to become root bound and do not disturb roots. Direct seed – After last frost when soil is 65-70°F (18-21°C), sow thinly, 2 seeds/ft, 1/4″ deep. Cover lightly but firmly. Keep surface moist until emergence. Thin to 9-12″ after first true leaves appear (Johnny’s).
Tubers
Most cut-flower farmers grow dahlias from tubers. When you plant a dahlia tuber, that tuber will produce a dahlia plant. That plant will produce multiple dahlia blooms and at the end of the season, that one tuber will have produced a clump of tubers underground. These tubers store the genetic information for future generations. As noted above, tubers are clones; the leaves, stems, and blooms grown from a dahlia tuber will be identical to the plant from which it came (Albrecht).
It’s important to note that while tubers are clones, that does not mean that they are exempt from genetic mutation. If you want to learn more about dahlia genetics, I highly suggest listening to the Sustainable Flowers Podcast episodes with Dr. Keith Hammett to get your feet wet.
Genetic mutations can lead to undesirable traits, such as open centers, and eventual die out. This is why a tuber-grown plant might not look true to variety or degrade season after season. According to Dr. Hammett, some varieties can last more than 50 years, but others won’t make it past 5 years. According to various sources, the longest known continuously-grown variety is White Aster, dating back to 1879. The best thing we can do as growers to delay the inevitable is to become keene observers and select/keep plants with desirable traits. But as Dr. Hammett explains, we cannot beat nature forever.
Before we get too crazy on tuber suppliers, note that genetic mutations are happening all the time and are not always visible. Mutations may also present differently from one tuber to the next and in different conditions. Furthermore, open centers and other undesirable traits can also be the result of the environment and/or nutrient imbalances.
That said, it’s something to be aware of, and I don’t hear or read about it often. I wanted to call it out, because even if stored under the best conditions, some tubers must be replaced over time (or may not be possible to replace). As Clara notes during the podcast with Dr. Hammett, she has yet to find a Scaur Swinton that shows the same qualities as it once did for her. This is why dahlia breeders are so important, so that they can bring us more desirable plants with even better qualities. If you’re interested in breeding dahlias, I highly suggest Kristine Albrecht’s Dahlia Breeding book.

Genetic mutations can also lead to “sports”(and are sometimes introduced intentionally). A sport is a genetic mutation in a dahlia that, if stabilized, is considered a unique variety. For example, Clara and Dr. Hammett talk about Spartacus and its many sports, such as Vassio Meggos. Similarly, Cornel Bronze, Ivanette, and Isabel are sports of Cornel (Huber). Sports can be a beneficial genetic mutation because the desirable traits of the variety are carried on with different colors.
OK, genetic mutations aside, it’s also important to note that tubers themselves cannot produce new buds. A tuber must have a piece of the original stem/crown attached with a viable eye (see Understanding Tubers below). Also, it’s generally common knowledge at this point that tuber size does *not* affect plant or bloom quality. Tubers come in a wide array of shapes and sizes!
Tubers can be potted up and planted out after danger of frost. Tubers can also be be planted directly out into the field after chance of frost, planting 6-8 inches deep (TPOF). One should always avoid excessive moisture with tubers as they are prone to rot.
Cuttings
Cuttings are more of an advanced-topic, but they are an excellent way to increase stock. When people refer to cuttings, they are most often referring to taking cuttings from tubers, which have broken dormancy and are sprouting. It is possible to take axillary cuttings, but as Dr. Hammett points out there is not much reason to do unless one is attempting to isolate a sport (though potentially maybe others do when they have a difficult time overwintering).
Albrecht and Huber both note that cuttings mature faster and bloom quicker. Most sources recommend taking cuttings 6–8 weeks before last frost. However, the speed at which a tuber will make cuttings varies based on the variety. As Albrecht notes, some will sprout in two weeks, while others will take two months.
The American Dahlia Society has a great video on taking cuttings via both the cut or pull method here.
According to SCF, terminal cuttings can be taken from actively-growing plants, but best results are from cuttings taken from tubers forced in the winter. They recommend selecting 2- or 3-node cuttings and placing in a well-drained medium in a humid environment at 65–75F (18–22C).
Albrecht recommends pot root clumps (miniature tuber clumps) in a tub with potting soil and giving a “good watering” to settle in, keeping the temperature between 65–68F. She suggests using a heat mat in colder environments and grow lights at 14 hours per day, because the warm temperature and longer exposure get roots to sprout. She recommends the “pull” method, stripping the the lower leaves, dipped in rooting compound, placed in a Root Riot cube, which fit 72-cell trays. The 72-cell trays are then put onto a solid-bottom tray on a heat mat kept at 72F. Trays are covered with a heat dome and pulls are misted once a day. Once roots are developed (approximately 2 weeks), pulls are potted up to 4-inch pots.
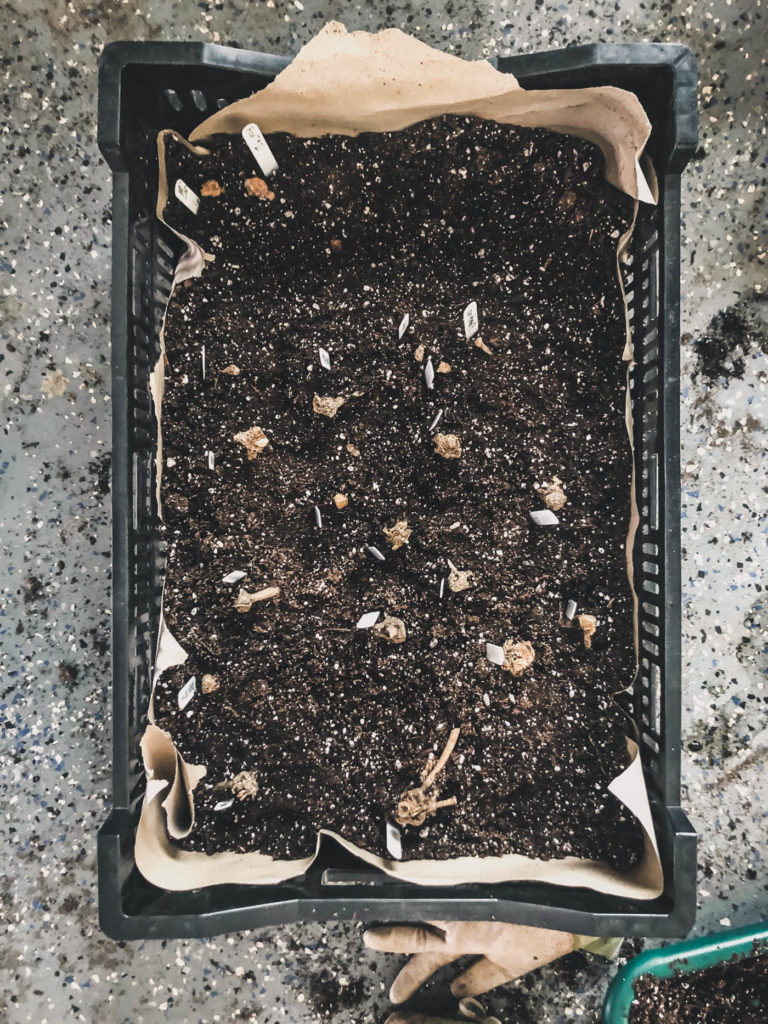
Love uses bulb crates lined with paper and filled with potting soil (ProMix) with up to 25 tubers and the necks poking out. Because her greenhouse is cooler this time of year, she places the crates on heat mats set at 70F with humidity domes to create ambient temperature. Shoots should have two fully-developed leaves and more on the way as well as a stem that’s at least an inch long before taking the cutting. She uses the cut method, cutting right where the green growth meets the brown neck of the tuber, removes the lower leaves, dips in rooting hormone, and places in potting soil (with pre-poked holes) in 128s. Similar to Albrecht, she keeps trays on a heat mat, misting once daily, but does not use a humidity dome because it can lead to rotting. Once roots develop, cuttings are potted up to 72-cell trays.
Benzakein notes that cuttings require a warm, bright space to thrive (table or shelf with heat mat and shop lights). She recommends planting vertically in course soil-filled pots that are at least 5 inches tall, leaving one inch of the neck poking out, placing the pots in a 65–70F (18–21C) spot. She says that tubers should not be placed on heat mats at this point, as she lost almost half her stock to this mistake (I lost some this way too, more below). Similar to Love, she also uses the cut method, strips the leaves, dips in rooting hormone, and places in cells filled with potting soil with pre-drilled holes on then places on heat mats at 70F. However, she recommends 1 inch of water in the bottom of the holding tray with a dome on top, keeping the water level in the tray 1-inch deep.
All sources recommend placing the cuttings under light, whether in the greenhouse, shoplights indoors, or shady spot outside protected from elements and direct, hot sun. All recommend only transplanting well after last frost has passed and hardening off. Most sources seem to agree that if one takes 4-5 cuttings (with Love saying as high as 7), the tuber can still be planted. If one takes 10+ cuttings then the tuber is spent and should be disposed of.

Propagation: BTS
Our dahlias are mostly propagated from tubers, though we have increased seedling and cutting production with plans to continue increasing both. I never pot up tubers to start them early as transplants (just cuttings). We simply plant tubers straight into the ground (more on this below).
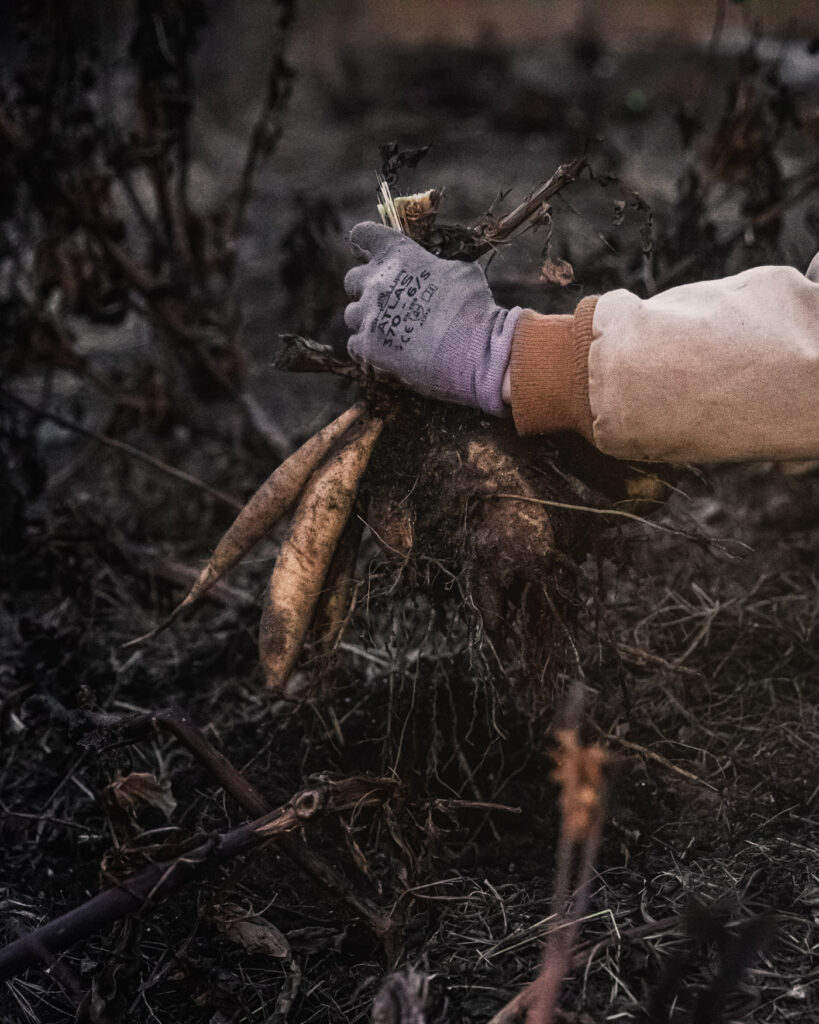
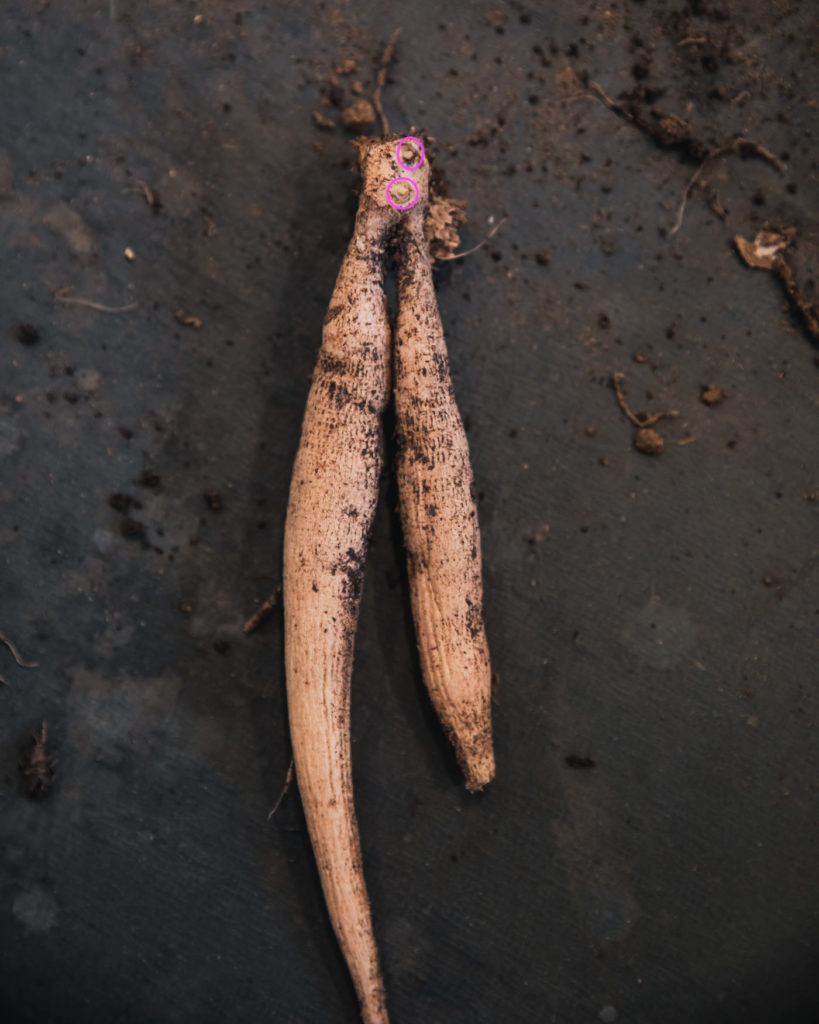
Understanding Tubers
This is a good point to talk about the anatomy of a tuber, as this is equally important to understand when growing, dividing, and storing dahlia tubers.
Tubers and tuber clumps come in a wide variety of shapes and sizes. Some are super long and skinny, while others are round and plump. Some are small, some are huge, and others are in between. While size matters for bulbs like tulips and ranununculus, it does not matter for tubers, so long as they are bigger than AAA battery (they just need enough stored energy, more below). Some store amazingly (Chewy!), while others are challenging (Cupcake and Bloomquist Tory P).
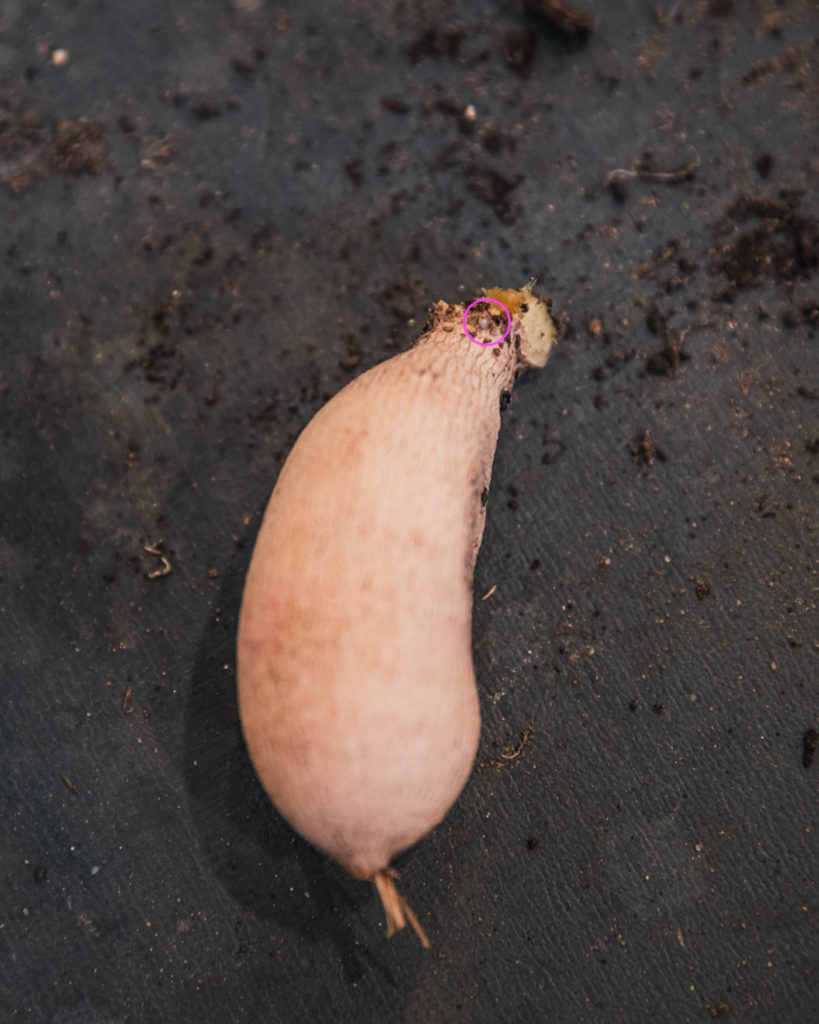
You might be all excited to see all those tubers, but for a tuber to produce a plant it must be “viable”. In order for a tuber to be viable, it needs to be healthy, but it also needs to have an eye and an intact neck. In fact, these are the 3 major important parts: the tuber (turquoise), the neck (white), and the crown (yellow) (where the eyes form (pink)).
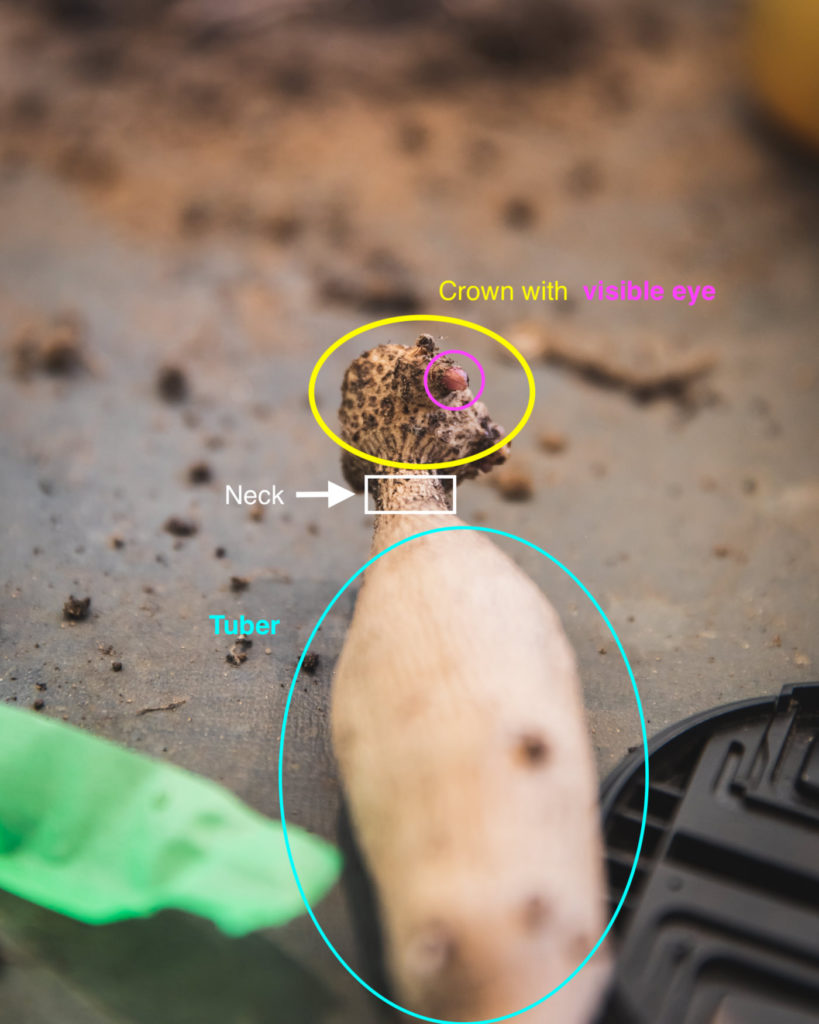
What we’re after is healthy, plump tubers with an intact neck and a viable eye. If there is no eye, the tuber will not produce shoots. The tuber is the energy source, so if the neck is broken, we won’t have enough energy to produce a viable plant.
Seeds
For seeds, I follow Johnny’s recommendations, sowing into 72-cell trays, transplanting after last frost.
Cuttings
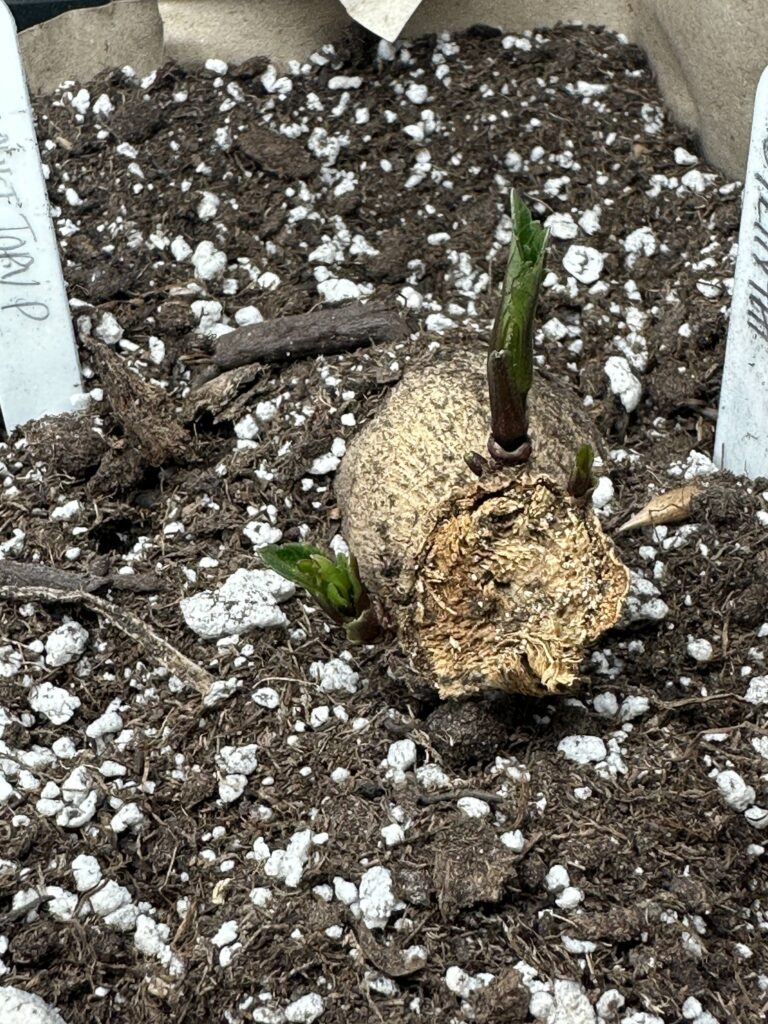
I wish I would have revisited my Floret book before jumping right into cuttings this year, because I would have seen her note about losing stock to rot due to bottom heat. I lost a few to rot, and I definitely think it’s because I placed my crate on the heat mat, urrrggg. They went in our basement this year, which is quite warm this time of year (it’s unusual and a long story), but I think the addition of the heat mat was too much in this already-warm environment.
The ones that were fine I left in the crate but removed from the heat mat, and they are doing just fine now and starting to sprout. I’ll be waking up more in the coming weeks, but I think I’ll use my coex pots (which I’ve used in the past) or tree pots (I have a bunch of 5 inch-tall tree pots that have really big drainage holes). My thought was that the crates would be more efficient, but much like my corms, if there is an issue, I’d like to isolate it. Oh well. I like the cut method and simply using rooting hormone and potting mix (Sungro). However, after reading Albrecht’s book while travelling for work, I impulse-purchased some Root Riot Cubes. I usually add mycorrhizal inoculant to our potting soil, so if I go with the root riot cubes, I may consider dipping this too?
Environmental Factors: N&B
Photoperiod and Light Intensity
Daylength has a direct influence on flower and tuber formation. Long days (approx 14 hours) cause faster flower initiation. If daylength is very short (less than 8 hours), flowers can fail to open. A large volume of research on various cultivars suggest that the percentage of flowering plants and the total production of flowers are optimized in daylengths of 13–15 hours. Similarly, daylengths below 11 and greater than 16 hours have a deleterious affect. Short days (12 hours or less) result in tuber formation (SCF).
Temperature
According to SCF, the optimum temperature range for vegetative shoot development is 55–77F (13–25C), while optimum temperature for flower initiation and development is 50–59F (10–15C). However, they also note that night temperatures between 50–86F (10–30C) do not affect flower initiation, but flower development proceeds more slowly at cooler temperatures. The most practical temperature information I could find was from USU, which states that that dahlias experience injury below 41F (5C) and above 88F (31C).
Site Selection
All sources recommend planting dahlias in an area with full sun, which is 6 to 8 hours of direct sunlight. However, the ADS states that while sun is best, if you live where summers are hot, perhaps there’s good reason to avoid afternoon sun. In this case, partial shade during intense afternoon sun may be of benefit.
Rich, deep soil of medium texture and well-drained is ideal (TPF). Dahlias prefer slightly acidic soil (6.5), and a soil test will tell you your current soil pH (ADS). High tunnel crops may bloom 4–5 weeks earlier than field-planted crops (USU, Benzakein).
Environmental Factors: BTS
Because we grow dahlias in the field, we are reliant on natural daylength. We grow our dahlias in two separate fields, both in full sun. Our soils are sandy, so they have good drainage. Based on our soil test, we will add lime when planting dahlias to raise our pH. I plan on attempting a small crop in the high tunnel for early production.
Field Performance: N&B & BTS
Planting/Transplanting, Spacing, Support: N&B
Because dahlia tubers and young plants are cold sensitive, most growers recommend planting outside only after all danger of frost has passed and soil temperatures have warmed to 60F. However, according to SCF, tubers may be planted earlier, but if planted when the soil is too cold, sprouting is delayed. Most sources recommend planting tubers 4–6 inches deep, laid flat, with eye (if visible) facing up.
SCF recommends spacing 2′ (60cm) apart and that 3′ apart may result in better-quality blooms but is generally considered uneconomical. Albrecht plants 18 to 24″ apart, Love plants 18″ apart, and Benzakein plants 2 rows per bed, 18″ between rows and 12″ between plants.
Planting during excessive rain/moisture should be completely avoided as tubers are prone to rot. For this same reason, most growers recommend waiting to water until shoots appear above the soil line.
Most sources recommend supporting plants, whether with stakes and support netting or stakes and twine (video of Kristine Albrecht stake/twine method via the ADS). SCF includes comments from growers who do not use any type of staking, which is not a problem if they are cutting deeply throughout the season.
Planting/Transplanting, Spacing, Support: BTS
Planting tubers is one where I have not always followed common wisdom, right or wrong. As SCF mentions, tubers may be planted earlier. My thought has always been that the soil is insulated, so I *may* plant a little earlier than our last frost date (a week or two). We primarily plant tubers straight into the ground. I’ve also heard of growers in Canada do this (hi, Canada pals, do you do this too?).
This is a gamble of course, but I figure as long as the soil is warm enough, even if there is a late frost, only the sprouts should die back. However, this is also highly dependent on the weather and our workload. We watch for intense cold swings in the extended forecast, as well as the rain. We avoid planting when there is a lot of rain in the forecast since tubers are prone to rot. Last year, we were so busy with building the high tunnel, we didn’t plant dahlias until after our last frost (I believe it was first week of June). So, take the above for what you will. If you’re not sure, wait until after your last frost.
Before planting tubers, it’s a good idea to write the name of the variety on the tuber with a permanent marker. It’s a little extra labeling insurance! Also, we don’t replant or sell the mother tubers. Usually these are easy to identify, but not always.
Seedlings do not get transplanted until safety of frost has passed.
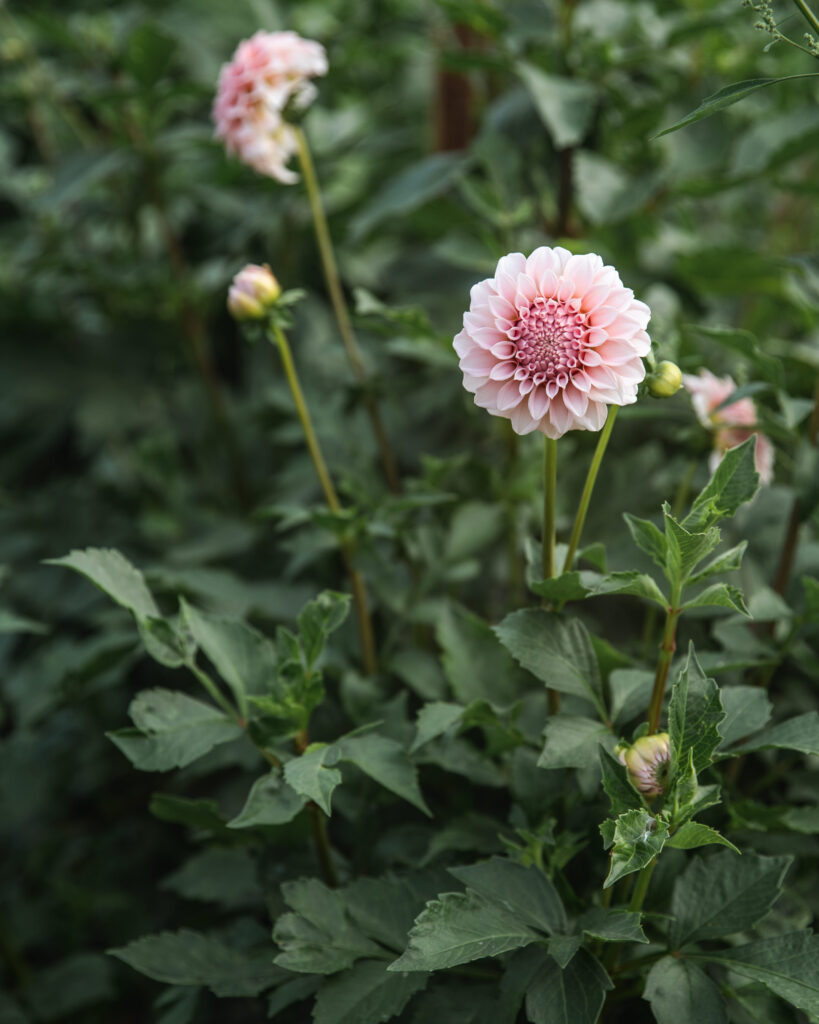
We have always spaced our dahlias via Floret’s recommendation: 2 rows per bed, 18 inches apart, 12 inches between plants. We stake our dahlias with either wood stakes or T-Posts and wrap with twine. I like the wood stakes for aesthetic reasons, but we have so many T-Posts around the farm that Matt has informed that this is what the majority will get this year🤣.
There are times where I did not stake, simply because we got busy. At the home farm, plants are generally shorter due to the soil conditions, so staking isn’t always necessary (some are totally fine while others topple over). The dahlias at the AirBnB require staking. We didn’t stake one row because we got busy and it was a disaster. Either way, support makes for tidier rows.
Successions: N&B
Most growers do not succession sow dahlias, because dahlias generally bloom until frost, though growers will plant 4–5 weeks earlier in a high tunnel, weather permitting.
Successions: BTS
We do not succession sow dahlias intentionally. What I mean by that is that they are sometimes planted at different times simply due to time constraints.
Nutrition: N&B
All sources recommend soil testing to assess proper nutrition. According to SCF, side dress with complete fertilizer, like 10-10-10 when tubers begin to sprout and liquid fertilizer (300–600ppm) once every 2 weeks. While it’s often said to avoid nitrogen with dahlias, Huber believes this is outdated. USU trials seem to back this up. A field of ‘Café au Lait’ was planted on May 24 to test five N fertilizer rates (0, 50, 100, 150, and 200 lb N per acre). Harvest began on July 27, and the most total and marketable blooms were harvested from plants fertilized at 150 lb N per acre.
While the ADS recommends adding organic material every year, Huber comments that organic matter is only needed when soil tests show that it’s low or deficient. Aside from making necessary soil changes based on your soil test, Benzakein recommends quality compost and general fertilizer.
Love and Huber discuss that the most-common nutrient deficiencies include calcium, boron, and sulfur. Here is a great video on identifying nutrient deficiency and disorders in dahlias by NC State University.

Nutrition: BTS
We amend our fields organically based on soil tests, and I have an eBook that outlines exactly how we do this, which is available here. I also wanted to note that I agree that “not adding nitrogen to dahlias” is an outdated recommendation.
Our county extension office generally recommends adding 0.3 lbs per 100 square feet, so that’s what we do. For our 4′ by 100′ beds, this means 1.2 pounds of nitrogen. Interestingly, this rate is quite comparable to USU trial findings. You might want to double-check my math, but the USU trial equivalent amount of 150 lb N per acre for a 4′ by 100′ bed would be about 1.4 lbs.
Another note is that our best dahlia crop yet was planted at our AirBnb. This was simply an experiment because our soil at the home farm is really whacky and devoid of organic matter. The AirBnB has better soil and is more-protected from the elements, and we figured the dahlias would be fun for guests.
The past owner was big into horses and the property has some old horse stables (that I keep trying to convince Matt we should fill with horses). Anyway, there is a ton of old hay and manure in the barn and paddock, so we do what we always do when we find $hit laying around, we use it!
We spread this out in the AirBnB field without much thought (before we knew we were going to plant dahlias, thought maybe pumpkins). Much to our surprise, the dahlias thrived here, so we plan to increase production in this location in 2023. I also think this is a really good reason to get horses, lol, Matt’s not so sure.
Mulch & Weed Management: N&B
SCF explains that dahlias are shallow-rooted, so root mulch should be applied liberally: pine straw, bark, peat moss, manures, or lawn clippings. Some growers warn against mulch encouraging slugs and either not adding until after plants have matured or using a control like Sluggo. Similarly, Benzakein adds a thick layer of mulch once young plants emerge from the soil, though she states this is more for water conservation and it is not necessary.
Mulch & Weed Management: BTS
Update: In 2023, we starting mulching all of our dahlias with grass clippings, and we love it! The reason being is that we do not use row fabric in our rows. We have lush grass rows and wanted to repurpose the grass clippings. So now, we simply mow them and then mulch the dahlias with the clippings.
This not only helps with weed suppression and moisture retention, but grass clipping are also a good source of nitrogen, phosphorous, and potassium (4% nitrogen, 0.5% phosphorus, and 2% potassium). According to vlawmo.org, and summer’s worth of grass clippings is equivalent to an application of fertilizer.
That said, I also still LOVE hay (we still have an abundance of old hay in the horse barn, but I tend to save this method for perennials like roses). I’m still going to leave it here in case you readily have access to hay:
Once sprouts emerge, we use paper and hay for mulch. We purchase big rolls of kraft paper, lay this down first, and then lay the hay over the paper. The dahlias really seem to enjoy this and if I could do this with every plant in my garden, I would. Someday, when I have all the time in the world, which I basically daydream about during work.
And yes, I said hay! Hayyyyyyyy, unpopular opinion: The internet will tell you to not use hay in your garden because of weed seeds, it decomposes fast, and that straw is superior. But I think that’s complete rubbish and have used hay in my gardens for years. Both hay and straw have the potential to have weed seed unless you purchase certified weed-free straw.
Hay, at least in our area, is cut before it goes to seed. The reason is that it’s used for animal feed and if left to go to seed, the plants transfer proteins and sugars from leaves into the seeds, which lowers nutrient content.
Hay is not only cut when nutrient content for the animals is high, but it is usually made from traditional cover-cropping plants that add nutrients *back* into the soil. It does decompose, but I think that’s a benefit. With a layer of paper plus the hay on top, they smother more weeds than they create in my experience. As the plants get bigger and establish, they also create a canopy. The hay and the paper break down, leaving a nice composted bed with additional nutrients for whatever crop follows the next year.
Bonus: Before we had access to an old horse barn on the property (with enough hay to last a lifetime, ha), I reached out to local farmers. Hay (at least in our area) is *way* cheaper than straw and is often free (most farmers prefer to feed their livestock fresh hay, and some picky horses won’t eat old hay). Bonus bonus: We’ve gotten hay from a myriad of farmers, and none of them spray anything on it because their livestock eat it. I had a horse owner who gave us as much free organic hay as we could haul from her barn (check facebook and craigslist).
Drainage & Irrigation: N&B
Most growers agree that good drainage is necessary for dahlias, especially early on as tubers are prone to rot. Most also recommend avoiding watering until after shoots emerge. However, once plants emerge and become established, they need a steady supply of water and drip irrigation is recommended. How much water will vary based on weather, location, and soil type.
Drainage & Irrigation: BTS
All of the plants at the home farm are on drip irrigation. However, the dahlias at the AirBnB were not, simply because we got busy and we had a good year for rain. That said, we intend on adding them this year if needed. The midwest is weird . . . sometimes we get plenty of rain but we have had years that require supplementation.
Pinching & Bud Trimming: N&B
According to SCF, pinching the terminal shoot encourages the development of many side shoots, meaning more flowers are produced more rapidly, though this does usually delay flowering by 1–2 weeks. They note that most varieties bear flowers with small side buds beneath the center bud, and that removing them yields larger flowers.
Most growers agree that pinching is necessary for quality cut flowers, because if you don’t, you’ll end up with a giant stalk and not as many flowers. However, pinching can also lead to loss.
While most growers recommend pinching at 8–12 inches by snipping 3–4 inches off the top of the plant, Huber likes to pinch when there are 5 or 6 leaf sets on the bottom. She notes that’s an ideal size, but when you’re working with a lot of plants they are naturally at different stages, and that’s OK. She recommends not pinching before a rain storm (hollow stem in the rain can lead to rot).
When Love pinches, she sometimes leaves a leaf umbrella over the opening. She also mentions sticking a pinhole at the base for water to drain. If the plant looks like it’s failing, both Huber and Love recommend digging it up and see if rotted. If part of the tuber is rotted, you can cut off the rotted part and re-plant, salvaging your stock.
Pinching & Bud Trimming: BTS
We pinch our plants when they are about 8–12 inches tall. As LeeAnn notes (when I write N&B, I feel like I should use last names, but when I write here, I feel like we’re on a first-name basis lol) . . . anyway, as Huber/LeeAnn notes, plants are often at different sizes and this is true for me too. I like to keep two pairs of snips in a 10% bleach solution between cuts, so I prefer to get them done all at once even if some are not the ideal size. I will occasionally remove small buds beneath center buds, but this is really if I’m just walking around with coffee and have time. I don’t make a point to do this.
Bloom Period & Yield: N&B
According to SCF, flowers bloom from early summer until frost. Yield is highly dependent on cultivar and climate. SCF comments that yields of 20 flowers per plant are not uncommon, while Huber states that ideal plants in her breeding program get 8–10 stems per week per plant, with 5–6 considered OK. USU trials note that of August 27, the high tunnel produced an average of ten stems per plant while the field averaged six.
Bloom Period & Yield: BTS
Our dahlias bloom starting in late July or early August (depending on the weather and when we plant them) up until frost (some years as early as mid September while other years late October). I wish I had a quantifiable yield number, but it just depends on the variety and I haven’t kept detailed records of this yet.
Note: You may have noticed I added this section to past plant profiles. I did so after requests, which I think was an *excellent* suggestion. That said, I don’t include specific dates for specific reasons. Unless we’re growing in a controlled environment like a greenhouse with controlled temperature, humidity, and artificial light, timing crops perfectly is extremely difficult (Farmer Bailey has talked about this with lisianthus and I couldn’t agree more).
So, I don’t actually do it. Yup, you read that right: I don’t plan crops for specific dates or even weeks. I aim for early-month/late-month and even then, I don’t depend on any one crop. The reason why is that there are far too many variables when we grow in uncontrolled environments. In January, we learned that something as simple as cooling lisianthus at 54F when young can accelerate flowering by almost two weeks. Similarly, we learned in February, that sowing sunflowers in cooler temps can delay flowers by weeks.
Now think about other factors: warmer or cooler seasons, drought, excessive rain, cloudy vs sunny days, and the list goes on. For me, every year is different even if I do the exact same thing. When it comes to timing blooms, I try to have grace with myself and mother nature. We do our best planning for weddings and events, but I abide by Jennie Love’s mantra: Trust the field.
And last year, I found out just how much unique soil can have an impact, even fields that are 5 minutes apart from one another! We planted Chewy at the home farm and the AirBnb. While the AirBnb was planted a couple days later, it actually bloomed 2–3 weeks earlier🙃.
Harvest: N&B
SCF recommends harvesting when flowers are 75% to fully open, but before the outer petals begin to decline. If cut too early, dahlias usually fail to open, and if they do open, they are usually lower quality.
If growing on a large scale, analyzing each flower is time-consuming, so most growers recommend harvesting every few days, harvesting every bloom. This means that the blooms are always at the right stage and aren’t left to go to seed. Similarly, this ensures a steady supply of blooms because the plants are not putting energy into producing seeds.
Interestingly, this is also important for tuber production. Albrecht explains that plants prioritize flowers and seeds, with only excess nutrients going into tuber production. “For example, suppose a dahlia plant is not deadheaded, and its flowers go to seed. In that case, the seeds will consume the lion’s share of the nutrients, leaving little excess for tuber production.” For this reason, disbudding, cutting blooms regularly, and deadheading old blooms is important for robust tuber production.
When harvesting, Benzakein recommends cutting deeply, not only for long stems, but also because this encourages branching from the base and longer stronger stems in the future.
Harvest: BTS
Because we grow so many dahlias, our goal is to harvest every 2–3ish days versus analyzing every flower. It goes something like this: Harvest Tuesday into cooler, harvest Thursday into cooler, Saturday/Sunday deadhead. Events get Tuesday flowers, retail/market bouquets get Thursday flowers (on Friday mornings). If a florist needs a lot of one specific variety or color and I am short, they may get Tuesday harvest IF using for an event that weekend (I check with them, most just want the color/variety). Any extras are used for photoshoots.
While that is our goal, I’ll be the first to admit this doesn’t always happen. I remember frantically trying to deadhead the dahlias right before hopping onto a flight for work (for a whole week, oy!) Sometimes, things get away from me and flowers do go to seed! I try and have grace with myself and use this as an opportunity to save seeds. Are you sick of me saying “grace” yet?
When I harvest, I cut deep, usually the flower is at about my upper arm/shoulder and I cut where the natural length of my arm meets the stem (even on shorter plants, because I’m bent down).
Post-Harvest Treatment and Storage: N&B
SCF recommends harvesting in the morning and placing stems directly in a hydrating solution or hot water (allowing the water to cool before arranging). They note that dahlias persist 3–5 days in water and 7–10 days in solution. They recommend avoiding storage when possible, but that 37–40F (3–4C) in water is acceptable.
Post-Harvest Handling notes that vase life generally averages 4–5 days, but can be up to 11 days for some cultivars with proper harvest and handling. Holding solution will increase vase life by up to 3 days. One week of cold storage decreased vase life by 2 days and stems did not tolerate longer storage at all.
Post-Harvest Treatment and Storage: BTS
I always bring buckets of fresh water with hydrating solution into the field. Because of dahlia’s hollow stems, it helps them take up water. After a few hours or the next day, they go into holding solution. Because of dahlia’s shorter vase life, I prefer to cut Wednesday evening or Thursday mornings for our Friday deliveries. I wrap bouquets (and make arrangements) Thursday nights and store in the cooler over night (stems stick out of wraps and sit in holding solution). I don’t mind holding a day or two for events.

Pests & Disease: N&B
Bacteria
According to Benzakein, the most-common bacterial disease in dahlias is crown gall, which can sometimes be identified by bumpy, cauliflower-like growths around the neck of tubers or on the tuber clumps. Other growers also mention leafy gall, which can show symptoms of numerous leafy shoots. Gall impacts 100s of different plants and there is no known treatment. All plants and tubers should be thrown away (not composted) and any tools that came into contact should be disinfected (Benzakein). It should be noted that these are just some symptoms, and that bacterium may be ubiquitous but not pathogenic.
Virus
Numerous dahlia viruses impact dahlias. They live in both the plant and the tuber, there is no known treatment or cure, and plants and tubers should be destroyed (Benzakein). According to USU, virus will also infect seed.
The ADS has invested an enormous amount of time and research into dahlia virus and reducing the spread. The ADS suggests their “being part of the solution” approach, which includes: choosing clean stock, removing stock with virus, removing suspicious plants, integrated management for thrips and other pest vectors, and disinfecting tools which can spread disease.
While virtually all sources recommend starting with clean stock, most concede that this is challenging. Symptoms of virus can be difficult to identify and plants can have virus but be asymptomatic. “Some plants may show no symptoms at all while others are stunted, have mosaic patterns, vein clearing on leaves, or develop necrotic lesions” (USU).
The ADS provides this visual guide for help identifying symptoms of virus. Most sources note that virus can be confused with nutrient deficiencies and disorders. USU trial research notes that unpredictable plant growth can be due to soil deficiency and virus, making virus challenging to identify without testing. For this reason, the ADS, WSU research, USU research, and many growers recommend: When in doubt, throw it out. While the ADS notes this can lead to removing uninfected plants, research by WSU has found this reduces the spread of virus.
That said, it should also be noted that plants can carry virus (or bacteria) but not be pathogenic. In other words, plants can be completely asymptomatic. According to USU, further research is needed to understand when and why symptoms present (potentially when a plant becomes infected by more-than one strain).
Huber has an educational talk on dahlia virus here.
While diseases should be taken seriously and plants removed immediately when there’s concern, I also appreciate Dr. Hammett’s thinking. For example, he suggests focusing on breeding virus tolerant plants. He reminds us that plants can be completely free from disease and end up in a garden with numerous asymptomless plants that carry virus and then the new plant becomes infected and shows symptoms. Viruses can be passed by dahlias but also by other affected plants (tomato mosaic virus affects 900+ plants, for example) (Huber). It can be spread by tools and vector pests like thrips.
Fungus
Fungal diseases, like powdery mildew, botrytis, leaf spot, and smut also impact dahlias. The ADS has a detailed list of fungal controls. Most are not organic, and the ADS does state in numerous places that they do not endorse any one product. They have another article that suggests RootShield as a preventative. Huber and Love both mentioning using Actinovate for fungal diseases (including Huber dipping tubers before planting).
Pests
I appreciate Love and Huber’s light-hearted discussion on pests, especially about being flexible, researching things as they arise, and sharing what you learn. Huber laughs that every year, you’re going to get a new pest and a new chance to research. Huber and Love mention Japanese beetles, cucumber beetles, grasshoppers, corn borer, army worm, slugs, earwigs, ants, aphids, thrips, leafhoppers, tarnished bug plant.
While Huber notes she’s not 100% organic, she is moving in a sustainable direction, and chooses to use organza bags on dahlia buds to avoid Japanese beetle damage when she has big orders (but not on all). She also mentions installing DynaTrap for corn borer moth. Huber also notes how it’s important to choose correct strains of Bacillus thuringiensis (Bt) when controlling particular pests. Love mentions Sluggo Plus for slugs and earwigs. Love has worked hard to create environments for birds which eat many beetles and grasshoppers and that skunks are great for eating grubs and slugs!
Benzakein notes slugs, snails, earwigs, aphids, thrips, and Japanese beetles as common pests for dahlias. Here is an article that the ADS recommends for identifying and treating the Top 11 Dahlia Pests.
Pests & Disease: BTS
If you’ve been around for the past two plant profiles, you are probably tired of me saying this, but: I truly believe in creating as diverse an ecosystem as possible, so we grow a lot different plants, and always practice crop rotation. We also follow the recommendations of the ADS “being part of the solution”: when in doubt, throw it out.
Similarly, we follow the ADS “gold standard” for disinfecting tools, which is a 10% bleach solution. We’ve also introduced beneficial insects such as ladybugs and lacewings, though it’s hard to tell what impact these have though they have stuck around (I’ve recently read there’s controversy over lady bugs, but my brain cannot handle another controversy right now, so more on that later).
While we would never knowingly keep a diseased plant, diseases don’t always show symptoms, so we also proactively test for cucumber mosaic virus (CMV), tomato spotted wilt virus (TSWV), impatiens necrotic spot virus (INSV), and tobacco mosaic virus (TMV). These tests are expensive, so it’s not economically feasible to test every plant at this time, but I was genuinely curious, and thought it was worth investing in it (though it should be noted that these are not the only viruses that affect dahlias).
When it comes to purchasing clean stock, as others have stated, this can be challenging. For me, I try and be realistic about current limitations. I’ve purchased from numerous suppliers over the years, but my preference is to support small growers, because it’s usually clear that they really love dahlias! Check out their website and social media. Do they have pictures of their dahlias? I don’t mean professional pictures, I just mean can you see the plants and how they’re growing them? Do they seem knowledgable about the process of growing, dividing, and storage? Do they have an FAQ, Information Page, or terms and conditions? None of these are guarantees, but they are good places to start. Just remember that most growers are small operations, sometimes with limited website and copy experience (but major growing experience), so try and give some grace here.
And of course, none of this means that growers are exempt from diseases or mistakes (including us), but I do believe most would never knowingly send diseased stock. Truly, in my heart of hearts, I actually don’t think the vast majority of sellers (small or large) would. Sellers rely on healthy, true plants not only for production, but also for their reputations.
However, even in the best of cases, disease is a potential, and indeed very likely. According to the ADS, “It is virtually certain that your garden contains a mix of clean and virused dahlias. Some of the plants with virus could lack any evidence of virus on the foliage. When you work in your garden, there is a very real risk that you can and will move virus from the virused plants over to the clean plants unless you disinfect your tools between each plant.”
I don’t say this to freak you out, but I think knowledge is power. We choose to be realistic about the risk, but reduce risk where we can. Regardless of where you choose to source, try and remember that most folks are doing their best and sometimes these things are extremely difficult if not impossible to identify without testing (for both the grower and the supplier).
We’ve never treated for fungal issues, but I do plan on using RootShield for our tunnel-grown lisianthus. It has to be used within one year, so I may use the remainder on my dahlias for good measure.
While we don’t have a slug problem, I still have an unopen bottle of Sluggo because everyone and their mom told me that we would need it. We do have occasional earwigs, but nothing I control. As mentioned earlier, we do introduce beneficial insects for thrip and aphid control, but it’s hard to say if this is affective as neither of these were real issues in the first place. To me, this just seemed like a preventative option that wouldn’t cause harm.
Our biggest pest issue is Japanese beetles, urrrggggg. We have applied milky-spore to the soil, but I’ve read that this can take years to have an affect on grubs. I have organza bags, but I rarely use them (I keep them on hand in case I have a wedding or large florist order and not a lot of blooms in a particular color). If I had all the time in the world, I’d probably cover every bloom, HA.
I loved hearing Jennie talk about birds AND skunks, because we have both! I never realized how much they eat beetles, grubs, and slugs! We have many hummingbirds (hence our logo), which we have feeders for, but I’ll have to consider adding feeders/houses for other birds.
I also loved Jennie and LeeAnn’s lighthearted conversation about growing and learning based on your individual goals. I especially laughed when they talked about how much there is to learn, that you never know everything, there is no rest, and when LeeAnn laughs: how many people still want to grow dahlias?!
I kind of feel like asking that same question after this section, ha! But as Jennie says, they’re gorgeous, and worth it, and even though they break your heart every year, it’s in the best possible way. They’ll stop you dead in your tracks with their beauty. I couldn’t agree more 🙂

Overwintering: N&B
Growers in mild climates, such as USDA Zone 8a or higher can successfully overwinter dahlias, meaning leaving them in the ground through the cold months. These plants flower much earlier, 4–6 weeks ahead of spring-planted tubers (Benzakein). Love also has an informative blog post on successfully overwintering dahlias in Zone 7/6b. She notes that they are much better cut flowers as perennials (better quality and pest resistance). However, growers in cooler climates must lift their tubers and store them through the colder months, as tubers cannot freeze.
Overwintering: BTS
We do not overwinter dahlias, but don’t tempt me with a good experiment! If I was in Z6, I’d probably try with something like Cornel Bronze.
Digging, Dividing, and Storage: N&B
Perfecting dahlia storage is tricky business. There are different schools of thoughts on when to dig and divide, and even more ways on how to store them. Methods are highly dependent on climate, environment, and what works best for each grower. Listed below are a few schools of thought, including links to the more in-depth articles and practices.
General Information
The ADS provides the following pictorial guide of digging and diving, as well as an in-depth article on digging, dividing, and storage.
Johnny’s makes the following recommendation: In the fall, after plants have died back but before the ground freezes, cut plants back to 2-4″ above the soil line and carefully dig tubers and remove excess soil. Let tubers cure for 1-3 days in warm location with some humidity, out of direct sunlight with ample air flow. Pack tubers in peat or vermiculite inside perforated plastic bags, boxes or crates.
Ultimately
While everyone seems to have their own tricks (and superstitions, ha), virtually all growers are aiming to store tubers between 40–50F (4.4–10C) at proper humidity. Huber recommends mimicking a root cellar, with stable temperatures in the 40s and humidity at 80-90%.
While temperature is a bit more precise and easy to capture, what constitutes as “proper” humidity has a lot to do with the surrounding environment and the containers and medium in which the tubers are being stored. In other words, a sealed plastic container may have different humidity than the surrounding room.
Ultimately, if tubers are too wet, they will mold and possibly rot, and if they are stored too dry, they will shrivel and possibly desiccate/die. Virtually all growers agree that a little shriveling is perfectly normal and that no matter the storage method, tubers should be inspected periodically (at least monthly) to ensure proper storage.
Before discussing storage methods, here are a few things to consider:
Things to Consider: When and How to Cut Back?
Before digging, most growers recommend cutting back plants to 2–4 inches above the soil line, so digging is more manageable. While some growers recommend cutting back after frost and allowing to sit 10–14 days, others state this can promote rot if conditions are wet as moisture can collect in the hollow stems. The ADS recommends dipping cutting tools in a solution of one part bleach to ten parts of water before switching between one plant and the next to avoid spreading virus.
Things to Consider: When to Dig?
While Benzakein notes that it’s important to let tubers “cure” properly before digging, recommending waiting to dig after a hard frost or two, which toughens the skin on tubers, Albrecht claims that frost has no effect on maturing tubers. She maintains that maturation of tubers starts at the solar equinox in June, requiring 90 to 100 days from the June 20 Equinox. She notes that while frost has become a convenient placeholder in the calendar, it’s not the frost, it’s the passage of time after the summer equinox. However, Benzakein notes that tubers dug without proper curing had a higher rate of shriveling and seemed more susceptible to rot in her experience. She maintains that while tubers need to properly cure, they do need to come out of ground before the ground freezes or they won’t survive.
Things to Consider: When to Divide?
How one stores also depends on when one chooses to divide their tubers. Some growers wash and divide tubers right away, while many growers, like Benzakein and Huber, store right away until they have time to divide. Benzakein recommends leaving a light layer of soil on clumps rather than washing right away. Huber overwinters in a root cellar in open crates lined with paper, kept at 42F, and filled pine shavings because she has moisture. She recommends 80–90% humidity. Huber also mentions utilizing a cooler in her basement for dividing.
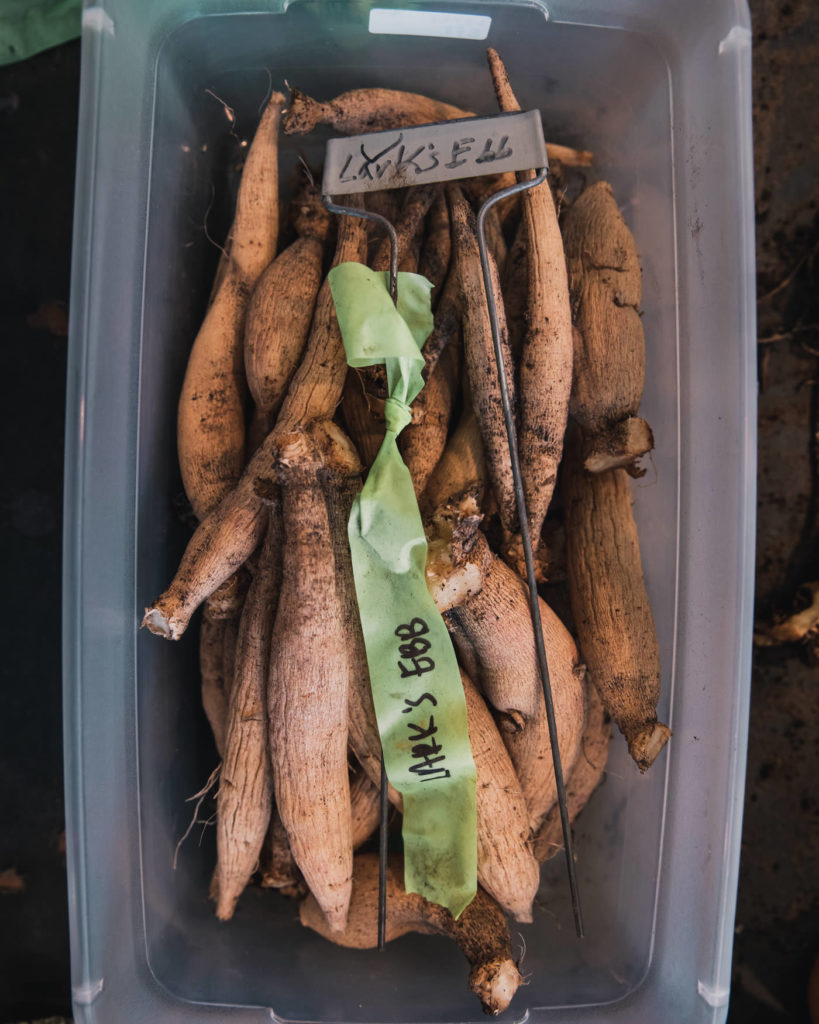
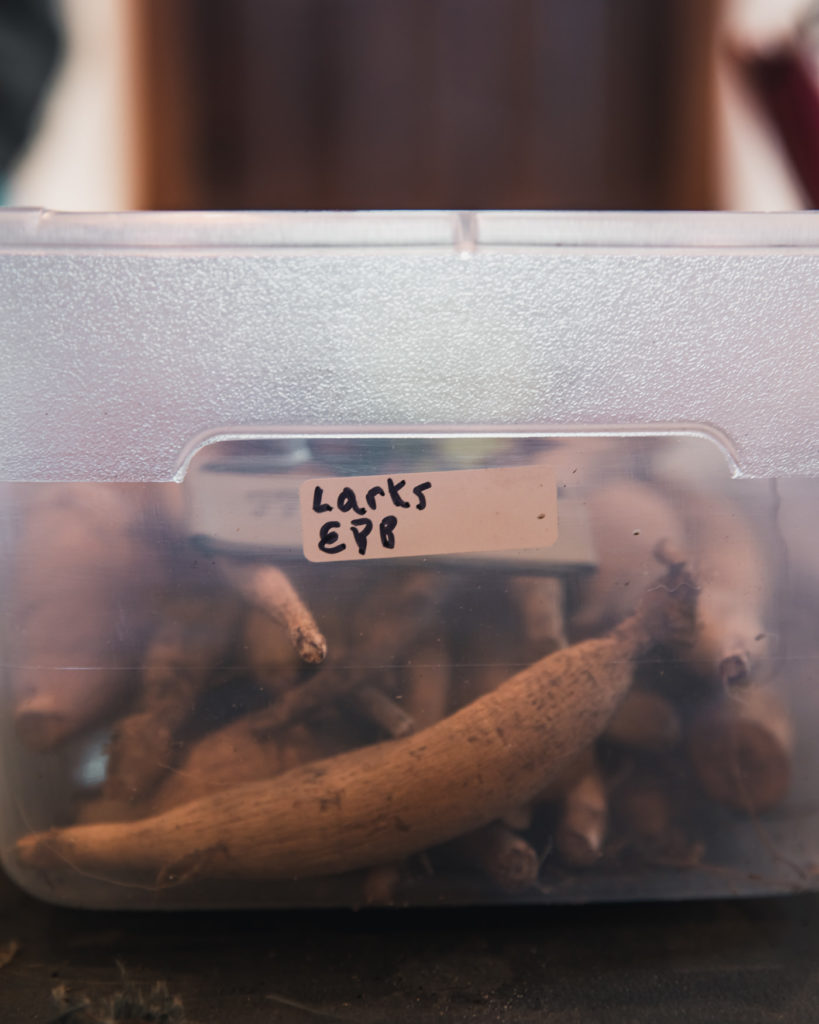
Proper Labeling
All growers stress the importance of proper labeling, often recommending double or triple labeling systems (tubers are easy to mix up!!).
Dividing & Storing
Regardless of when you dig and divide your tubers, here is a great video demonstrating the process as recommended by the ADS. They also have an excellent pictorial guide of dividing tubers. Another one of my favorite resources for dividing tubers is this excellent post by Summer Dreams Farm.
Once divided, there are many options for storing individual tubers. Most of the sources for this plant profile prefer either the Saran Wrap Method or the Plastic Shoebox Method, with Benzakein liking both methods. The Plastic Shoebox method involves filling a plastic bin with 1 to 2-inch layer of media (Benzakein uses vermiculite while Albrecht uses slightly moist peat moss), setting tubers on top of the media so they are close but not touching, covering with another 2 inches of media, and continuing to add tubers until they are full. Either method should continue to be stored at 40–50F (4.4–10C) at proper humidity and checked periodically.
Digging, Dividing, and Storage: BTS
I know that was a lot of information to consider for storage, and if you haven’t found the best method for you yet, please don’t lose hope. Leave a comment explaining your environment and methods tried, and I’ll see if I can help. Once you find a method that *does* work for you, the whole process becomes a lot less daunting, though one should never become too complacent with their dahlia storage in my experience, HA!
Over the past few years, here is what we’ve found works best for us.
Digging
Prior to digging and before a killing frost, I verify all plants are labeled correctly by adding a triple label. Because we sell our tubers, we like to take this extra step. Once frost hits, there’s no going back. I also flag plants with green flagging tape for potential sellers and pink flagging tape for keeping back (there are a lot of reasons for this, but some are: wanting to build stock, new seedling, a plant that may be displaying genetic mutation).
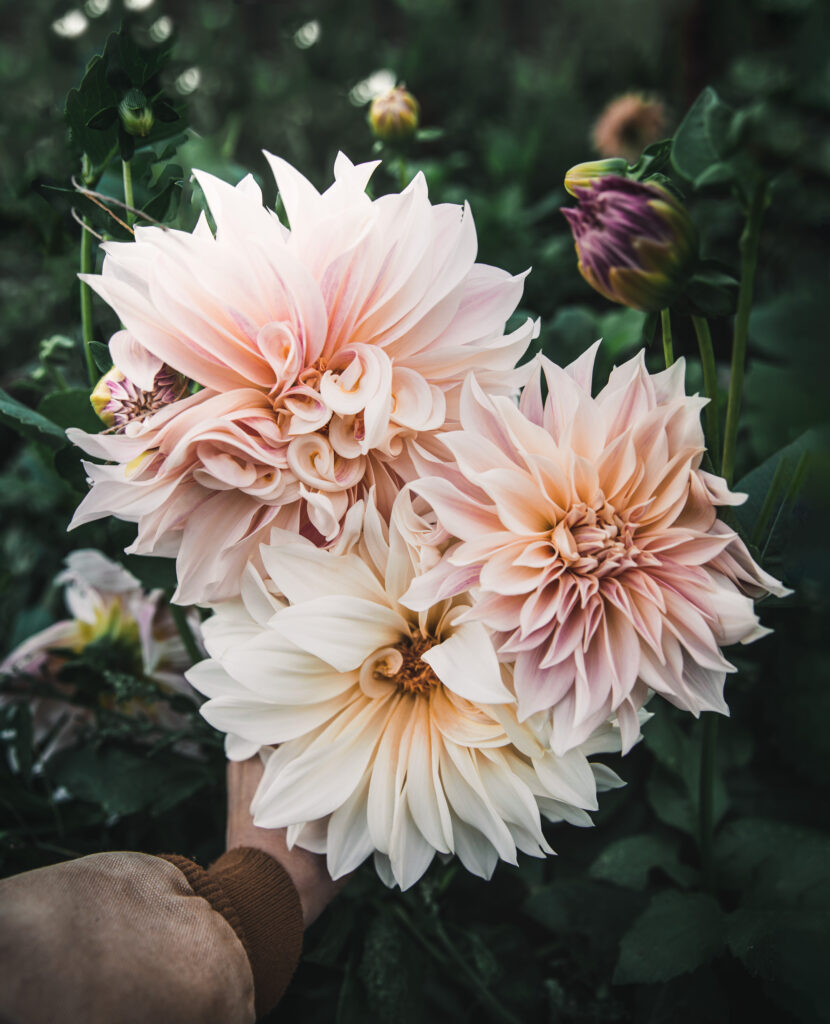
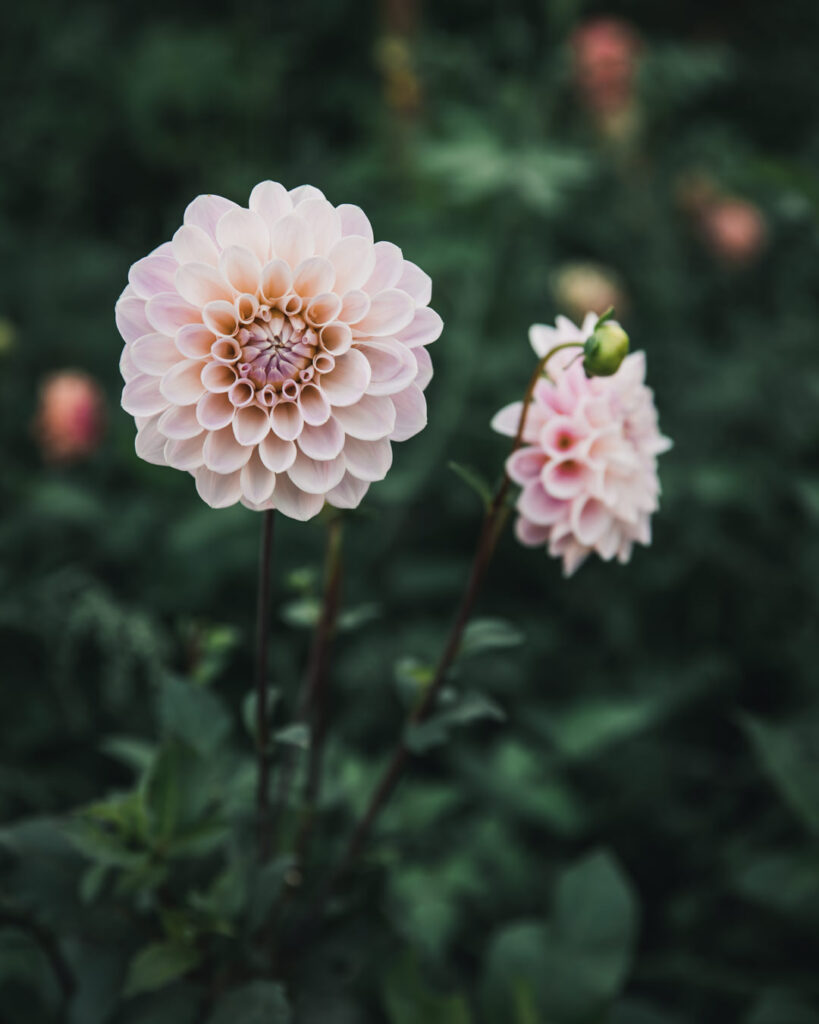
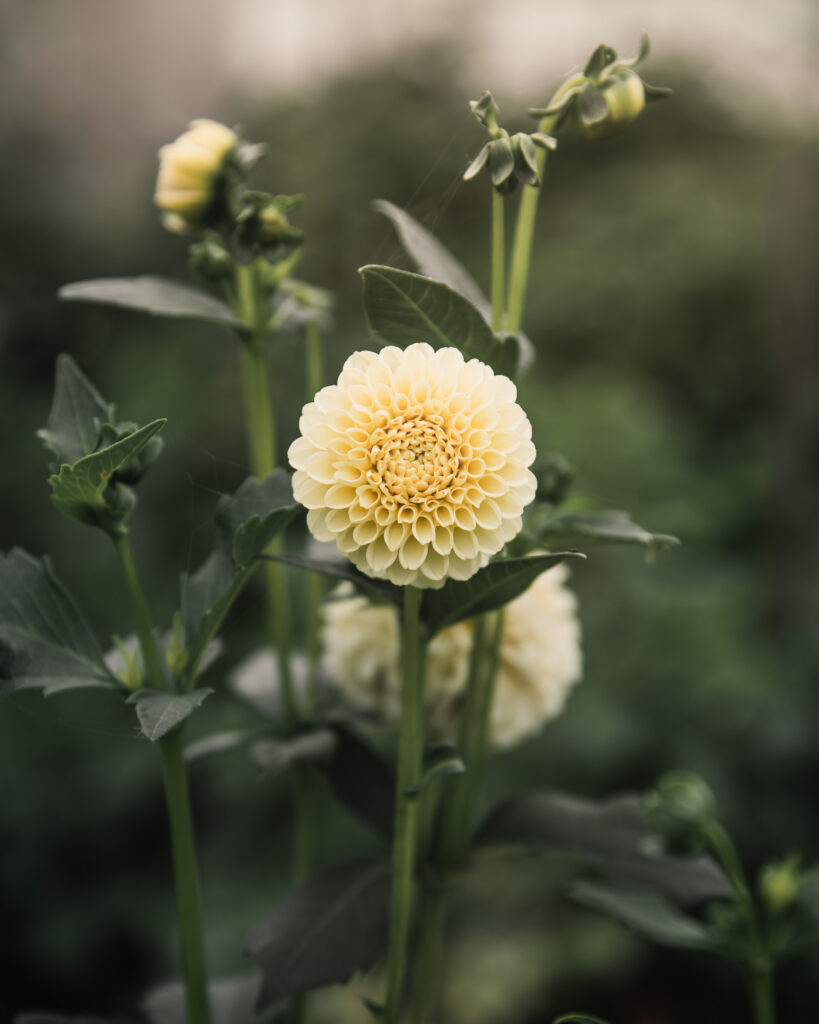
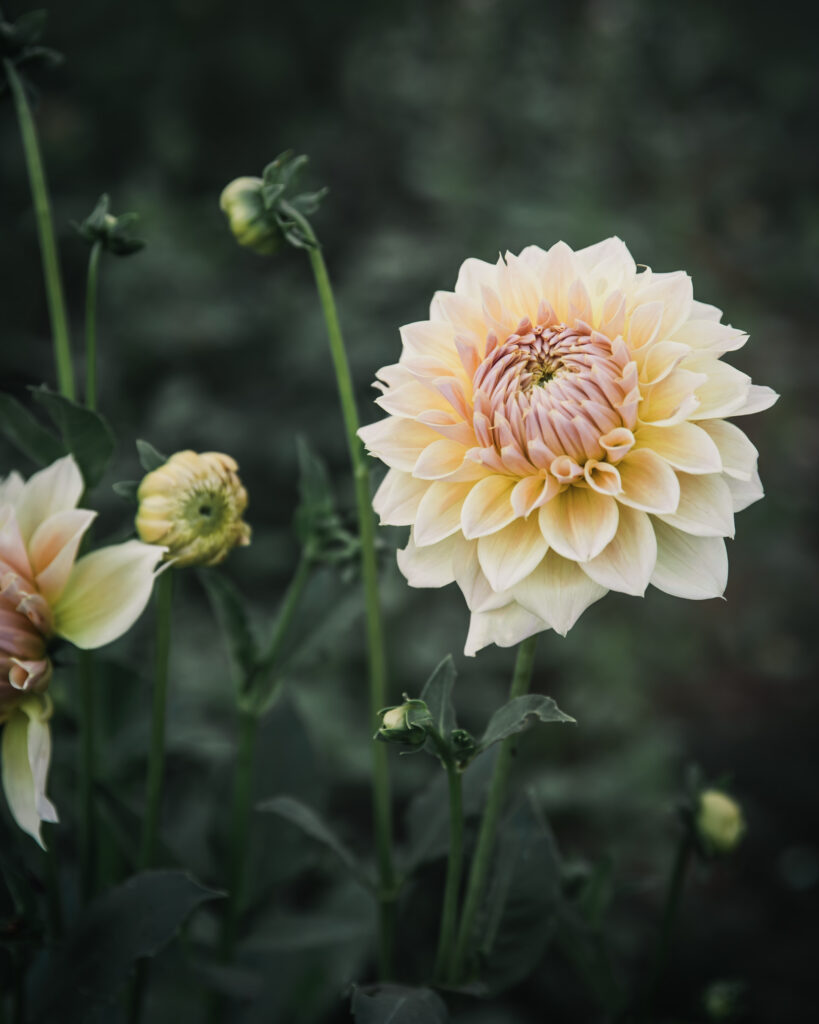
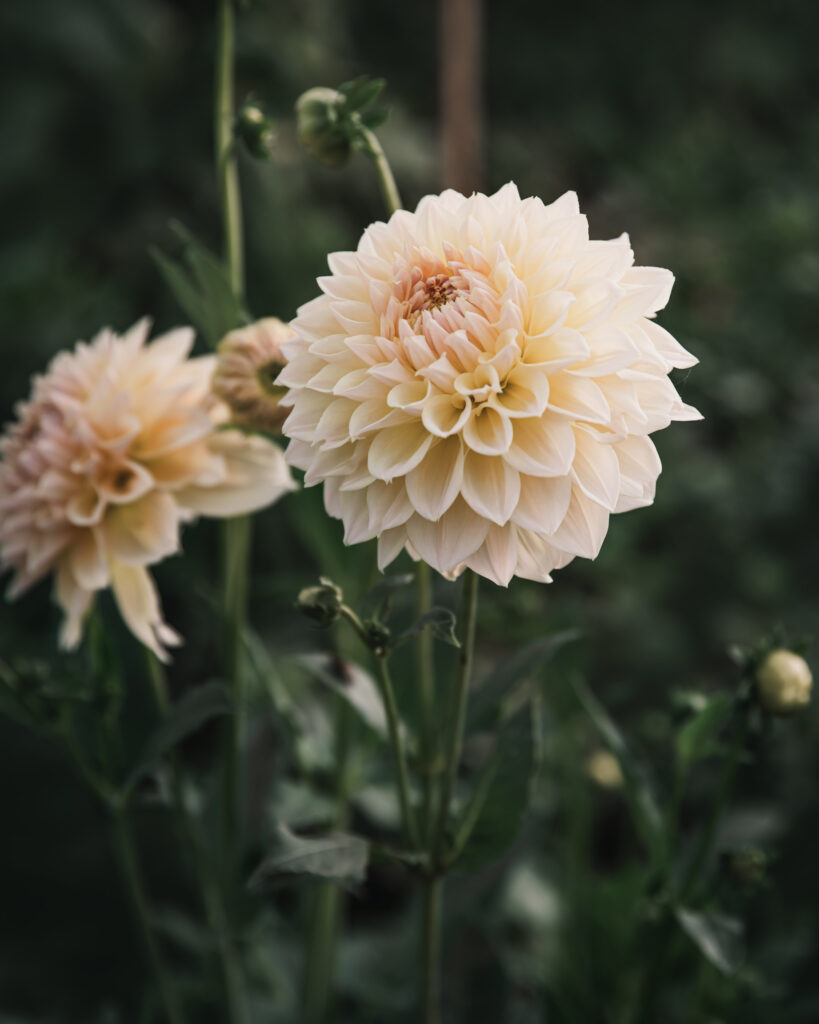
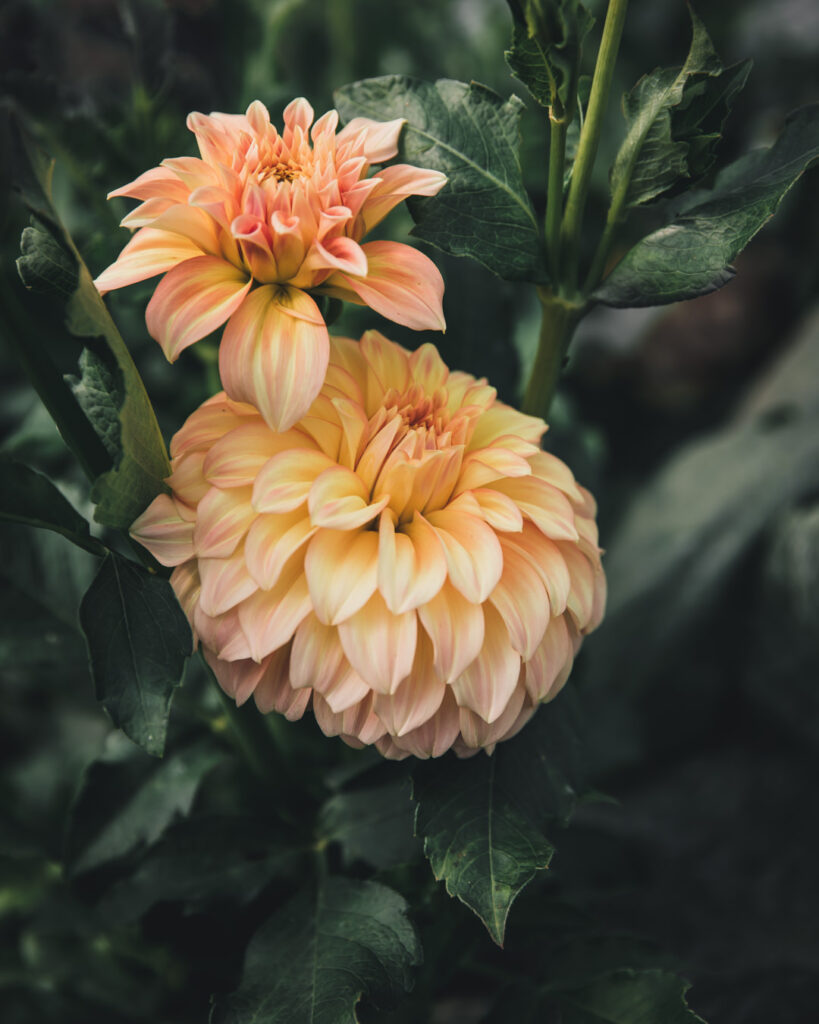
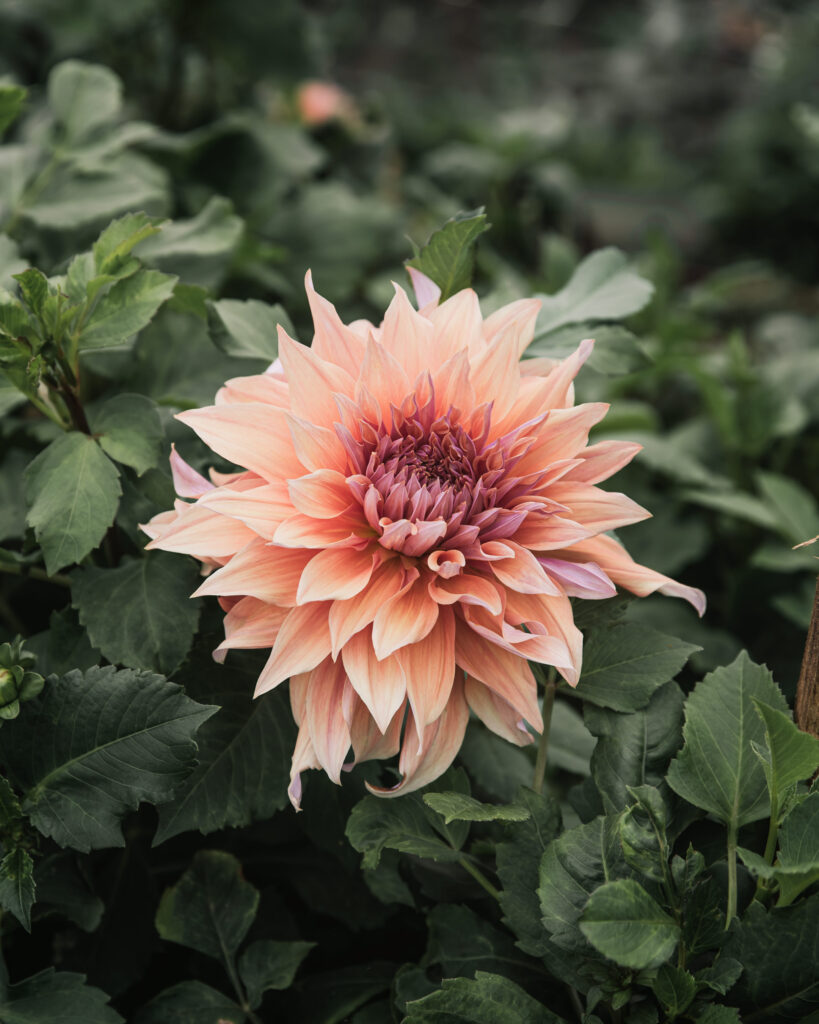
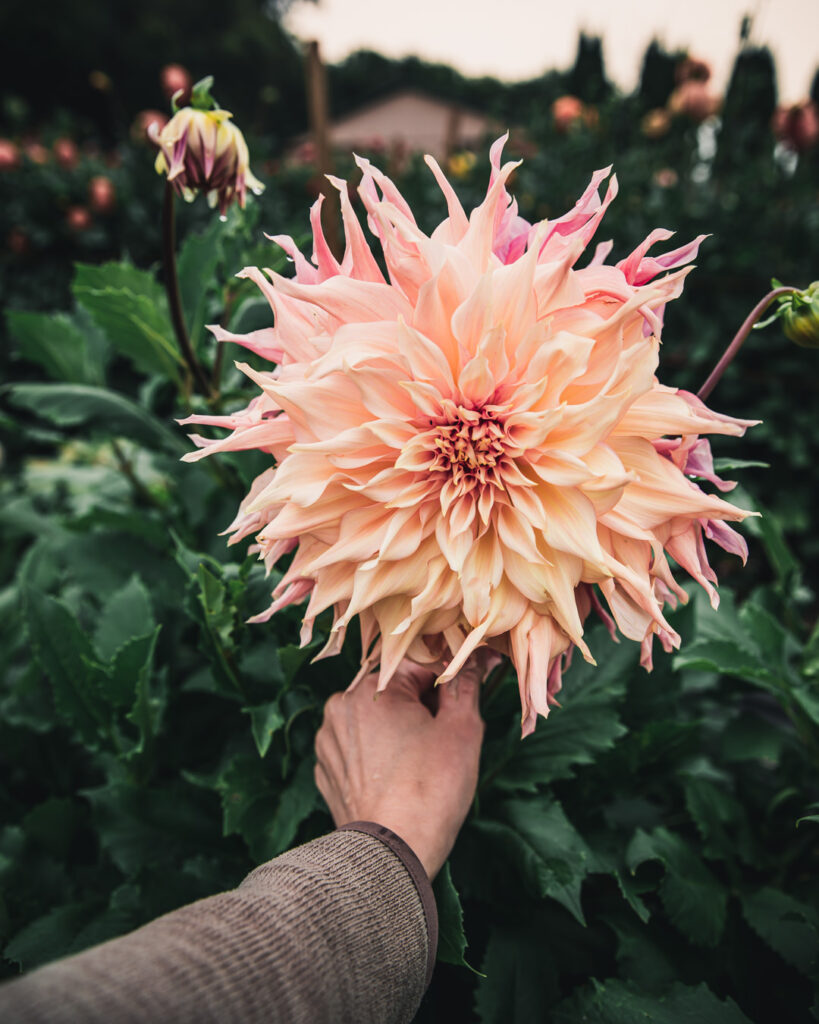
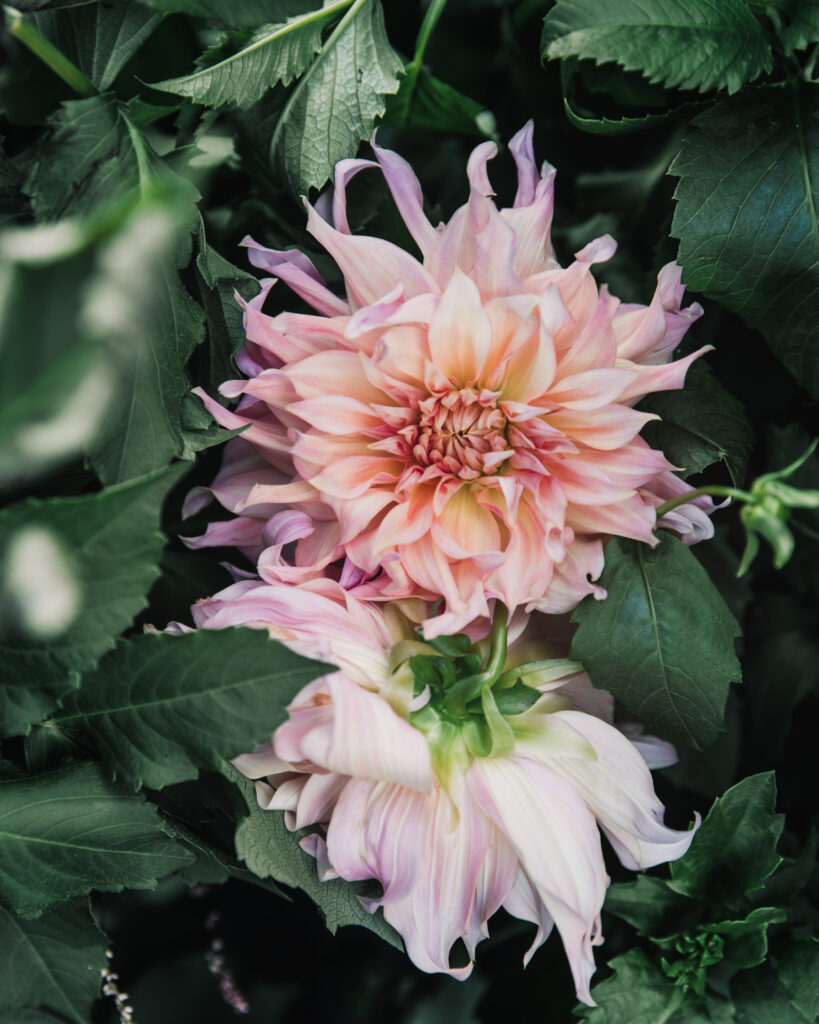
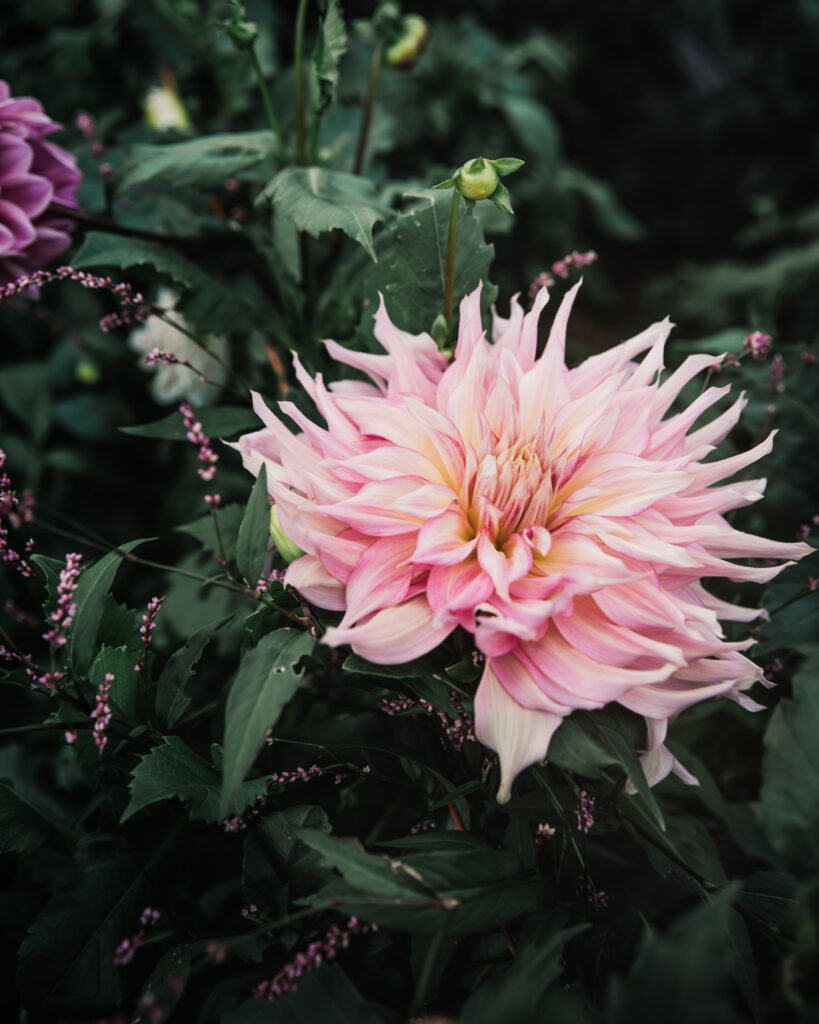
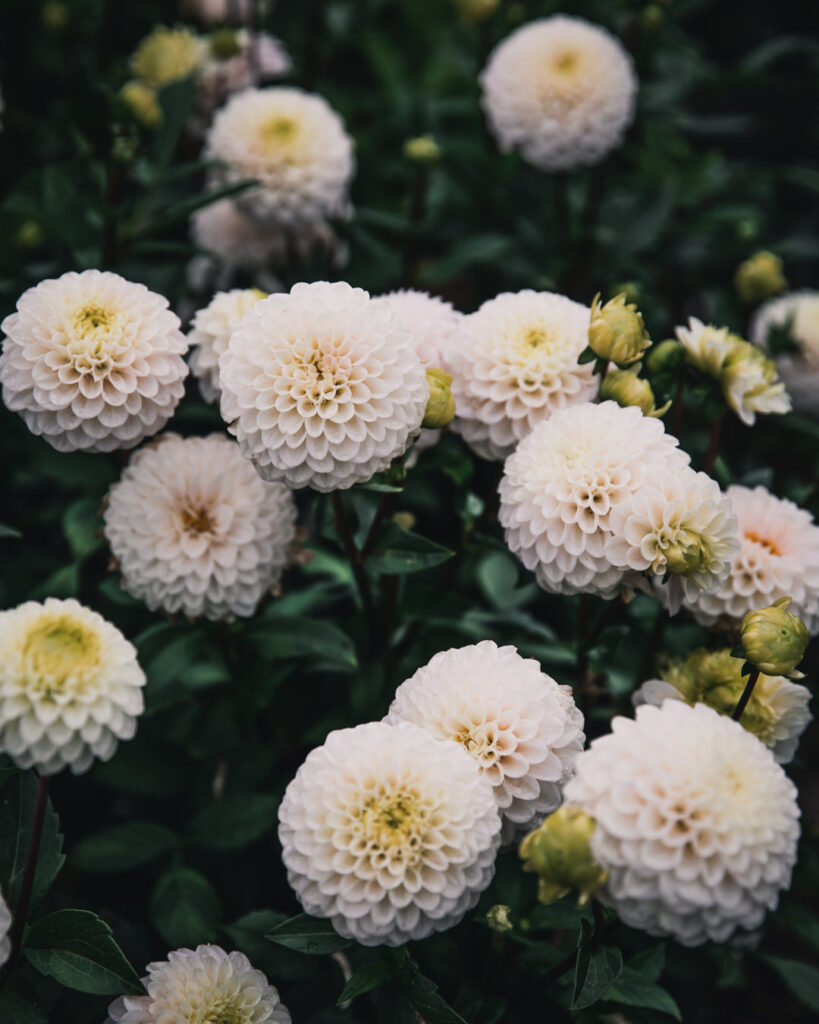
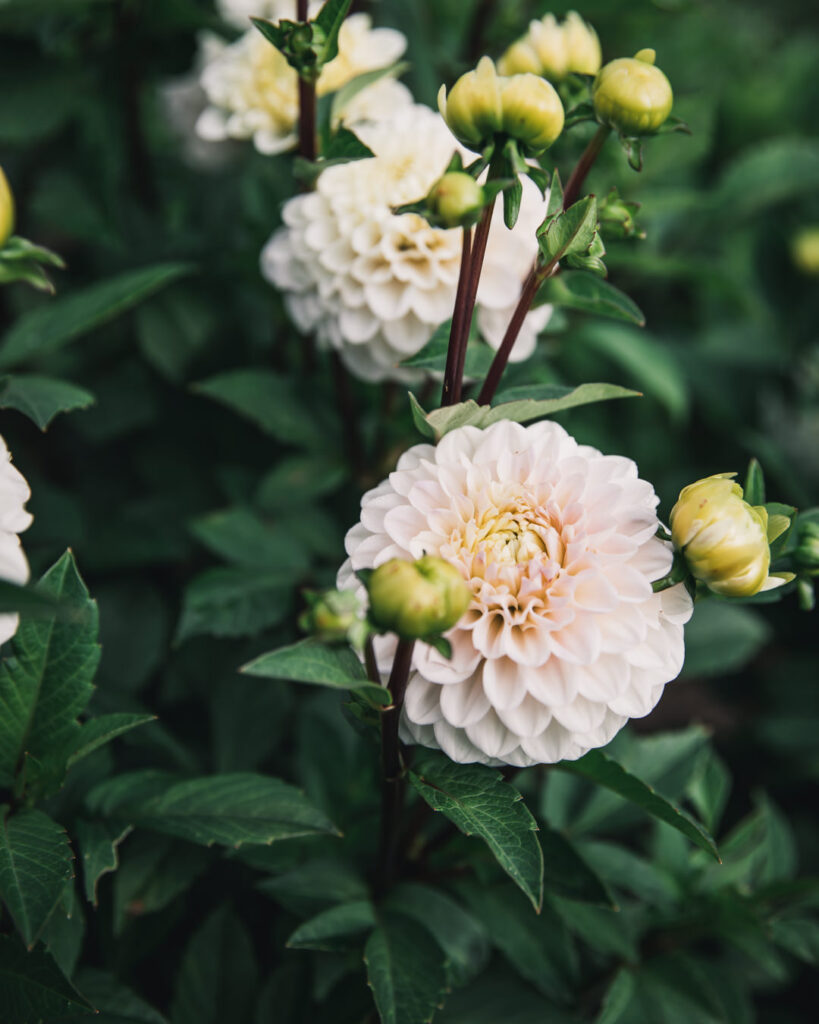
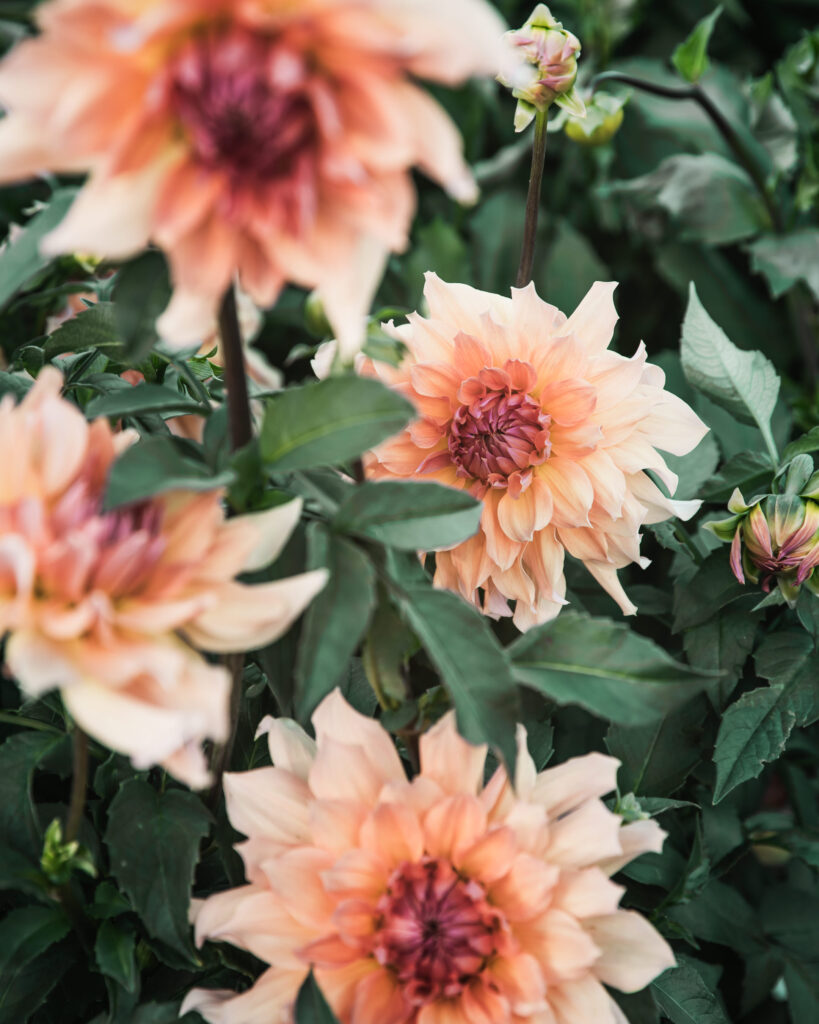
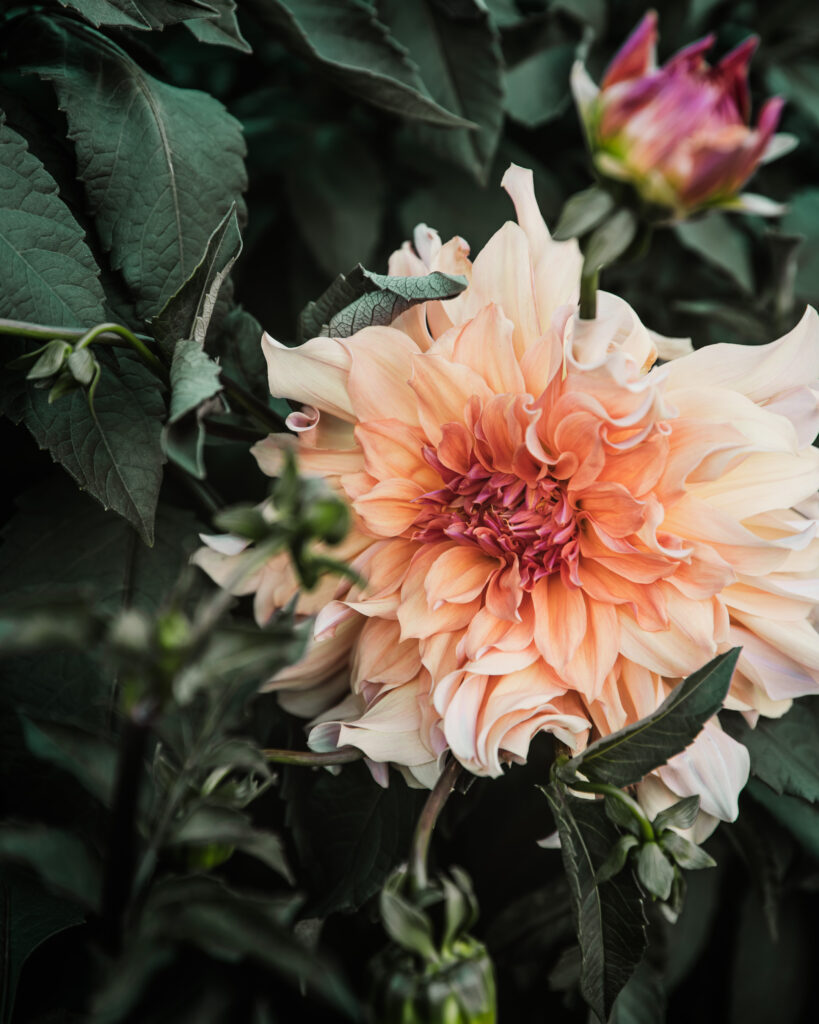
For example, I love all three of these Cafè Au Lait dahlias, but some people only want the one on the right. Truthfully, plants can throw a variation of blooms all season long, and that’s pretty normal.
Also an open center does not automatically mean a genetic mutation. It can also be caused by nutrient imbalances and extreme temperature fluctuations.
But if you’re selecting for good genetics, you likely don’t want to keep a plant that’s consistently producing open centers more often than not (if it’s not supposed to have an open center).
I actually decided to hold all my Cafes back this year to see if some plants made curly cues more often than others and if so, I wanted to see if I can isolate them (not as a sport, but just to see if some do it more often than others). Maybe this is a dumb idea, but I personally love them, so I thought it was worth the experiment.
Also, you’re not required to get rid of plants with genetic mutations. Some mutations are introduced intentionally to create sports (as mentioned in the beginning). Plus, maybe you like the mutation! But if you’re selling tubers, you want to cull out or separate plants that are consistently producing blooms that the buyer would not expect.
I’ve had to let some go because all the blooms on the plant had open centers when they were not supposed to. Tough lesson learned.
Anyway, where were we? The flags! The green and pink flags and labels follow the plants throughout the entire process, and they’re a simple way for Matt and me to communicate and understand the intentions with each plant.
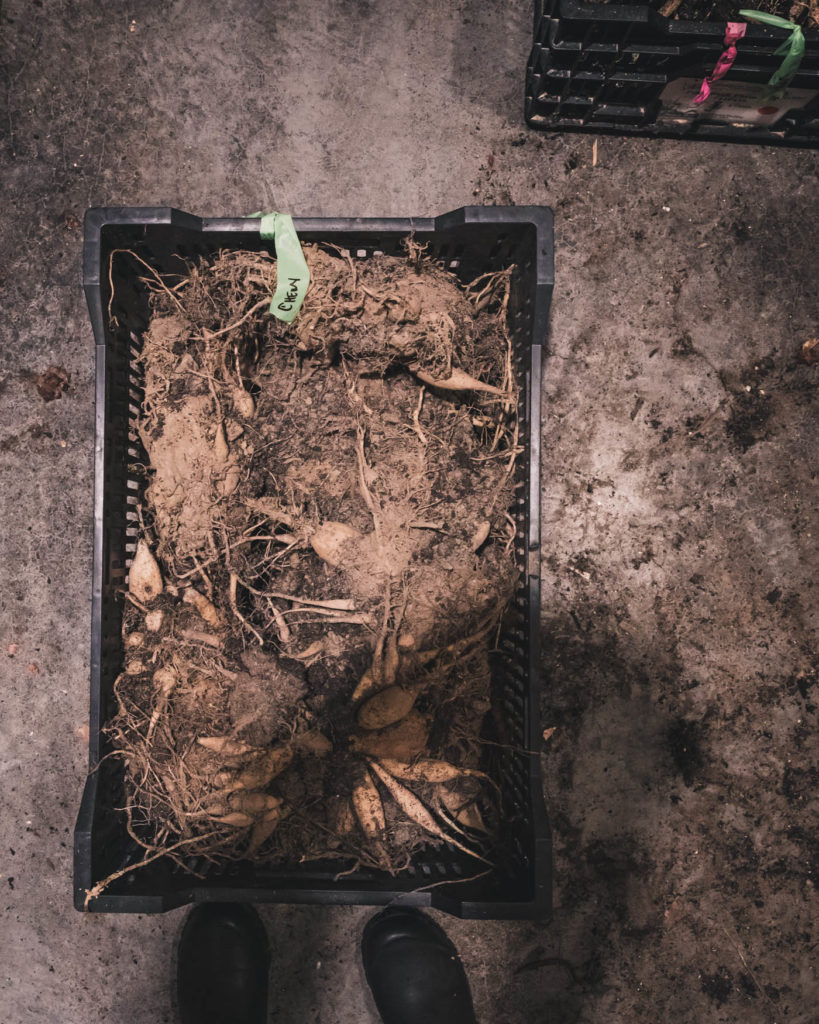
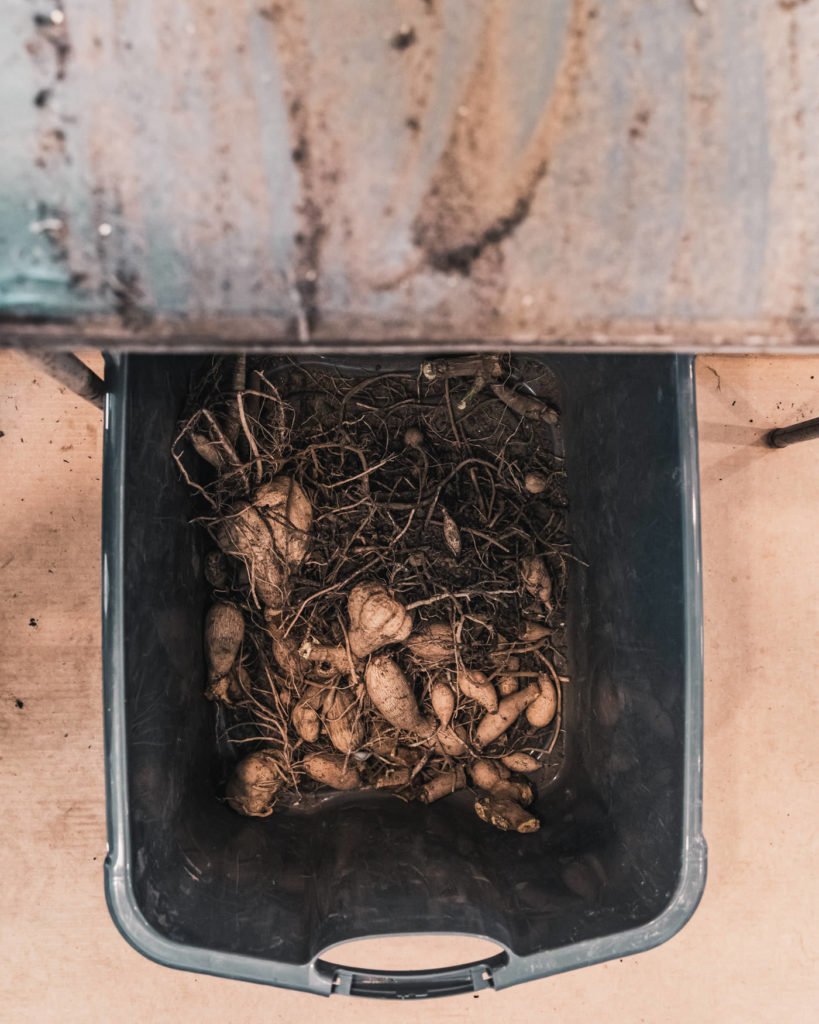
We dig our dahlias after at least one hard frost, often times two, not because I know whether or not they need to cure for certain, but because we are busy. Our season is far too short to dig before frost, and I cannot imagine a scenario in which we would do this. While we cut stalks first and then dig, how long they sit really depends on what we have going on. Sometimes, they’ll sit for a few days, other times we dig them right away. Either way, they can collect moisture, so I always tip them upside down to remove any pooled moisture, and try and place them this way into the bulb crates.
Per ADS recommendations, we do keep multiple loppers in a bucket with 10% bleach solution and switch loppers between cuts. This is admittedly tedious. We’ve used both forks and shovels for lifting, both work, I’d say the favorite is a fork like this one because they are sturdy. Once lifted, we shake a little bit of the dirt off, but maintain quite a bit as I find this is better for storage. They go into black bulb crates, and as noted, if it seems like the stem has a lot of moisture (sometimes frozen), I’ll set them upside down in the crate.
Like many flower farmers, we divide much later in the winter (January/February). This is not only due to time constraints, but tubers have historically stored well for us in clumps with dirt attached. For this reason, the tubers go into the crates, and straight into storage. They only sit out for as long as it takes us to get the crates from the field to the shop.
Between digging and storage, I want to avoid letting the tubers get too dry. I know some growers recommend letting them dry out, and perhaps you want to do this if you’re washing them, or working with a really humid environment, but my goal is to get them into storage. Especially avoid setting them on concrete, which can suck up moisture (been there).

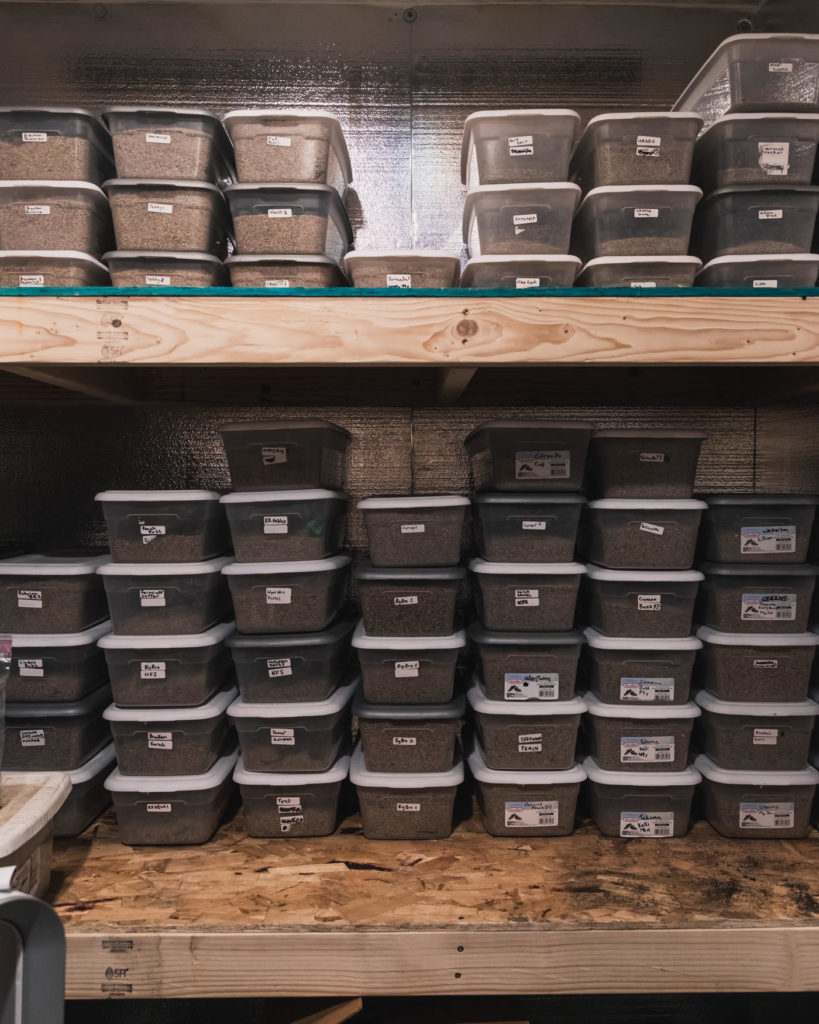
Storage Prior to Dividing
Crates are stacked in our walk-in cooler, which is converted to a heater for our cold climate. In the summer, the cooler runs on a coolbot system connected to an air conditioner. Most growers simply connect their coolbot to a heater over the winter for this purpose. We actually use a dyson heater that has a built-in thermostat, but this is simply because we received this heater as a gift. However, it’s expensive, and if it hadn’t been gifted to us, we’d have just connected an inexpensive heater to our coolbot system.
P.S., if you want a coupon for $25 off a CoolBot system, use this link.
Update: After many years, our dyson heater finally kicked the bucket and we replaced it with this heater, which has a built-in thermostat and was really reasonably priced (and working well so far). Then, we have this small heater connected to this thermostat as a second, back-up heater for peace of mind. It will only kick on if temperatures drop below a certain level. If it’s going to dip to negative temperatures, we set up a third space heater as triple back-up. We had the last two heaters on hand for other purposes, but they are great peace of mind. We now heat our entire shop with this system as we have outgrown the cooler.
While the heaters are set to maintain 44F, we also have this thermometer which measures the high and low temperature and humidity for the past 24 hours for monitoring. For $12, I love these little guys and I keep one in the high tunnel as well. However, we also have a monitoring alarm system (keep reading).
During winter, our shop stays at about 70% humidity, which has historically been just fine for us. If it dips, we’ll put a bucket of melted snow in there. I do have a backup humidifier with a humidistat controller if needed.
For peace of mind, we also have a cellular temperature, humidity, and power monitor. I love this thing, because I can see what’s going on in the shop from my phone, no matter where I am. It’s also set to text and call both Matt and me if the temperature or humidity levels go out of range OR if the power goes out. While this doesn’t replace checking on tubers, it’s great peace of mind on nights that are well below zero in our frigid climate.
P.S., we inevitably run out of crates every year, in which case we use cardboard boxes (but we do prefer the crates for stacking and storage).
Dividing Dahlias
If you read February’s Farm Tasks, you know that Matt took over the majority of our dahlia tuber dividing starting in 2021. I did it before this, but since our production has grown exponentially, I needed help. After explaining the process to him a few years ago, it turns out that he’s much better at it than me (naturally). Occasionally, we’ll do it together after I’m done with work over happy hour (my how the times have changed from when we were in our 20s).
While the majority of dividing happens in February, Matt has started dividing in January as our collection has grown (it takes about a solid month to divide them all). For us, we want to done dividing tubers for sale in March, have everything ready for inspection by the Department of Agriculture, and everything super organized prior to shipping. He starts with green labels so that we can decide on inventory for our dahlia tuber sale. Pinks *may* wait until closer to April/May since we are holding those back, but he actually just informed me that he’s working on the last few varieties as I type.
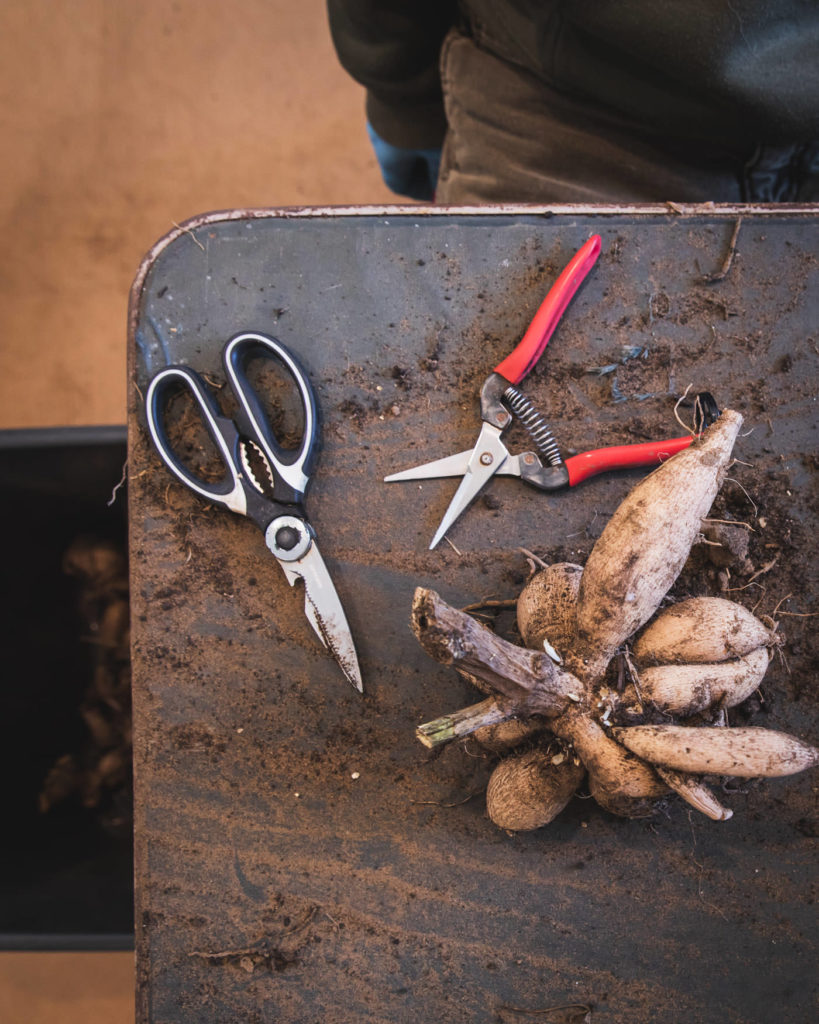
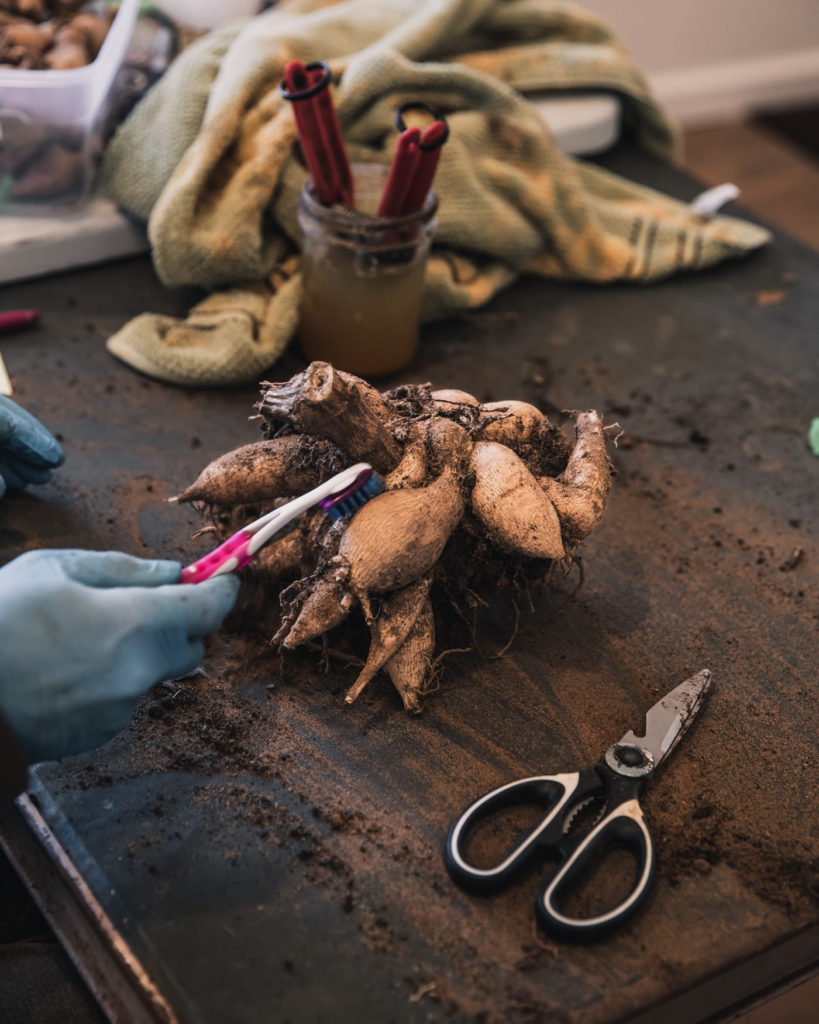
Setup & Tools
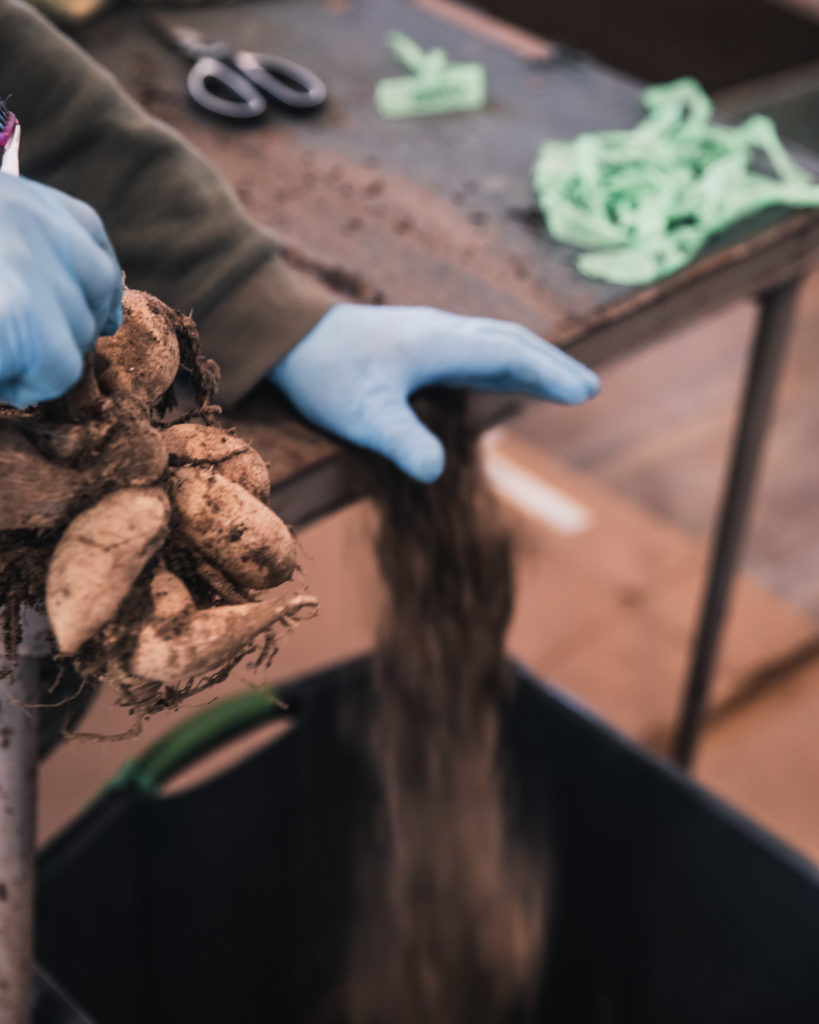
For a setup, we have a table over some cardboard with a bin below the table for excess dirt and throwaway tubers and debris. Because our soil is so sandy, we can simply brush the tubers off versus washing with a hose (growing in sand does have like 2 advantages, ha). For this, we just gently shake the clump or use a toothbrush.
For the majority of dividing, we prefer needle-nose snips (the same kind we like for harvesting). We are strict about sanitized tools, so there are at least two pairs of snips in a jar of water/10% bleach solution.
While we would never knowingly keep a diseased plant, we are still cautious. According to the ADS, it’s virtually certain that gardens contain a mix of clean and virused dahlias, especially since some plants lack any evidence of virus at all. They explain that there is no more aggressive “attack” on your plants than when you divide clumps into tubers. So, we use what they consider the “gold standard” which is a 10% bleach solution. After each clump is divided, the snips go into the sanitization jar and the snips are used in turn. New clump, new snips. (P.S., the toothbrushes are also sanitized and dried with a towel).
Divided tubers go into plastic bins with vermiculite (these are just plastic shoe bins from Wal Mart or the dollar store).
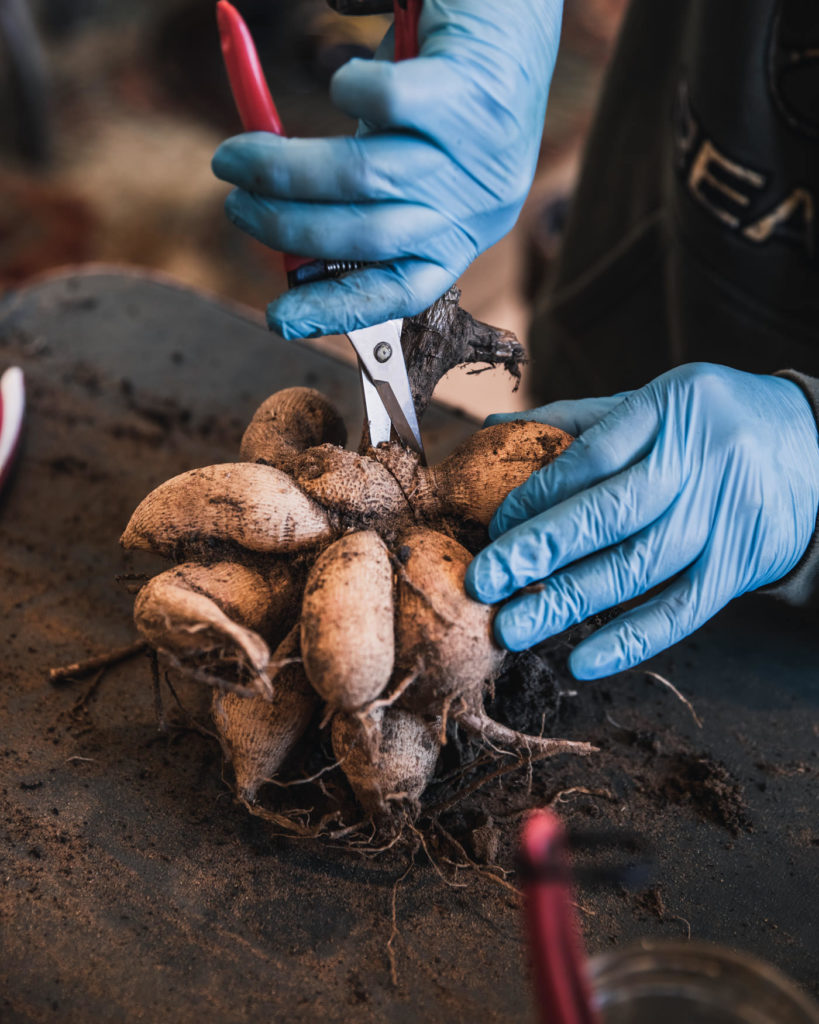
Are you wondering about the gloves? They aren’t specifically for sanitation purposes. Matt prefers them so that he’s not getting the bleach solution on his hands and so that his hands stay clean.
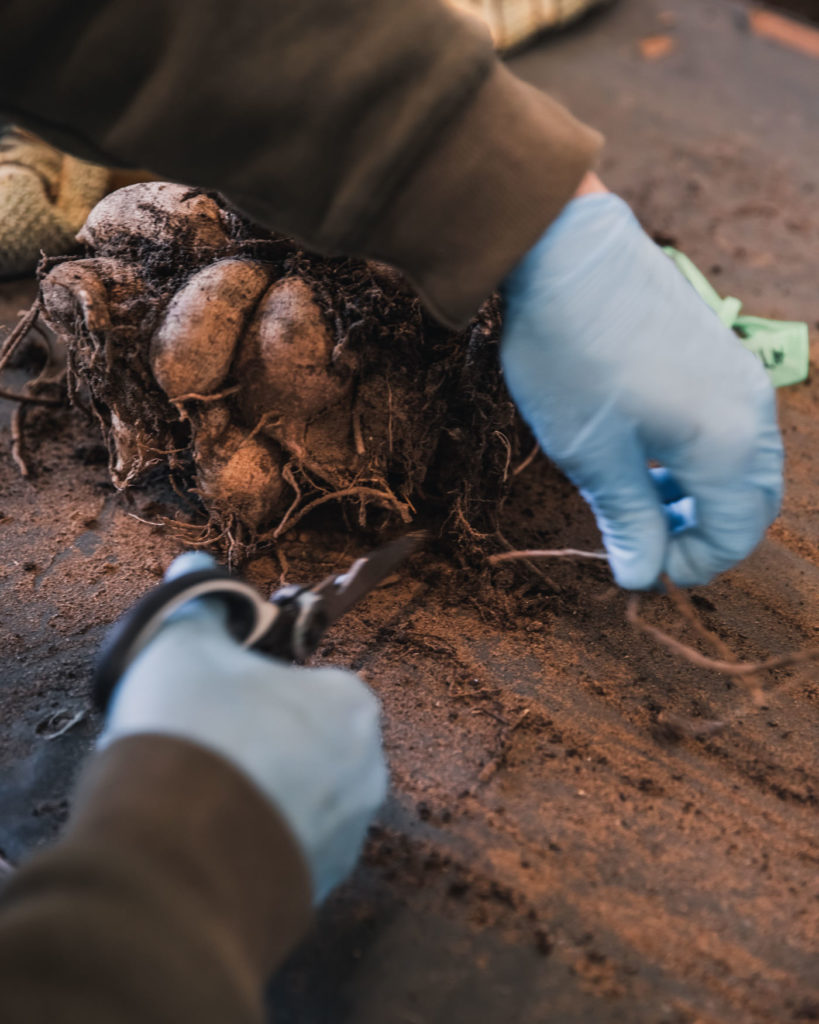
Dividing
To begin, we first brush off excess dirt dirt by shaking the clumps or using a toothbrush. This makes the clumps easier to see. We remove the longer “tails” coming off the tubers.
While some folks recommend splitting the clump into smaller, more manageable pieces, Matt just starts cutting out individual tubers. He said he gets more tubers this way versus splitting it up. Once he identifies a viable eye, he removes that tuber with the part of the crown that has the eye intact. Anything that has a broken neck or no eye gets tossed.
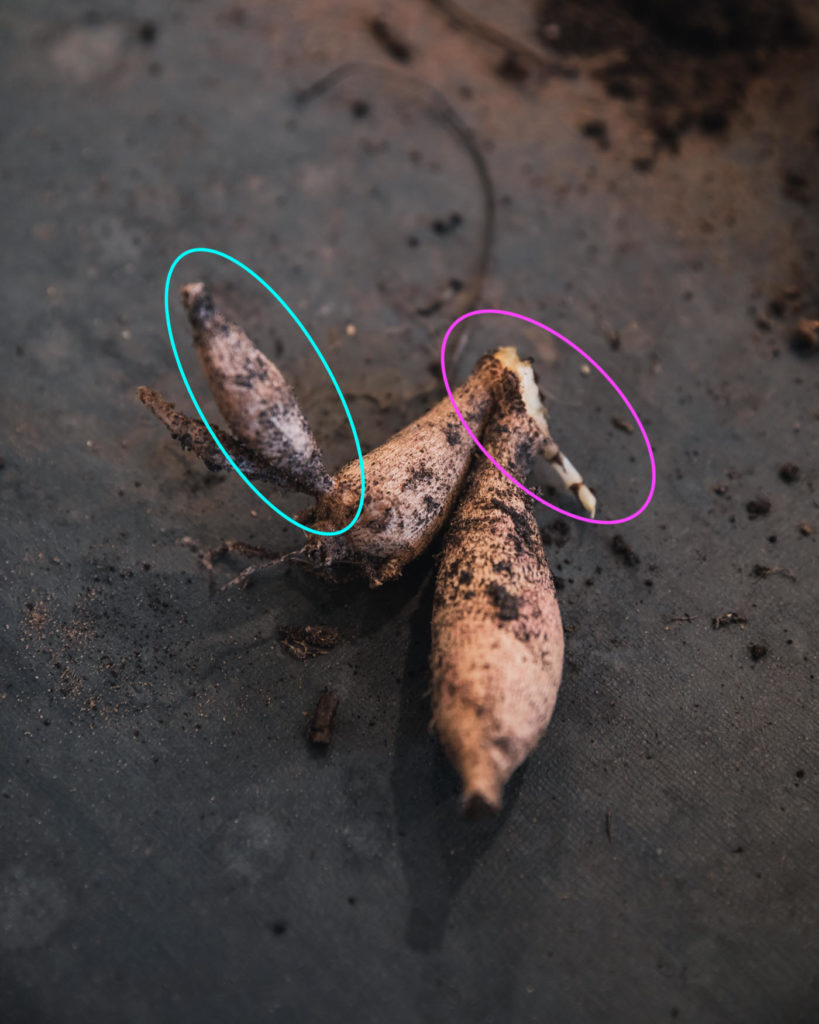
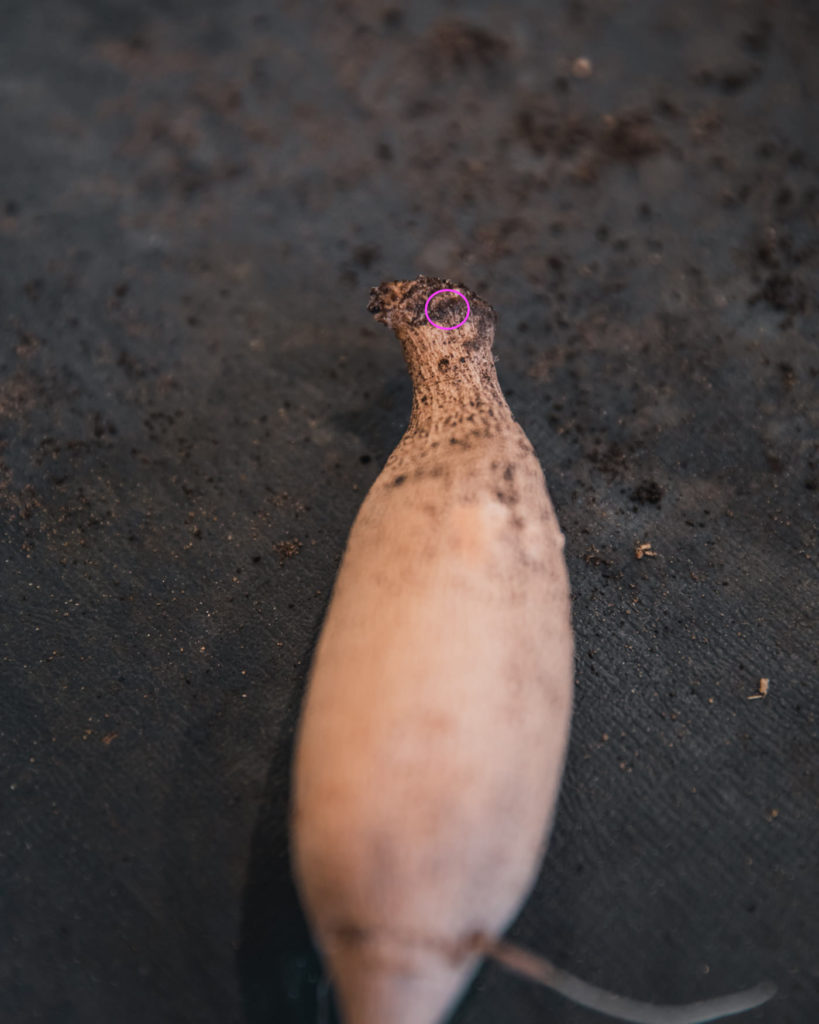
When the tubers are dormant, sometimes the eyes are difficult to see (this can be highly dependent on variety). Likewise, tubers break dormancy at different times. Below is a closer look at tubers with eyes of varying degrees of difficulty to see.
All “good” tubers are graded and put into one of two categories. Basically, the primo tubers get put into a “Yes/Sell” category and the others go into a “Good Enough for Us” category, HA! Why? Because we sell our tubers, the “best” looking ones go to our customers (very visible eye, plump, etc.) Ones that are shriveled or have a harder-to-identify eye or are rougher looking stay with us.
This is a simple way for Matt to communicate back to me, so that I can make inventory decisions.
P.S., the truth is that these less-than-desirable tubers are *perfectly* fine. Flower farmers often joke when people complain about tubers not being in perfect condition, because “you should see the ones we grow lol!”
Storage
Once the tubers are separated and graded, Matt lets them dry out a little (due to the fresh cut). He then puts them in smaller bins with all of their original labels (you can never have too many labels, just in case there is an accident). Because he’ll often divide tubers in the shed or over at the AirBnB, he uses the bins to transfer them back to the shop.
Once back at the shop, he’ll brush them off a final time as he puts them in storage bins. He puts a layer of vermiculite on the bottom of the bin, sets the tubers on top of the media so they are close but not touching, covers with another 1–2 inches of media, and continues to add tubers in layers, leaving headspace. They’ll go back into the cooler where the temperature is set at 44–46F. While you cannot see it in the photos, we began drilling a few small holes at the top of the bins to provide a bit of air circulation during storage.
Variety Selection: N&B
Some growers give a lot of attention to classifications, while others do not. The ADS has an *excellent* classification guide for dahlias that outlines just about any variety you can think of.
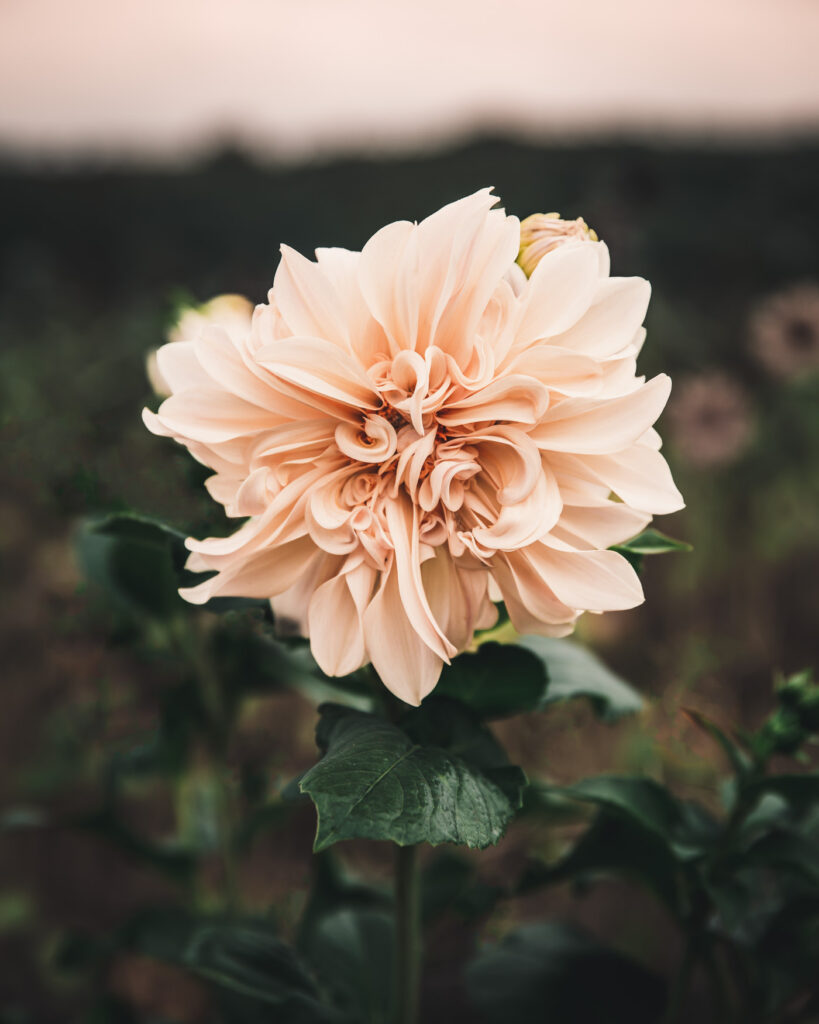
Most growers agree that selecting dahlias should be based on your goals. One who grows for events may want more showy blooms like Cafè Au Lait, while one who grows for market may want more reliable, productive varieties. The reality is, the possibilities with dahlias are quite literally endless!
It’s important to note that different folks have different experiences with some cultivars, but there are some that are generally-considered more productive and/or early. Huber lists some of her favorites for cut-flower production: Peaches-N-Cream, Coralie, Blyton’s Softer Gleam, Cornel, Cornel Bronze, Ivanetti, Isabel. Both Huber and Love mention liking Blizzard, with Huber noting that Blizzard is a good dahlia parent in breeding (Albrecht also notes Cafè Au Lait as a good pollen parent).
Variety Selection: BTS
As noted earlier, we’ve ordered our dahlia tubers from numerous places over the years, but I prefer to support small growers whenever possible! I am a huge fan of dahliaddict.com for researching different varieties and sellers, but I don’t limit myself if I’m after a certain variety. I’m pretty sure the only reason I even sign into Instagram these days is to find new flower varieties, HA! I have a collection of flowers that I save over the year, and during the winter, I usually create a spreadsheet of wishlist items. I note sale dates, sign up for newsletters, and have numerous alarms on my phone. It’s madness, and I kind of love it.
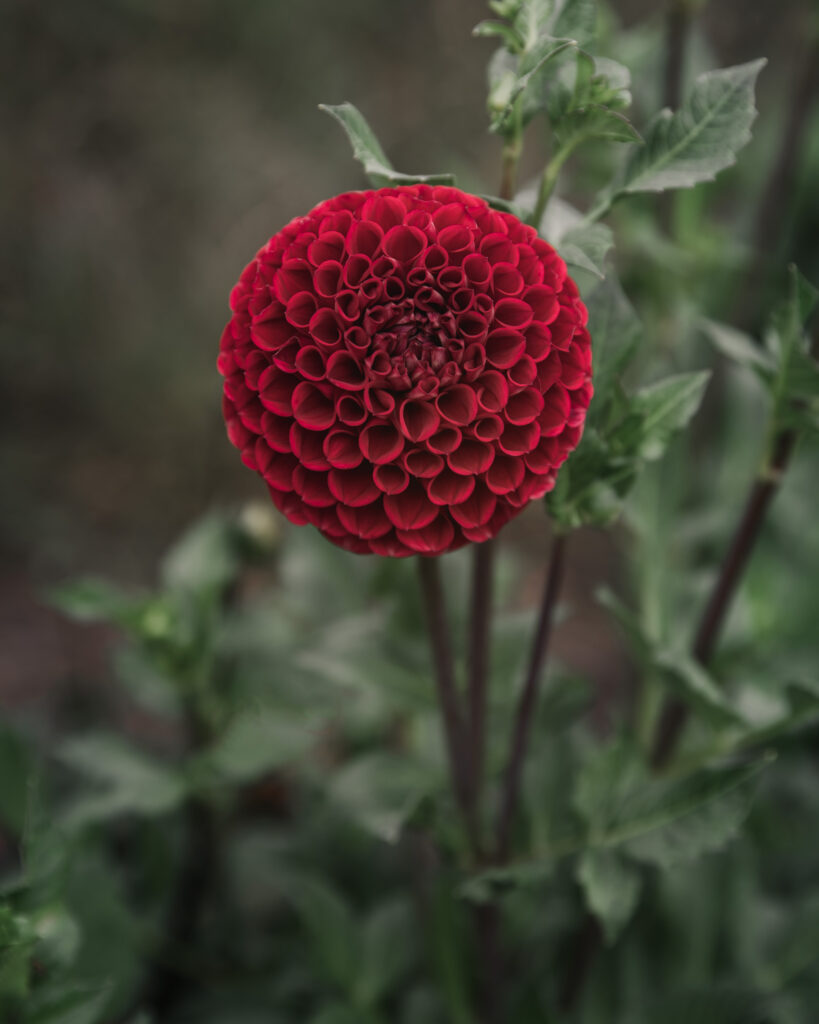
As a cut flower grower, I’m after reliable, early, and productive varieties. I like ball varieties for retail customers, but also stunners that I know my florists will love. As a supplier, I’m after in-demand varieties, but I’m also not afraid to try lesser-known ones to see how they perform. As a dahlia lover, I’ll grow anything that piques my interest, and that’s just the dang truth! I love getting to know a plant, writing descriptions, and capturing them with my lens. It’s all a part of a magical process that I just feel called and honored to do. I can’t stop!
Of the 100+ varieties we’ve grown the past few years, we only sell 36, and they are all good ones IMO.
*Some* Favorites
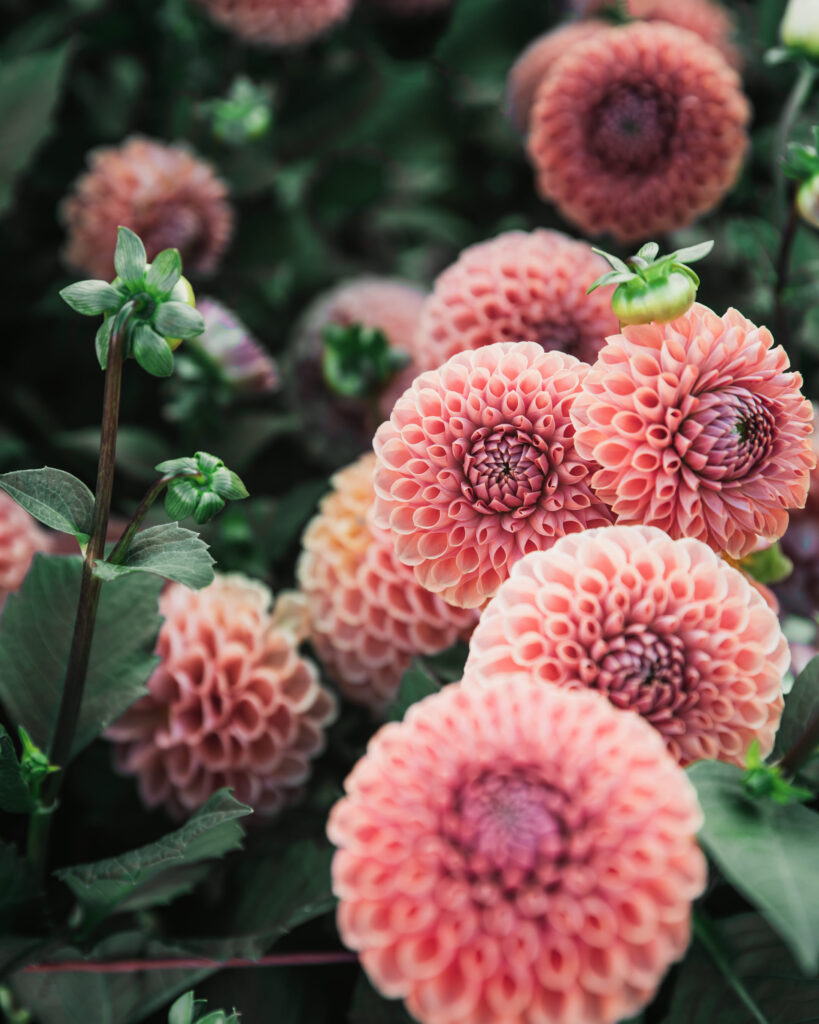
Favorites for productivity and reliability: Chewy, Jowey Winnie, Coralie, Jomanda, Ivanetti, Jowey Linda, Cornel Bronze, Pink Pearl, Kona. Productive for dinnerplates: Big Bro, Labyrinth
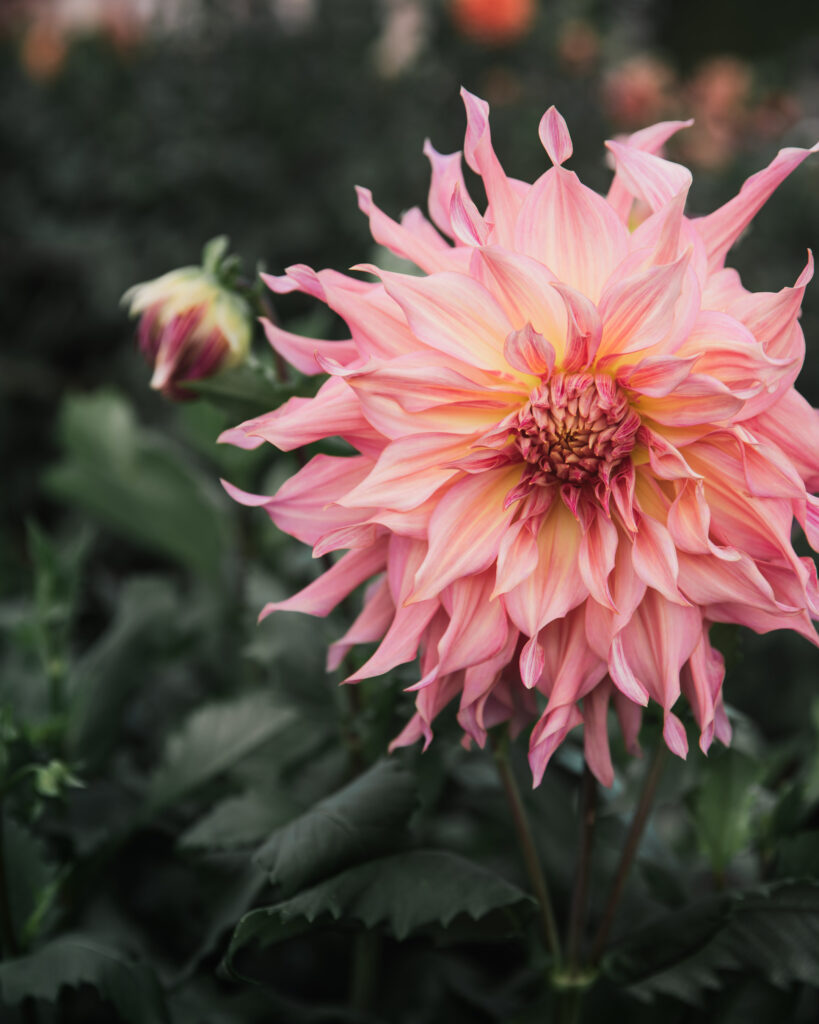
Favorites for beauty and uniqueness: Chewy, Sherwood’s Peach, Babylon Bronze, Bracken Palomino, Peaches-N-Cream, Penhill Watermelon, Crichton Honey, Bracken Sarah, Westerton Lilian, Hamilton Lilian, Labyrinth
Favorites for design: Cafe Au Lait, Valley Tawny, Sweet Nathalie, Rose Toscano, Linda’s Baby, Labyrinth, Creamy, Coralie, Kona, Big Bro
There are many others, but some are too early for me to give a fair assessment yet. And our collection is growing! We’ve decided to expand our dahlia production at our AirBnB for guests to enjoy. I want a little crazy this year, and if you want to see an entire list of the 200+ varieties we’re growing for 2023, you can find the spreadsheet here. Well, hopefully, if all new orders show up and current stock makes it, fingers crossed.
I’m sorry I had to remove the images. Some were mine but many others were from all over the internet. As someone who is a photographer (some of the time), I take image copyright seriously. It’s at the top of my goalzzz for 2023 to capture photos of as many dahlias that I can.
While I’m a little bit overwhelmed by the amount of dahlias we’re growing this season, I’m mostly excited. There are many I’m *super* excited about, maybe a little bit too much, but two I’m ridiculously excited about are Westerton Ella Grace and Fawn. I freaked out when I got both. I also cursed when I missed out on many, many others, which are all still on my wishlist (also in the spreadsheet). Let me know if I need to add any other must-have varieties, HA!
I don’t think I could find the entire list of dahlia producers I’ve purchased from over the years, but here are some (no particular order): Goldenrod Gardens, Dahlias by Julie, Swan Island Dahlias, Madelyn’s Floral and Farm, Coseytown, River Merle, Arrowhead Dahlias, Triple Wren Farms, The Farmhouse Flower Farm, Flowerwell Farm, Miss Madaline’s Dahlias, Fivefork Farms, Sunny Meadow’s Farm, Chelan Butte Dahliary, Petal Creek Farm, Tall Grass Farm, Pepper Harrow Farms, Kaeli’s, Delightful Dahlias, Bear Creek, River’s, Missy’s . . . ya know, just a few.
Pricing: N&B
Pricing is dependent on market, but usually I see $2.50–$7.50 per stem depending on size (Boston Terminal does not have dahlias listed).
Pricing: BTS
We sell dahlias by the stem to florists for $3–$6 per stem depending on the size and variety. One year, we offered 8 stems wrapped for $25, but they were not as popular as our market bouquets, and because of the shorter vase life, I’ve decided to only offer dahlias to retail customers mixed with other blooms (whether in bouquets or arrangements).
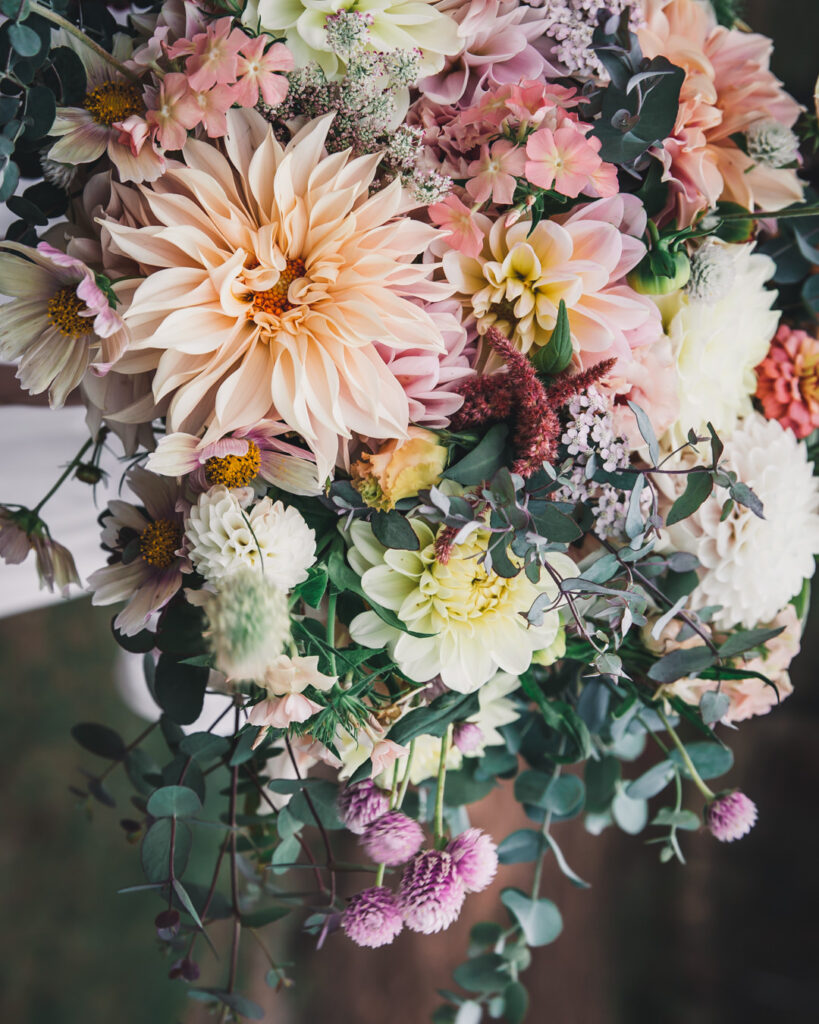
Design
Design is still very much a work-in-progress for me 🙂 If designing for a wedding or event, where the flowers don’t need to last more than a day, I’ll go heavier on dahlias. If the arrangement is for delivery for a retail customer, I add dahlias along with other flowers and educate that once the dahlias are spent to simply remove them. Some feel the dinnerplates are too overwhelming, but I just got for it, ha. I think their magnificent and try and play off of their colors throughout. If you love dahlias, you likely already have Floret’s “Discovering Dahlias” but if not, it’s major design inspiration.


Wrap Up
OK, my friend, that is IT for March’s Plant Profile. What do you think? Did you find some useful nuggets? Is there anything that’s unclear or you wish I would have covered? Or is your head spinning? No worries, you will get a copy of this at the end of April, so you can always refer back it. Tip: use the find shortcut (Ctrl+F on a PC or Command+F on a Mac to search for any word or term).
Have any questions or something you want to share with me or others? I know I say this ad nauseam, but I truly believe in the power of the collective and that we all have something unique and powerful to share, so please leave a question or share a comment below. We’re all better for it, and I thank you in advance!
Cheers pal!
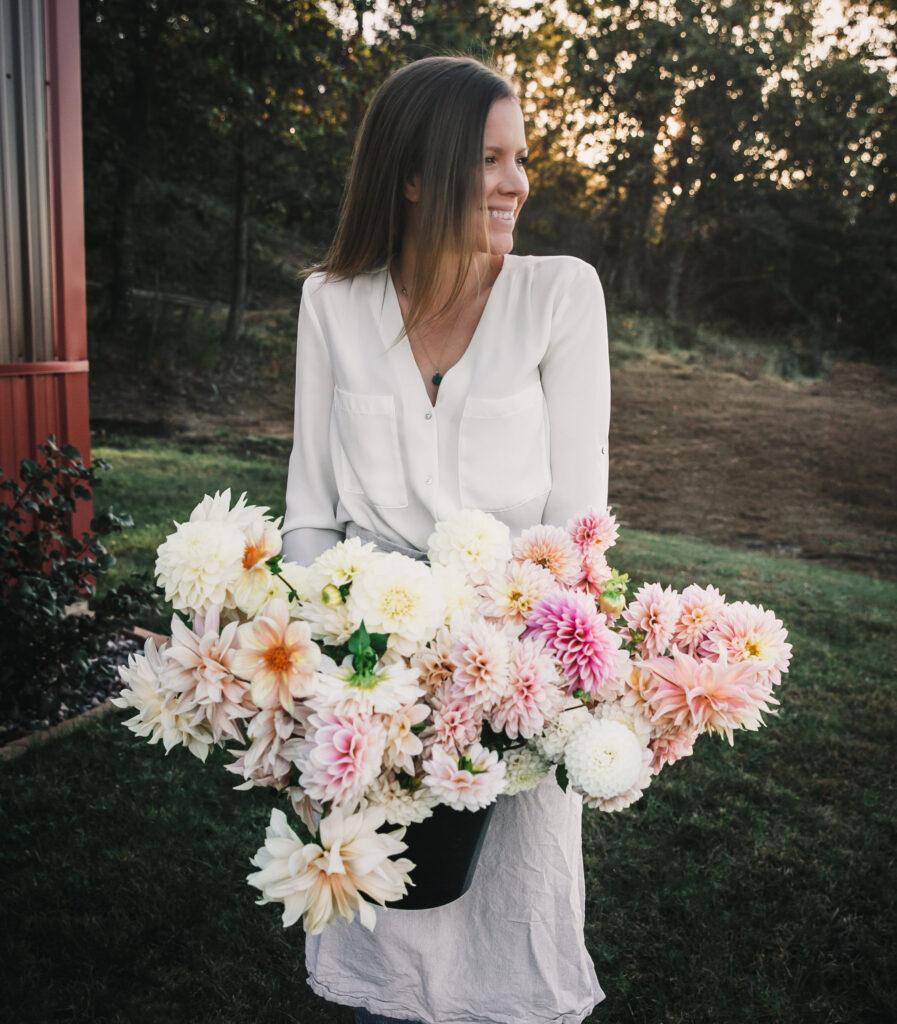


Loved this, thank you! I am growing dahlias for the first time this year and I will be referring back to this plant profile often!
I had sent you an Instagram message a while ago about some of my tubers I am storing in perlite are starting to grow shoots from their eyes. You said I could leave them as is (I’m not doing cuttings this year) so I did leave them and the tubers are fine. I am wondering though, when I go to plant the tuber, should I remove that growth? It’s obviously not getting any light, so it’s an almost white, straight shoot (looks nothing like the cuttings I’ve been seeing). I just wasn’t sure if that is still healthy growth, or if it’ll send up a sad little dahlia? Thanks for your help!
So glad to hear it, Kaylee! Welcome to the wonderful, wild world of dahlias 🙂
If I recall the conversation correctly, I believe the shoots in question were very small and the tubers were just waking up. In fact, it’s nice to know that you have a viable eye! Do you know what temperature you’re storing at? I’m just wondering if they should be kept a little cooler (though some are just quicker to break dormancy than others!). If the shoots are small (sayyy, smaller than the tip of your finger to your first knuckle, though this isn’t a hard and fast rule), you can plant them this way. However, if they are getting long and spindly (leggy), I would remove them. I’ve heard of people leaving them but you may need to be extra gentle when transplanting. Also, if it’s long/skinny, it’s because it’s reaching for the light (like a leggy seedling), and it may produce a weaker stem. Regardless of size, removing a sprout shouldn’t be a problem (sometimes it happens on accident!). That’s essentially what’s happening with cuttings, and common suggestion is that a tuber still has plenty of energy after 5 cuttings (and these sprouts are grown to small seedling size). I just wouldn’t remove a small one because it’s perfectly fine (though it’s OK if you do). Your instinct is right about the white being because of the lack of light (fun fact: chlorophyll does not absorb the green wavelengths of light). They’d be white under the soil as well, until the sprouts break through the surface (this is how some farmers grow fancy white asparagus for chefs, mounding the dirt so that the spears don’t get light, but the foliage still photosynthesizes the plant . . . at least that’s how I understand, it HA!). OK, I hope that helps, but don’t hesitate if you have any other questions!
Hi Maggie! I wondered if you may comment briefly on ‘waking tubers’ that you’ve overwintered prior to planting. Not to take cuttings, but just to nudge them slowly prior to planting them out. I stored mine as individual tubers in pine shavings in our cooler, and I’ve taken them out of the cooler now but wonder- would you leave them in the garage or indoors, out of shavings/vermiculite, or would they dry out?? I have some tubers that I ordered as well, and wonder what the best way to store them is prior to plant out in May. THANK YOU!
Hi, Marie!
So nice to talk with you. And great question! I’ll do my best to answer 🙂 A few weeks before you plant out, you’d want to move them to a warm spot, like 60sF. Personally, I’d leave them in their storage medium and monitor for moisture (it will depend on your surroundings . . . you may add a *small* amount of water but nothing “wet” since they are prone to rot . . . again it will depend on the humidity in your environment). Once they do sprout, if the sprouts are getting sizable, you’d want them under an adequate light source much like seedlings (or they’ll get tall and spindly). We grow at such volume that I actually keep them in storage as long as I can, but they eventually get booted out because of the tulips, maybe 2 weeks before planting (although this year, it might be earlier with the high tunnel tulips bc they are about to pop, oy!). Anyway, I just open up the boxes and check on them periodically. The sprouts are not big by the time we plant out (nor do I really want them to be, again, volume, you have to be a little more careful planting out ones with large sprouts). We also plant even if there isn’t a swollen eye. They all sprout in their own time (some as long as a month). I hope that helps!!
Hey Maggie!
Question about cooler goals. Right now my little but growing collection of tubers sits in an unheated storage room- the cat room lol. It usually stays cool except for weeks like this last one in the Midwest where we had to turn the space heaters on for the cats. If I want to get serious about having good refrigeration as my operation grows, where do you suggest I start?
Thank you so much!! I am getting so much out of this!
-Margeaux
Hi, Margeaux (you have a beautiful name)!
I love this question . . . a cooler was one of our first investments we made in our second season farming and it is a *game changer*! While you can sometimes score some great deals on commercial walk-in coolers, many growers (flower and vegetable farms) opt for a CoolBot system! This is what we also have and are super fond of it for its ease of use and economical price tag.
I’ll explain more below, but if you ever decide you want to go for it, you can use this code for $25 off: https://storeitcold.referralrock.com/l/1RBXKJK3/
The CoolBot is a device that can transform any insulted room or trailer into an affordable walk-in cooler with a standard window air conditioner. This allows more-precise control of temperatures. Unlike a traditional walk-in cooler, repairs and/or replacements are much simpler (not requiring a special technician), since the CoolBot uses a regular air conditioner. Bonus: with the CoolBot, you can convert your cooler into a modern-day root cellar over the winter (this is what we do for our dahlia tubers, more on that below).
Whether you want to add a cooler to an existing structure, build a new structure, convert a trailer, or retrofit an existing cooler, StoreIt Cold (the company who created the CoolBot) has detailed instructions and information here. At first this seemed daunting to me, and although Matt is much-more handy than me, this company does a great job simplifying the process.
A CoolBot cooler can be easily converted to maintain temperatures above freezing over winter. Aside from extending life of certain vegetable crops, this room can be used to prechill bulbs and overwinter gladiolus and DAHLIAS! All that’s needed to convert a cooler into a “modern” root cellar is the CoolBot system, a pass-through thermostat like the Inkbird, and a space heater. This allows you have much-more control of the temperature. You can also add a humidifier and thermostat to control the humidity levels.
OK, I hope that helps but please don’t hesitate if you have any other questions and I am SO glad it’s been helpful so far 🙂
Maggie
Hollyhill Serenity 😉 my fave from this past growing season and lasted 5 days in the vase for me. I’m guessing Jabberbox is another one you might like. Seems you have a very similar taste in flowers as I do anyway 😀
I’m absolutely tickled to find a grower in zone 4 giving information. Kinda hard to find people in colder zones like us giving out info (which btw we live 5 miles from Green Grove Supply so not that far at all )
I did something new this yr and trialed planting out 2 wks early and covering with row cover and a low tunnel ( https://www.growingkindnessproject.org/blog/growing-dahlias-in-cold-climates followed this advice) Those plants were my best looking ones and that low tunnel saved me a lot of heartache this yr with all the rain we got. Other growers lost half or more of there stock but I only lost a few here and there. Another thing is those bloomed before the few I had potted up to get an early start so it backs up his theory that transplanting tubers will shock them back by two weeks.
Just a small grower of around 180 dahlias but if you ever want to trade hit me up and I’d be more than happy to. I don’t have a lot of exotics but a few here and there .
Anita, hellooooo neighbor! I am *loving* HH Serenity too and I will definitely add Jabberbox to my list, thanks so much for the rec! I am jealous you are so close to GGS, love those guys!!
I actually chatted with Julio about covering dahlias in the Floret Workshop, love that you do that!! Because our fields are at our AirBnB, we don’t cover them, but it’s tempting as most things do so much better in our high tunnel 🙂 We had major flooding this year, so I can empathize with anyone who lost stock (we lost too much to count). The flooding was so severe, I’m not sure that a low tunnel would have impacted the loss at the ground level, but the extra heat is amazing for jump starting the season (and for hanging out under lol)! I share your experience in potting up dahlias. I don’t find that they produce much sooner, nor is it worth the extra effort (at least not at scale for us). And 180 is still a lot, bravo to you, it sounds like you have a gorgeous space. Thanks so much for sharing your experience, I’m guessing many of us zone 3–5 growers could benefit from under cover growing!
Dahlias are shriveling up in my cooler, not sure what the issue is here? Temp is holding between 38-39 degrees, humidity 77-87%. Do they need even more humidity? Higher temps? They are stored stacked with dirt on as clumps in black bulb crates (unlined). Should I cover the crates with something? I was planning on running the coolbot all winter but maybe it’s not necessary? Possibly the air blowing is drying them out. My cooler is located inside my garage. Thanks for your help!
Hi, Shannon:
I’ve definitely found that getting storage down definitely takes some experimentation and every environment is different. Let’s see if we can figure out what the heck is going on! I’m going to think out loud here, so bear with me. In general, most growers recommend mimicking a root cellar, with stable temperatures in the 40sF and humidity at 80-90%. Personally, once we get our tubers moved into our shop/cooler area, we are hovering around 44F and 70–80% humidity. That humidity reading is the entire room, and my guess is that the tubers (which are stacked in crates with *some* dirt are actually a bit higher in humidity in their immediate environment). All that to say that your stats sound within reason, perhaps a tad lower than optimum but I wouldn’t have expected them to have dried out that quickly at your current numbers. Is it all the tubers or some of the tubers? Some are just better storers than others. You could try raising the temp/humidity and see if that helps (it couldn’t hurt to raise the temps so long as it’s in the 40s, humidity I would watch for excess moisture/rotting).
The one thing that caught my attention is you mentioned the air blowing, presumably from the AC unit attached the coolbot. Are you running the cooler because you are in a warmer climate? I’m guessing that the air blowing could potentially be the issue but most coolbot systems should be running at 70–90% humidity. Wondering if the air is blowing directly on the tubers? If you’re in a warm climate, I personally like the idea of running the coolbot to maintain a constant temp (versus fluctuating), but perhaps your environment doesn’t fluctuate too much in your garage (we stored our tubers in our garage before we had a cooler). That said, you *can* add a humidifier to a Coolbot system (they recommend this one). We have one that I link in the article I purchased just in case, but have never needed to use it yet. The other thing you can do is wrap your crates in shrink wrap, but you will want to monitor the moisture. We’ve found that wrapping them this way is *too* much moisture for our environment, but a lot of growers go this route. I think your stats are really close, I would experiment with a few of the above options. It definitely takes a little bit of tinkering in your environment, but once you get it down, it usually works like a charm moving forward. Let me know if what you think after reading this and happy to dig further with ya!
Thank you so much for taking the time to help me!! I think it has to be the AC fan too. It’s a very small cooler space in our garage, basically size of a closet. And I didn’t realize the is, but I can turn the fan speed down (it has settings 1-3) it was on highest setting due to summer flower storage. So I turned the fan down to speed 1, and I also placed each crate into a trash bag but left the end open. I have a SesnorPush temp and humidity tag I placed in one of the bags to monitor the humidity. So far so good! I have to keep the coolbot running at least until we get to full on winter here, because it’s still been too warm in the daytime that our garage heats up to where it gets above 50. Soon that won’t be an issue in about another month. I live in Reno zone 7b. Also I can’t just store them in garage without someway to control humidity since it’s so dry here in Reno, humidity in garage is in 30%. So I think keeping them in the cooler will hopefully work for winter! I haven’t had much success in prior years keeping them in garage, I lose about 3/4 to shriveling and also rot (since temp fluctuating so much probably got too warm some days).
Yeah, you bet! Now that we talked through it, I definitely think what you are doing sounds like the best approach (running the cooler, keeping it cool, turning down the fan, and the bags for humidity). If and when you start dividing them, we really like the dollar store shoebox method (we drill a few holes and fill with vermiculite). They seem to be happy in this environment and the boxes can be moved to warmer temps when you want to wake them up. Keep us posted, the problem solving is fun . . . once you find what works 😉