If you haven’t already done so, please read the FFY Introduction.
April Overview
Here’s a breakdown of what we’re covering in April:
- Time Exercise
- Bed Prep
- Dahlias
- Ordering
- Sowing
- Planting
- Harvesting
- High Tunnel
- Photography Tips
Time exercise
I often get messages from people asking something along the lines of: Am I fooling myself thinking that I can do all of this while [working full time, raising a family, add whatever other thing here]? I already feel so behind, do you have any tips?
My answer is that it all depends on your goals, no I do not think you are fooling yourself, but yes, it’s a-freakin-lot! And honestly, I’ve never had a season where I was not behind on something. I’m trying to change my own personal narrative and limiting beliefs around this, but I also think that’s part of farming (or running your own business). I think feeling behind or not where we want to be yet is all part of the process and just means we have admirable goals.
I love this quote by Ira Glass:
Nobody tells this to people who are beginners, I wish someone told me. All of us who do creative work, we get into it because we have good taste. But there is this gap. For the first couple years you make stuff, it’s just not that good. It’s trying to be good, it has potential, but it’s not. But your taste, the thing that got you into the game, is still killer. And your taste is why your work disappoints you. A lot of people never get past this phase, they quit. Most people I know who do interesting, creative work went through years of this. We know our work doesn’t have this special thing that we want it to have. We all go through this. And if you are just starting out or you are still in this phase, you gotta know its normal and the most important thing you can do is do a lot of work. Put yourself on a deadline so that every week you will finish one story. It is only by going through a volume of work that you will close that gap, and your work will be as good as your ambitions. And I took longer to figure out how to do this than anyone I’ve ever met. It’s gonna take awhile. It’s normal to take awhile. You’ve just gotta fight your way through.
Even though he’s talking about art, I think running a farm, especially growing flowers, is very-much creative work. If we’re not where we hope to be yet, at least that means we have good taste!
And of the toughest pieces of bringing your great taste to life is finding the time among all the other things. I cannot tell you how many times I’ve said to Matt: I know exactly how this should be done, exactly what I want to do/create/etc., I just cannot seem to find the time!
While this is still a work in progress for me, here are a few exercises that have helped:
Track Your Time
For a few days, track your time. Literally write down everything you do from the moment you wake up to the moment you go to bed and timestamp those items and tasks. While we may think we know where all of our time goes, research has found that 40–50% of our actions are not conscious decisions, but rather unconscious habits. That means that about half of our day is on autopilot!
After a few days, analyze your results. Did anything surprise you? Are there any time sucks that you can eliminate or outsource? For example, do you spend a lot of time commuting to work? Would it be possible to work remotely a few days a week to get that time back? Or could you work four 10-hour days instead of five 8-hour days to reduce some commuting time?
Did you notice any habitual patterns that don’t serve you? Could you create a new habit that would increase productivity (p.s., one of my favorite books is The Power of Habit if you want to dig into this further).
Prioritize
Once you’ve exhausted finding more time, next up is prioritizing the time you have. What are your non-negotiables, both in life and your business? Having these clearly defined helps me focus my attention when I am feeling overwhelmed. For example, lisianthus are one of our highest priorities on the farm. Even though my schedule said snaps should be transplanted before lisianthus, I was behind! In the past, I’d just keep following my schedule. However, now that I’ve determined lisianthus are higher on my priority list, those took precedent.
Also, when I feel like I am just super in the grind with no light at the end of the tunnel, I try and remind myself that this is LIVING! Yes, I’m working my @ss off, but we’re working toward a dream, and that’s so d@mn beautiful. One more quote that gets me through:
Life should not be a journey to the grave with the intention of arriving safely in a pretty and well preserved body, but rather to skid in broadside in a cloud of smoke, thoroughly used up, totally worn out, and loudly proclaiming “Wow! What a Ride!
Hunter S. Thompson
Bed Prep
Now that it’s April, I thought we’d focus on prepping beds. Though, I have to say that in my ideal state: all beds would be prepped in the fall. I would add fertilizer, compost, and top with a thick layer of hay/leaves, so that each bed would be ready to rip come springtime. Sadly, I am far from that ideal state! The reality is that lifting dahlias and planting bulbs and peonies usually takes us right up until there is snow on the ground.
That means that our bed prep typically happens in spring. If there is still plant debris in existing beds, those are mowed down (we’ll leave things like sunflowers for the birds overwinter).
For new ground or particularly weedy beds, we like to put down a layer of tarp or landscape fabric to kill any grass/weeds. This year, we are moving the majority of our dahlia production to our AirBnB, so that area currently has landscape fabric over the rows.
Once we’re close to planting time, tarps will be taken off and we will till with either the tractor or walk-behind tiller. We only till brand new ground or beds that really need it and only once per season. Each bed gets fertilizer based on our soil test and about a 1 to 2-inch layer of compost.
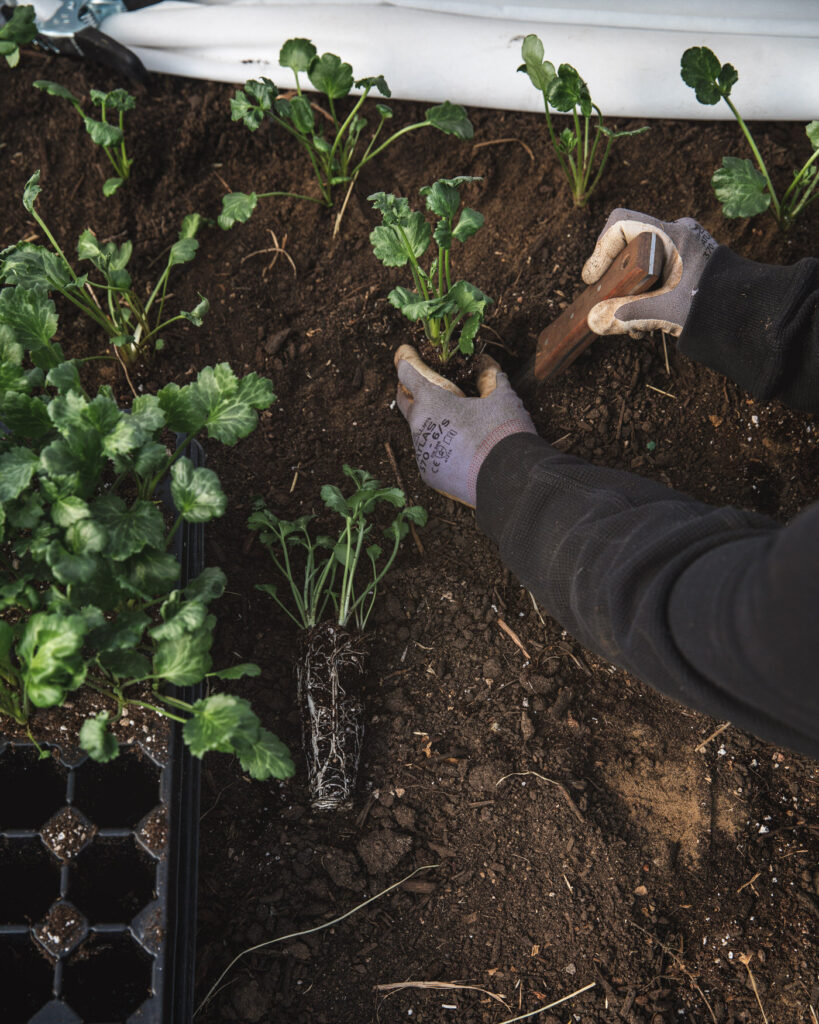
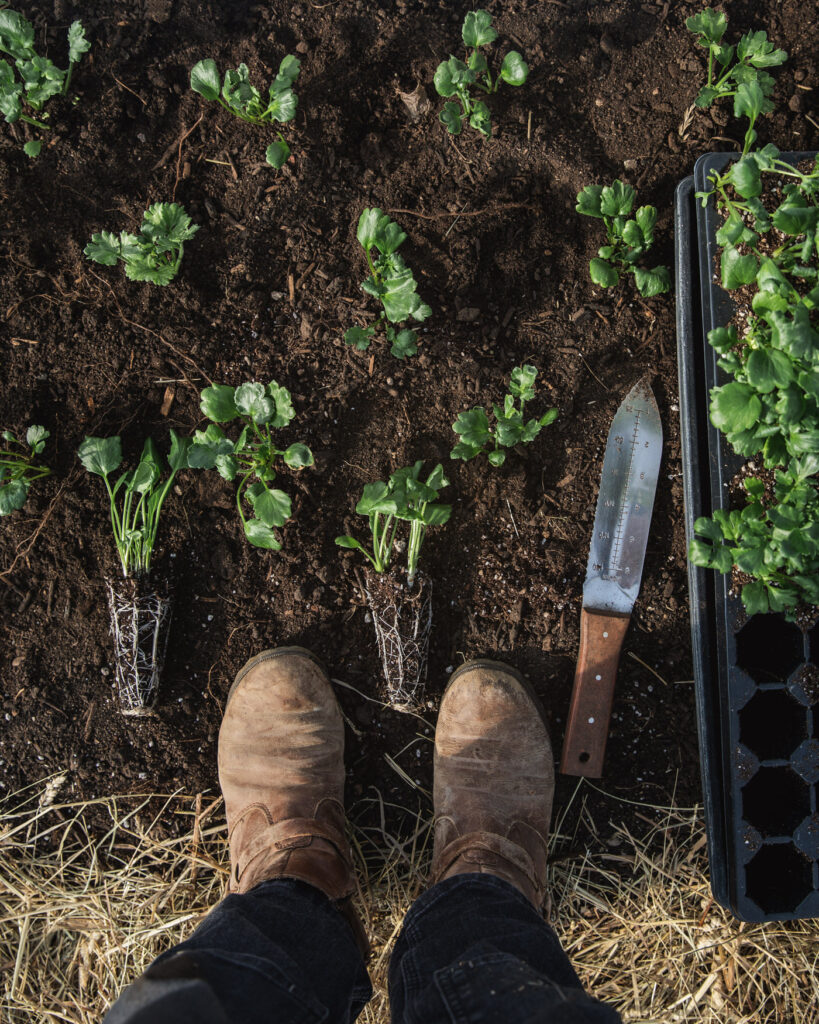
Existing beds get hand weeded (I love a hori hori knife for this), fertilizer based on soil tests, and a pass through with a broadfork. I have the Meadow Creature. This aerates the soil with less disturbance than the tiller. Finally, the bed gets about a 1 to 2-inch layer of compost. I do simply leave my compost on top as a mulch. I’ve heard concerns about seedlings drying out when planted directly into compost, but I’ve always done this without issue. At the farm, our soil is 80% sand, so our seedlings always need extra water while establishing.
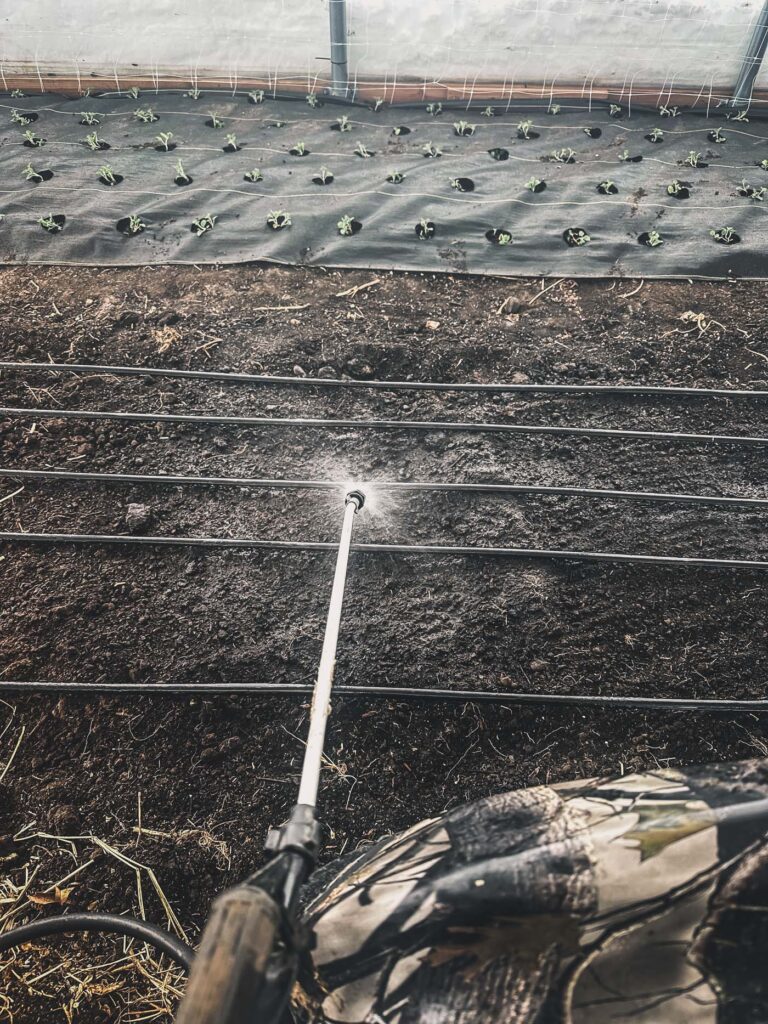
Once beds are prepped and amendments added, beds are watered in to let them settle (if this can be accomplished by rainfall, even better). I find this makes transplanting easier as well, especially in our sandy soil. Field beds get 4 lines of drip tape, while the tunnel beds get 5 lines. We actually aren’t able to turn our water on in the field until after frost, usually mid May, but it’s good to have the lines ready. Until then, I water everything with a water tank/pump attached to our ATV.
Finally, beds get landscape fabric, if using. We use landscape fabric to combat weeds for many plants. We don’t use it for dahlias, ranunculus, anemones, sweet peas, most veggies, or anything direct sown (i.e., sunflowers). Perennials get paper or cardboard, compost, and hay for mulch (sometimes woodchips, there is usually free woodchips on our road from maintenance . . . we also have a woodchipper).
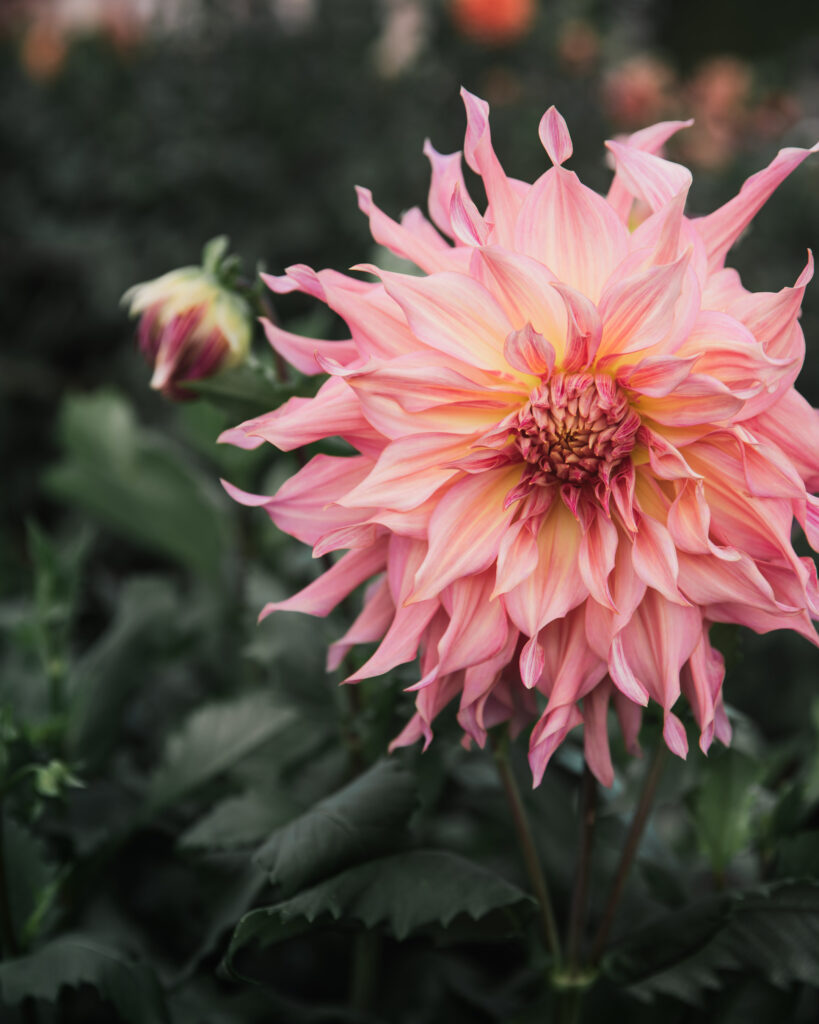
Dahlias
Dahlias are a year-round flower! Here at our farm, we are in the thick of shipping season. After our inspection and approval from the Wisconsin Department of Agriculture, it’s been nonstop packing and labeling each individual variety and then packaging and shipping them out across the United States. While I’m thrilled to say that the majority have found their way to their new homes, we’re waiting on the final few to show eyes. We’ll finally wrap up the last of the orders at the end of April.
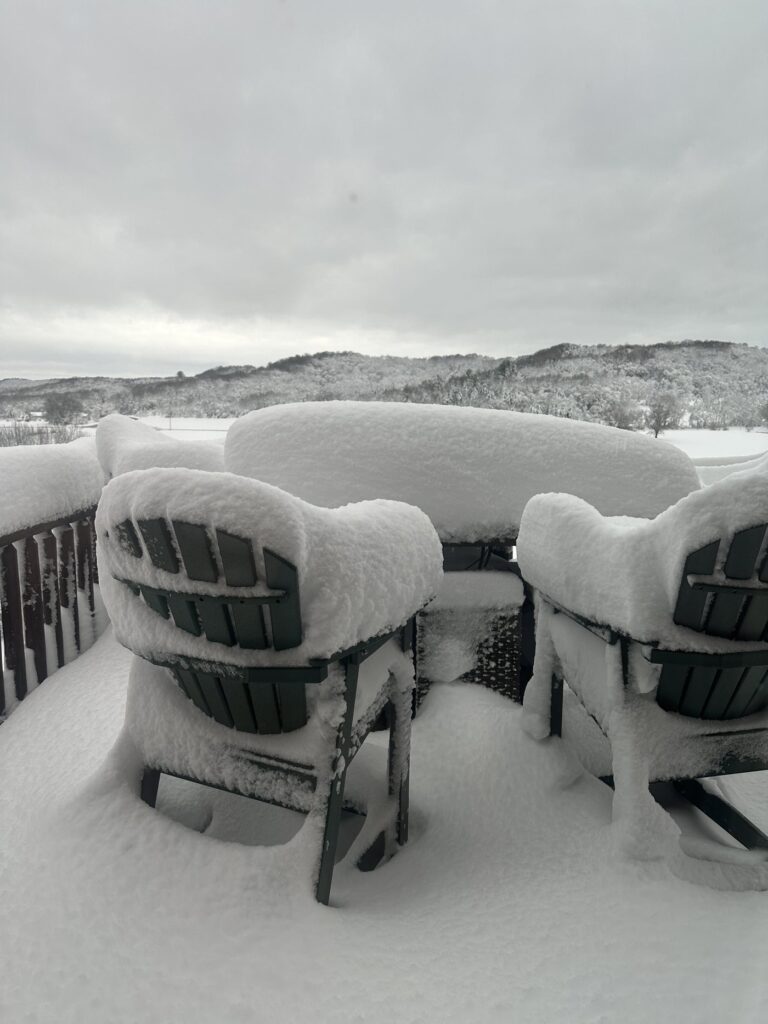
Any varieties not being sold also are brought out of the cooler to start waking up. We simply pop their lids open and check on them periodically for moisture and/or drying out. After this last cold spell (we got almost 20 inches of snow April 16/17 (literally made national news, ha, ugh), I will plant a few varieties in the high tunnel.
Ordering
I’m currently ordering vases (Accent Decor is my favorite) and ribbon (Tono Co) for events. I’ll also be putting in a small order of wholesale flowers for a wedding mid-May. I rarely do this, opting for whatever is available on farm, but early May is still a bit early for us in the midwest for some colors. The bride wants blue, so I am planning on ordering in some Delphinium. In the past, I’ve ordered from Sunny Meadows Flower Farm for this purpose.
And of course, I’m still ordering dahlia tubers because I have a problem. Someone please send help 🙂
I also put in a panic order for shade cloth from Bootstrap Farmer to put up in the high tunnel. We put some shade cloth over some of the ranunculus and anemones (we had a record 90F on 4/11 . . . yes, we had 90F followed by 20 inches of snow in the timespan of one week). Our tunnel just seems to bake in the sun, even with the doors and sides wide open. Instead of shading individual beds, we plan to install white, 30% shade cloth over the rafters to shade the entire area. Hoping it helps and is worth the effort.
Fertilizer
Depending on how much we have on hand, we also normally stock up on fertilizer in April. However, we’re traveling right now, so I’m guessing we won’t get around to this until May. For my local peeps or anyone curious what amendments we use, we get everything from Ohio Earth Food (Wisconsin location). We choose amendments based on our soil tests. You can see examples of this here.
Sowing
Below is what’s currently on my sowing plan for April, but I’m honestly still catching up on March, so I may end up making some cuts or have later plantings, tis life.
- Basil
- Celosia
- Drumstick flower
- Globe amaranth
- Winged Everlasting
- Ageratum
- Grasses
- Anise Hyssop
- Apple of Peru
- Chamomile
- Carrot / Radish (DS)
- Cilantro (DS)
- Dahlia (tubers HT)
- Peas (DS)
- Red-Leaf hibiscus
- Nasturtium
- Zinnia
- Amaranth
- Salvia leucantha
- Annual baby’s breath (DS)
- Cress (DS)
- Dill (DS)
- Cosmos (DS)
- Rutabaga (DS)
Planting
We’re currently planting the following in the high tunnel: Ranunculus, Anemone, Iceland Poppies, Bells of Ireland, Lisianthus, Snapdragon, Stock, Lettuce, Spinach, Celery, Cabbage, Swiss Chard, Kale, Orlaya, Sweet Peas, Dusty Miller, Saponaria, Phlox, Bachelor Button (wouldn’t normally put these in the high tunnel, but wedding with blue). I also plan to plant a few dahlia tubers in the high tunnel once this last cold spell passes.
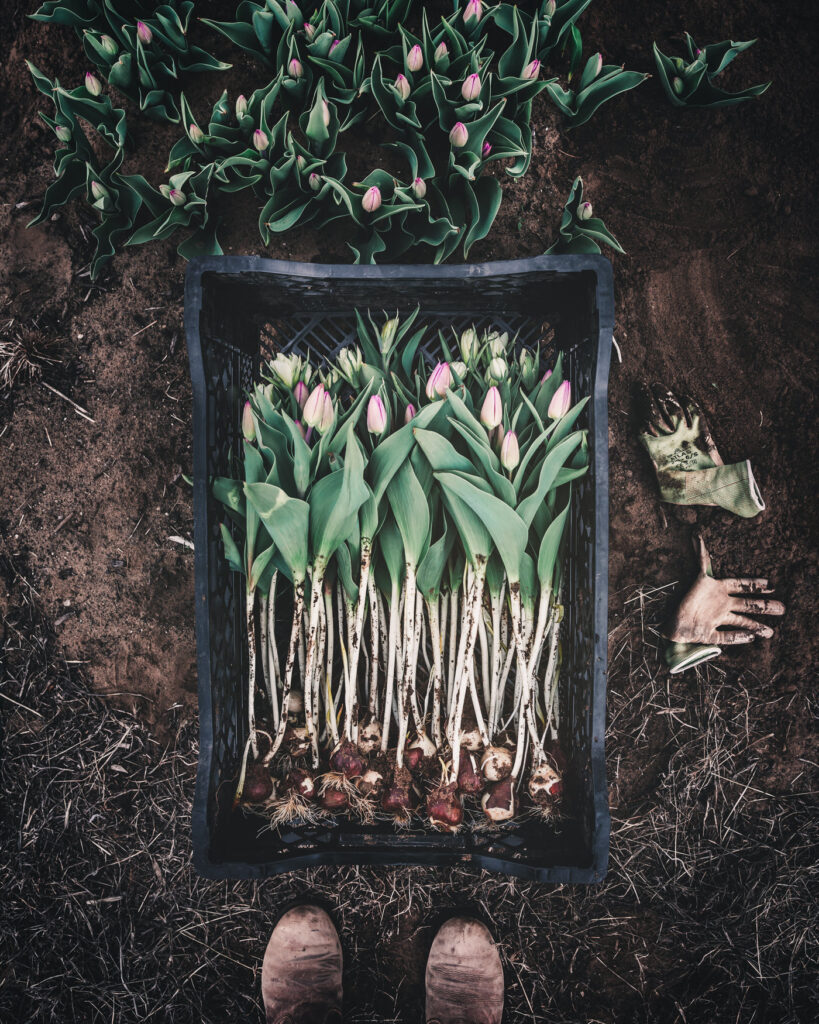
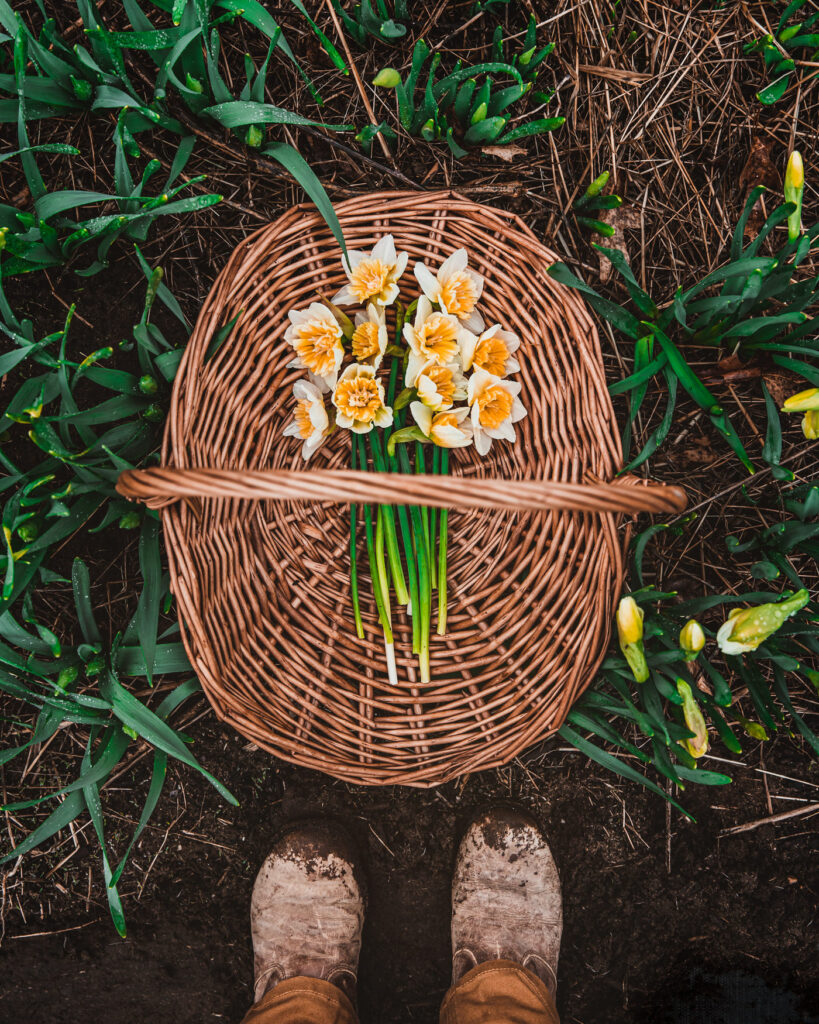
Harvesting
We are currently harvesting tulips and muscari from the high tunnel and narcissus from the field (although now it’s currently back under a thick blanket of snow).
High Tunnel
In the high tunnel, I’ll mulch the roses now that the garlic is getting substantial (I planted garlic among my roses to help deter pests). They are leafing out beautifully and I’m excited to see them grow!
The ranunculus and anemones have taken a lot of hits, both the overwintered experiment and the spring transplants. After surviving the polar vortex, they were then assaulted by extreme heat. First, because the high tunnel has been continuously barricaded with snow, it’s been challenging to vent open. Then, once the snow melted, we had a week with multiple days 80–90F. To add insult to injury, they’ve also been under vicious attack from mice. In fact, the mice have become voracious demons at the farm. They’ve eaten numerous bulbs, ranunculus, anemones, and mowed down 150 sweet peas. We put out deterrents, but unfortunately, also had to resort to traps. There is also either a cat or fox visiting the tunnel, hopefully eating the mice.
Photography
Depending on which hemisphere you’re located, your season is either just getting started or wrapping up. Both are great times to capture as much of the beauty as possible.
It’s no secret that I’m extremely passionate about photography, but I also think it’s an invaluable tool for your business. Bonus! It’s also great for record keeping.
Photography, like any skill, takes time and practice. There’s a lot to learn, and it’s a big topic to cover, but I’ll share some of my top tips below. If you’re interested in more photography content, let me know. After many requests, we started filming content last season for a future photography and digital marketing course, but it’s a big project, and still a ways from fruition.
Before we dig into my top tips, let’s talk about the why behind it. I wrote a lengthy blog post on why I think editing photos (and learning photography is so important). You can dig into the entire thing here, but below I’ll include reason 1, because to me, it’s the most important:
YOUR UNIQUE STORY
If you only take away one reason to edit your photos, let it be this: it has the potential to set you and your business apart in a major way! While there are plenty of technical reasons why you should edit your photos, the most important is that when you apply your unique style you stand out from the crowd.
Look, almost anyone can take a photo an a smartphone or camera on auto and upload it to the internet (my three-year-old niece can legit use a smartphone). While in some ways this is magical, these images tend to look generic. You really need your subject to be a wow to grab your viewer’s attention. A bad@ss photo AND edits that draw the viewer’s eye to your awesome product, subject, or story? Now that’s an epic image that will capture the eyes of your audience.
Similarly, a professional photographer will no doubt provide you with amazing, professionally-edited images. But if you want your content to be consistent, you need to hire that photographer every time you have a new offering (or find one that has a similar style). Learning to photograph and edit photos yourself gives you more opportunities to tell your story in your unique way.
Challenge
I want you to think of a brand or account that you really love. Now, go look at their website and/or social media. What stands out to you? Really consider this question and why you’re drawn to this person or brand.
It’s likely something that’s very unique to them: their aesthetic, writing, story, innovation? I’m willing to bet they are shining a light on whatever sets them apart with high quality, intentional visual content. Maybe they can afford a team to create this content, or maybe they are creating their own. Either way, I’m willing to bet that if they made it to the top of your favorite list, their content is anything but generic.
Real-World Example
The famed flower farm Floret is a great example of this. Erin has commented on numerous occasions that good photography has been one of the biggest keys to the success of their business. And she’s not talking about hiring a photographer, either. She’s talking about how she and her husband learned photography in order to better tell their story. They have a very natural style, but make no mistake: these are intentionally-styled photos taken with professional cameras.
Erin and Chris also dedicate an enormous amount of time to their craft. Aside from education, Erin has commented that most days look like photographing at golden hour in the morning, working through the day, and then busting their cameras out again in the evening. Farmers are busy, but visual content is SO important! The images they capture not only help tell their story, they are also used for their blog, product photography, marketing material, and books.
While tackling yet another skill on top of farming and running a business can feel like a lot, I hope you can see how learning this invaluable skill can open up limitless opportunities for you and your business.
Top 3 Photography Tips
1. Become a Student of Light
The number one thing you can do to improve your photography is become a student of light. Photography is all about the light. I cannot reiterate this enough. It sounds simple and I heard it for years before it finally clicked for me. You can have the most captivating subject, but if your light is not right, the image will fall flat, literally.
While there are many post-processing tools that can enhance your images, the most important component of photography is capturing the image right in camera first. And I don’t mean that you need a fancy camera or equipment either. It’s all about understanding the light and figuring out how to manipulate or capture the light in order to highlight your subject.
Certainly, high-quality cameras and lenses give you more options and better features, such as the ability to shoot in lower light conditions. However, if you don’t understand light in the first place, it will be difficult to consistently take quality images, even with the best camera.
The best way to learn this is to simply take pictures in various lighting conditions and study how the sensor on your camera captures the images. My two favorite tips for improving light in photography are 1, photographing in natural light and 2, blocking light.
Natural Light
Natural light is king and that’s a good thing, it’s also free! Artificial light can be manipulated in a way that creates gorgeous photos, but this is an advanced topic and those photographing in artificial light are aiming to mimic natural light conditions.
All that said, not all natural light is the same. I’ll touch more on this below, but we want to avoid harsh highlights and shadows, while still capturing dynamic image that isn’t flat. Some of the best times to photograph outdoors are golden hour (either shortly before sunset or after sunrise), overcast days, or my personal favorite: after a rainstorm.
Block Light to Create Strong Directional Light
A strong directional light source cast on your subject draws attention to it while keeping the other items in the shadows. It usually creates more dramatic highlights and shadows making for a more dynamic image (but not as harsh and blown out as direct sunlight).
Indoors, you can accomplish this by finding a singular light source, like a large window or glass door. Ideally, you don’t want a room with multiple light sources (like multiple windows), because the light will be entering the frame from each of those sources, bouncing and reflecting all over the place.
One way that I accomplish this is by shooting next to a patio door in our basement. There are no other windows. Additionally, I hung dark curtains that can be adjusted to let in more more or less light. Another space that I like to shoot is in our pole barn. It’s nothing fancy. There are no windows, so when the garage is open it only allows in light from one side (i.e., directional light).
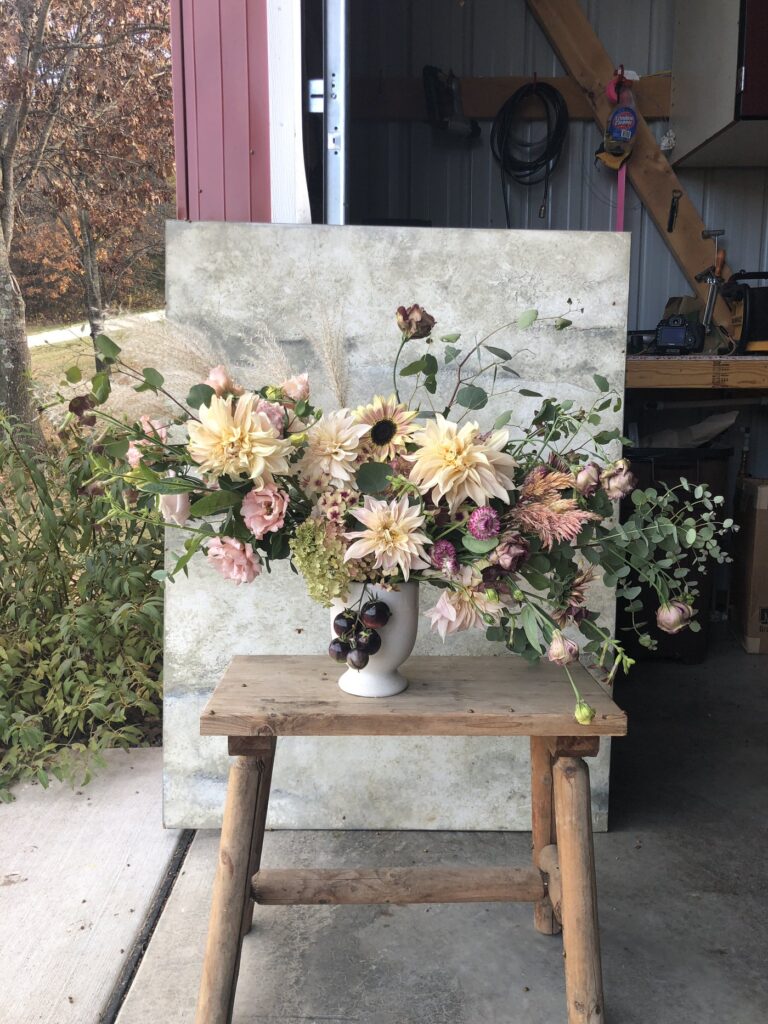
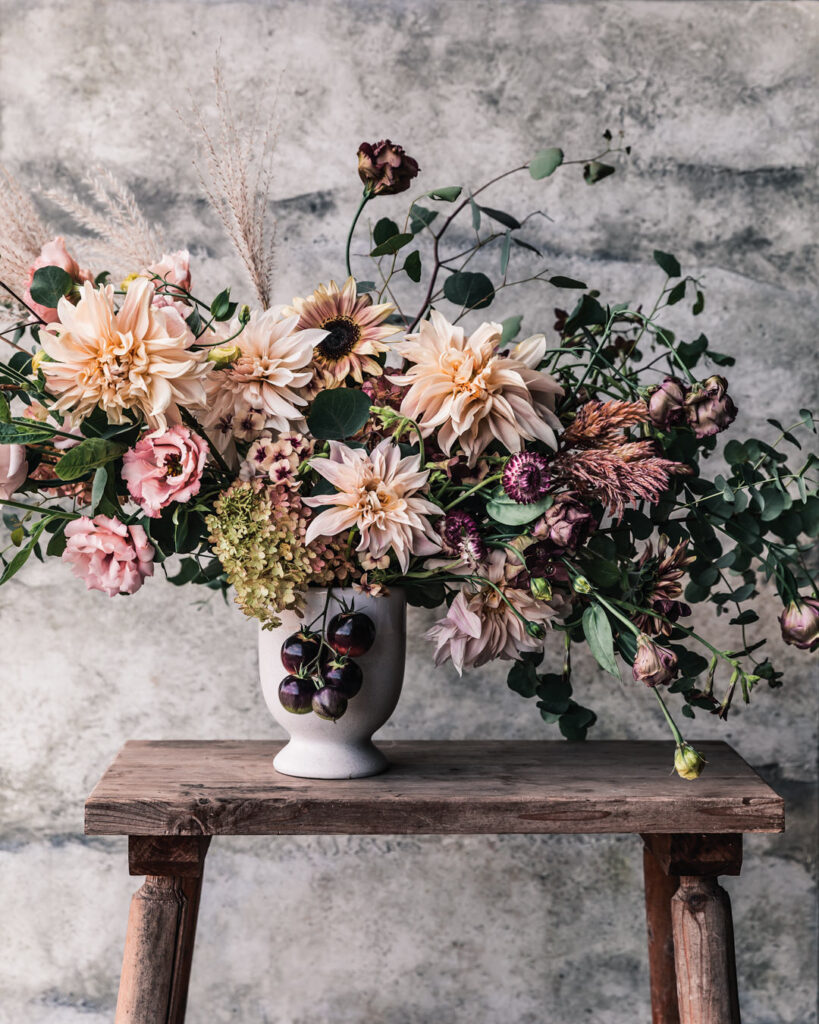
Above is a BTS example from our pole shed. The light is coming from the left and there is no light source in the shed. The directional light may not be as visible to our eye, but the sensor is sensitive and having this one light source creates more dimension in the image.
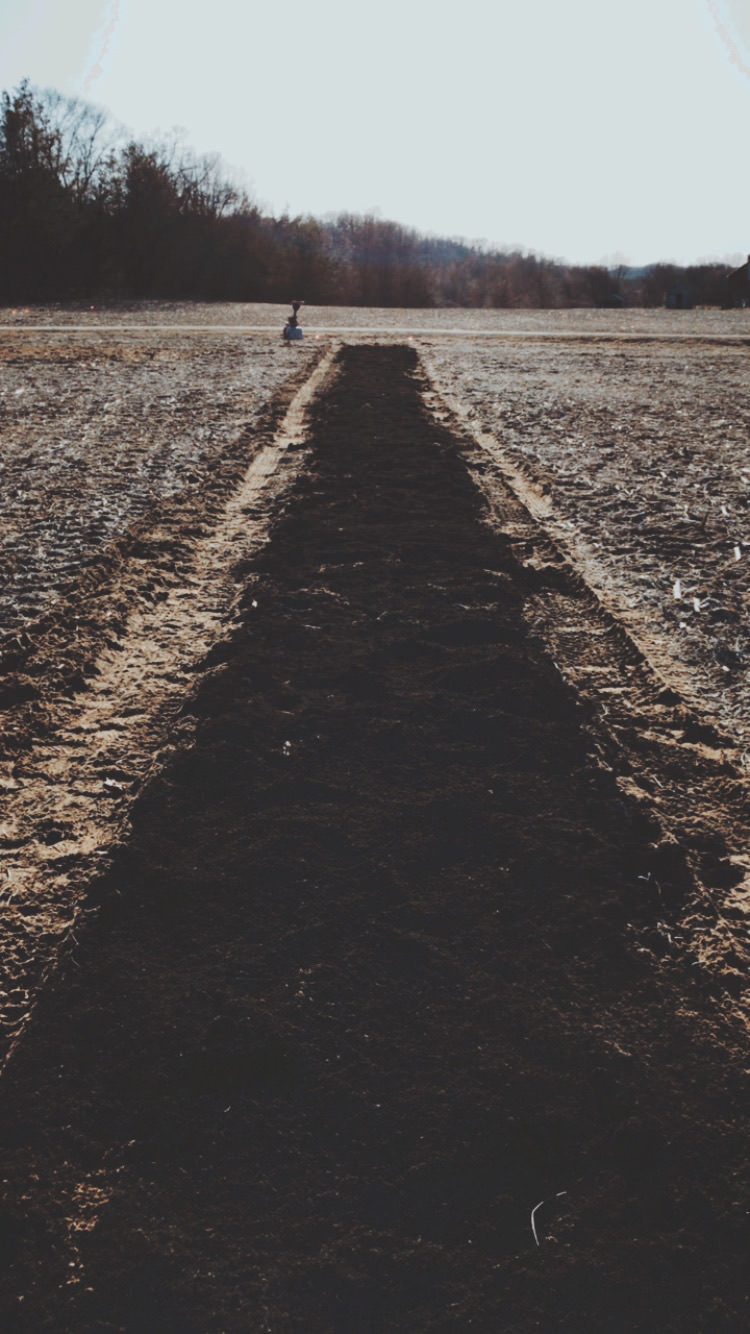
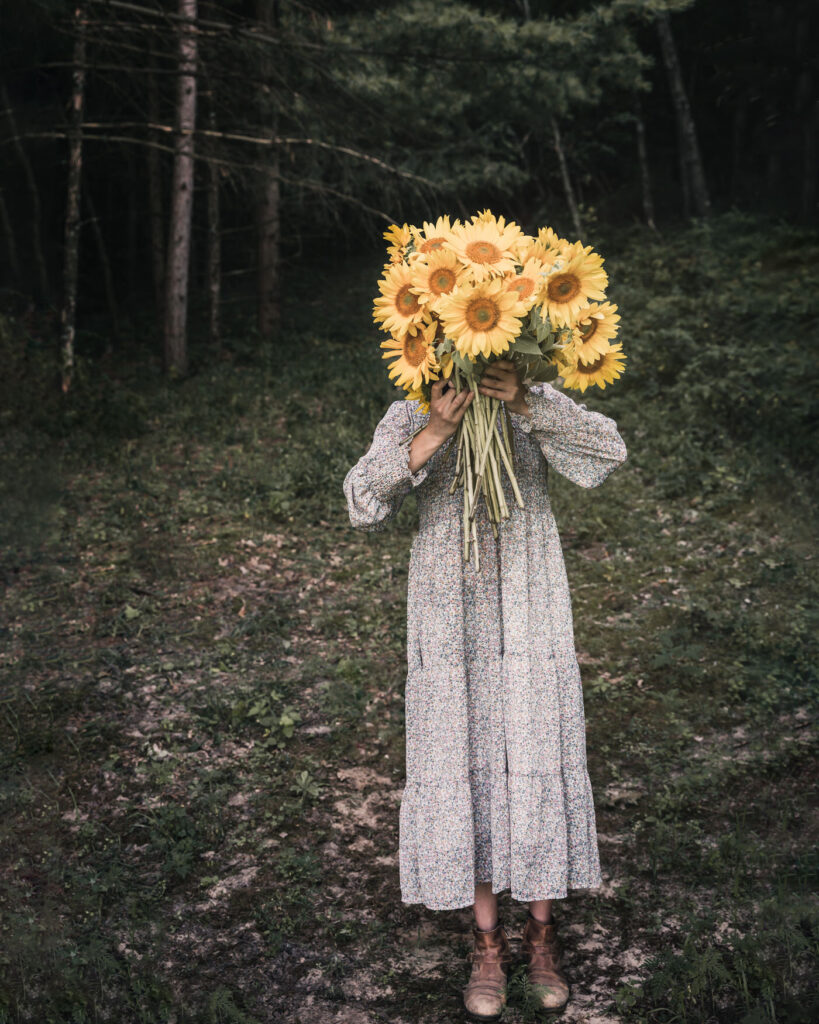
Outdoors, there’s more light and less control, but you should still consider where you’re shooting. In the image below, I’m against our woodline. There is a pathway that goes into the forest. The light is coming in where the viewer/camera/tripod is at while the light is blocked by the forest behind and on either side.
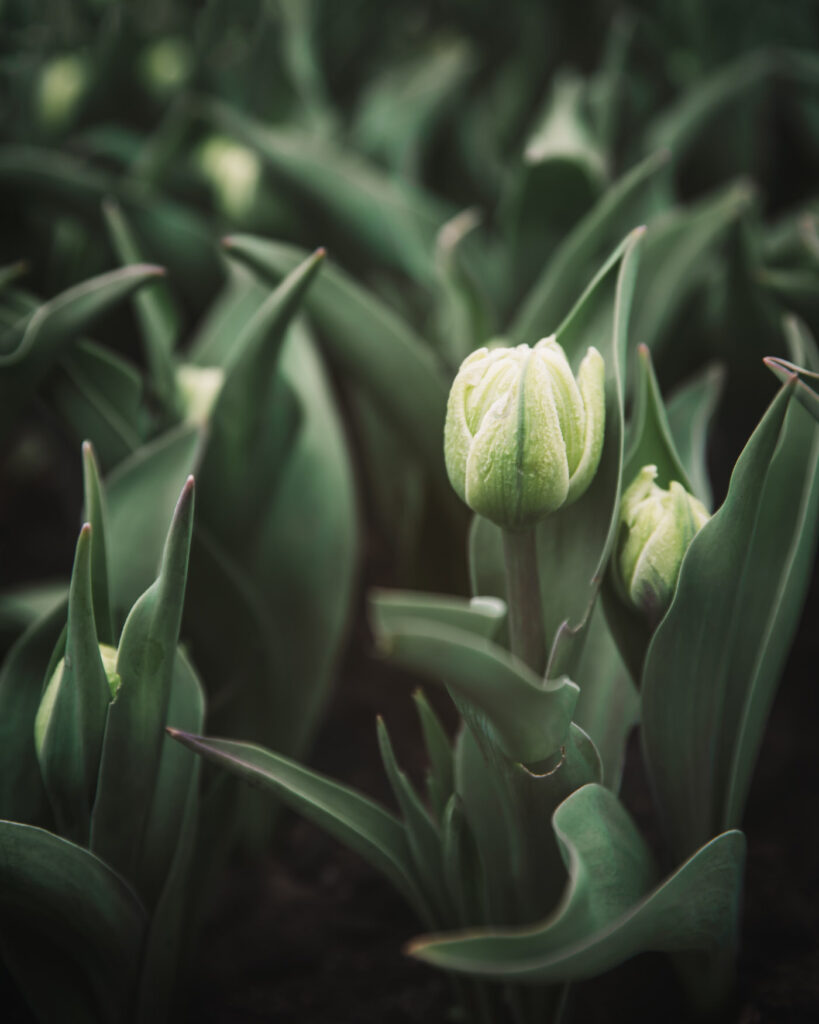
Block Light to Diffuse Light
Diffused light is my favorite light to shoot in. When the light is diffused, there is less disparity between the highlights and shadows, meaning more details are visible in the image. While we want directional light to create more dramatic highlights and shadows, we don’t want them too harsh. By diffusing the light, we achieve a happy, balanced medium.
There are a number of ways to diffuse light, but ultimately, we’re avoiding shooting in direct sunlight. If you can see hard shadow lines, the light is most likely too harsh and direct (though the are some photographers that intentionally photograph stunning images under these conditions).
So how can we diffuse light?
If your shooting indoors, you want a window or door that does not get direct sunlight (in the northern hemisphere, this would be a north-facing window) or photograph when the sun is not shining directly in (as in the BTS example above). However, if your only option is a window that receives direct sunlight, you can diffuse the light with a sheer curtain or I like these diffusers from Amazon.
Outdoors, you can use the same to diffusers to disperse sunlight shining on your subject. However, that’s not my preferred way. My preferred way is clouds! I’d rather wait for a cloud to block the sunlight than drag out my diffusers. My favorite time to shoot outdoors is just after it rains, when the clouds are still overcast. Right after it rains, the light is beautiful diffused by the clouds, and everything is so vibrant green.
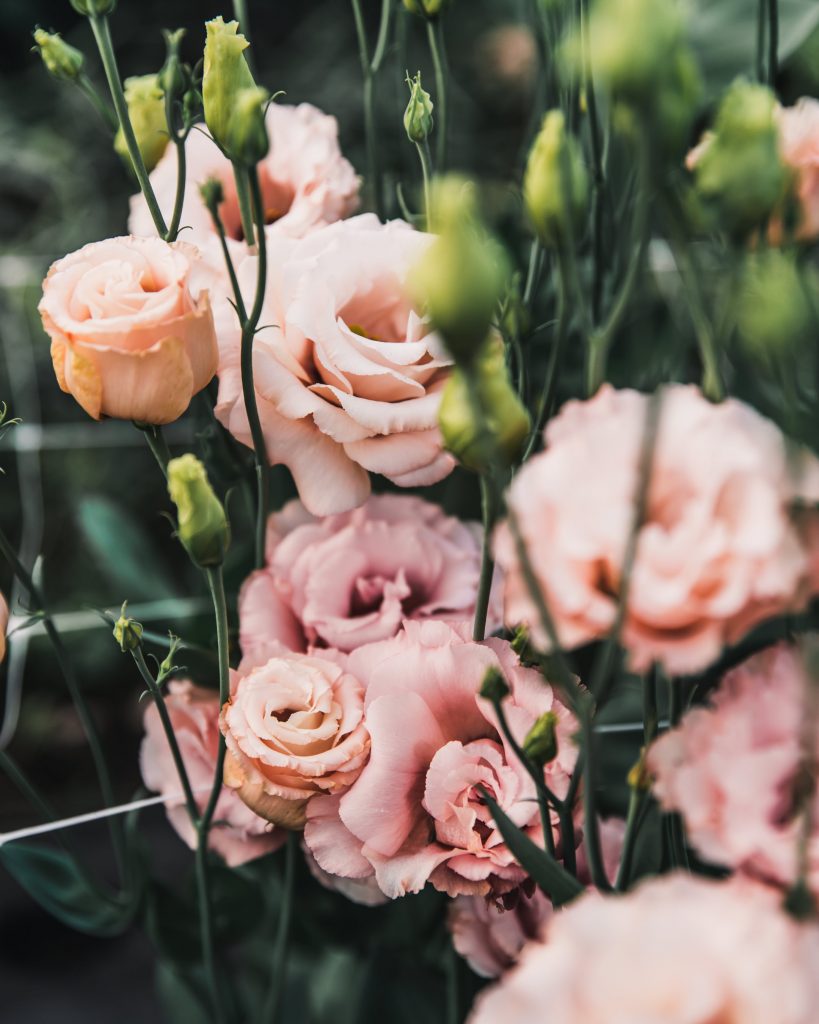
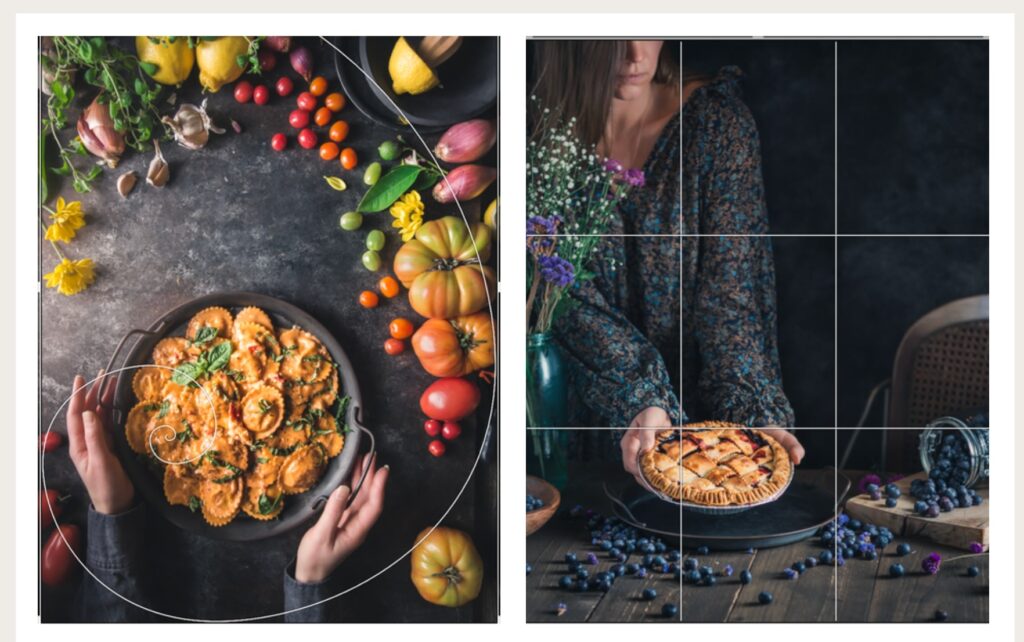
2. Become a student of Composition and Color
Study photos, art, design or any other visual medium. If something catches your eye, it’s likely because it is following composition rules or using pleasing colors. While there really are no rules in photography, guidelines like color theory and composition “rules” can hep create visual impact.
There are many composition rules, but below are two examples (Left: Golden Spiral; Right: Rule of Thirds). By placing elements along the lines or at the intersections, it helps create balance.
Understanding color theory is just as important in photography as it is in floral design. Purposeful use of color can draw attention to your subject and create harmony in your design or image. Using complementary colors (those opposite on the color wheel) can create contrast in your image and make things pop. On other hand, analogous colors are adjacent to or near each other on the color wheel and can create a calming affect.
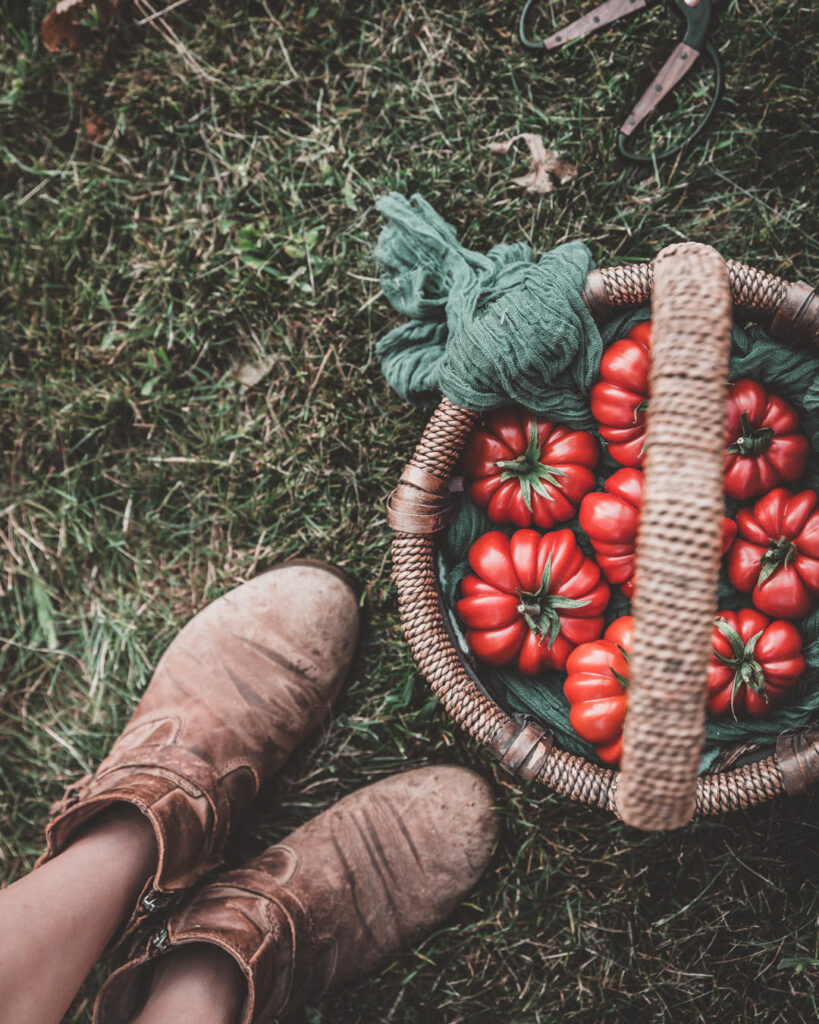
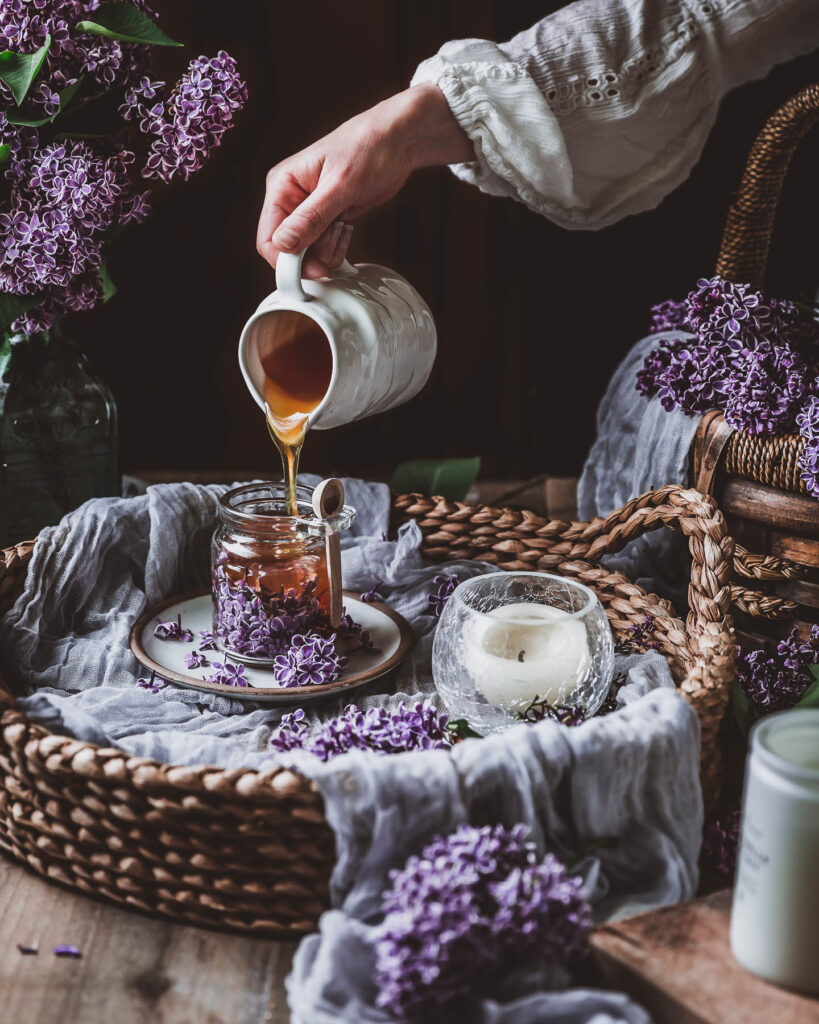
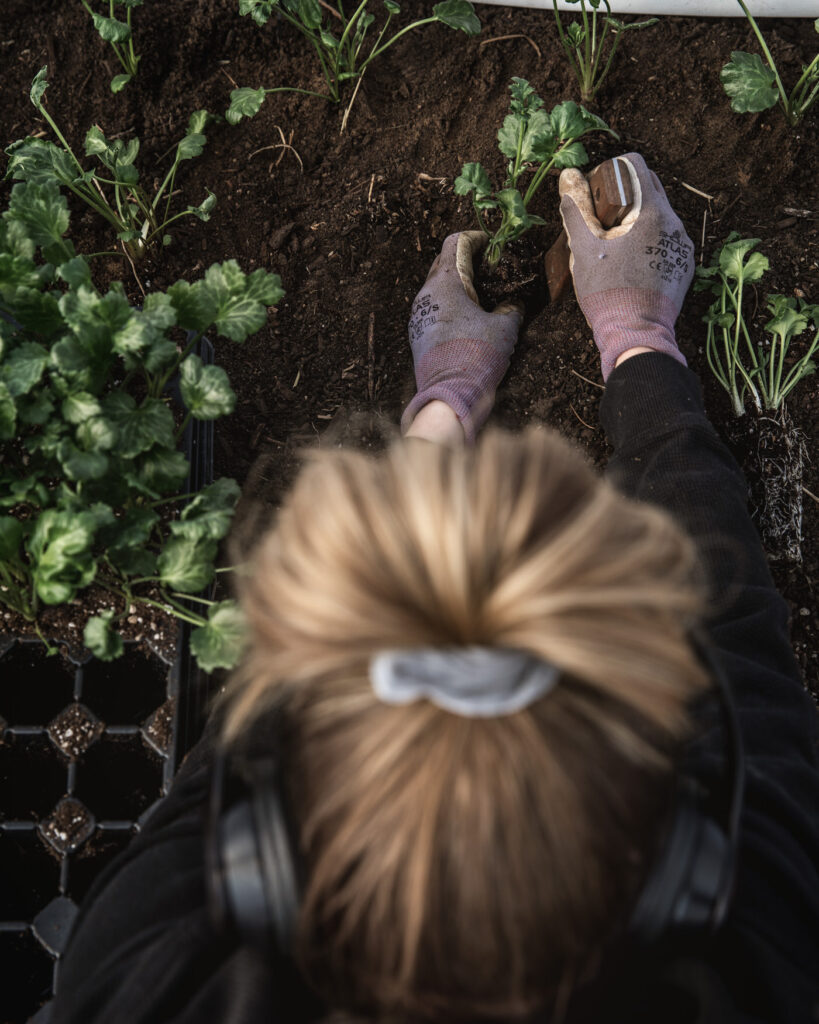
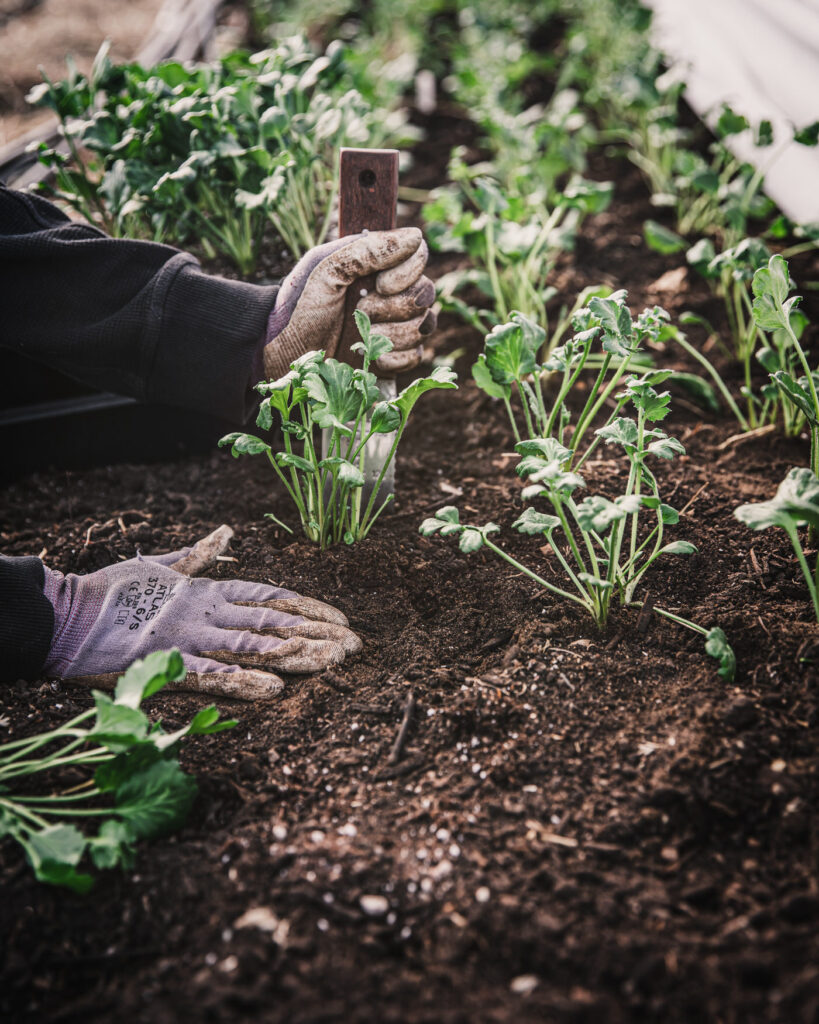
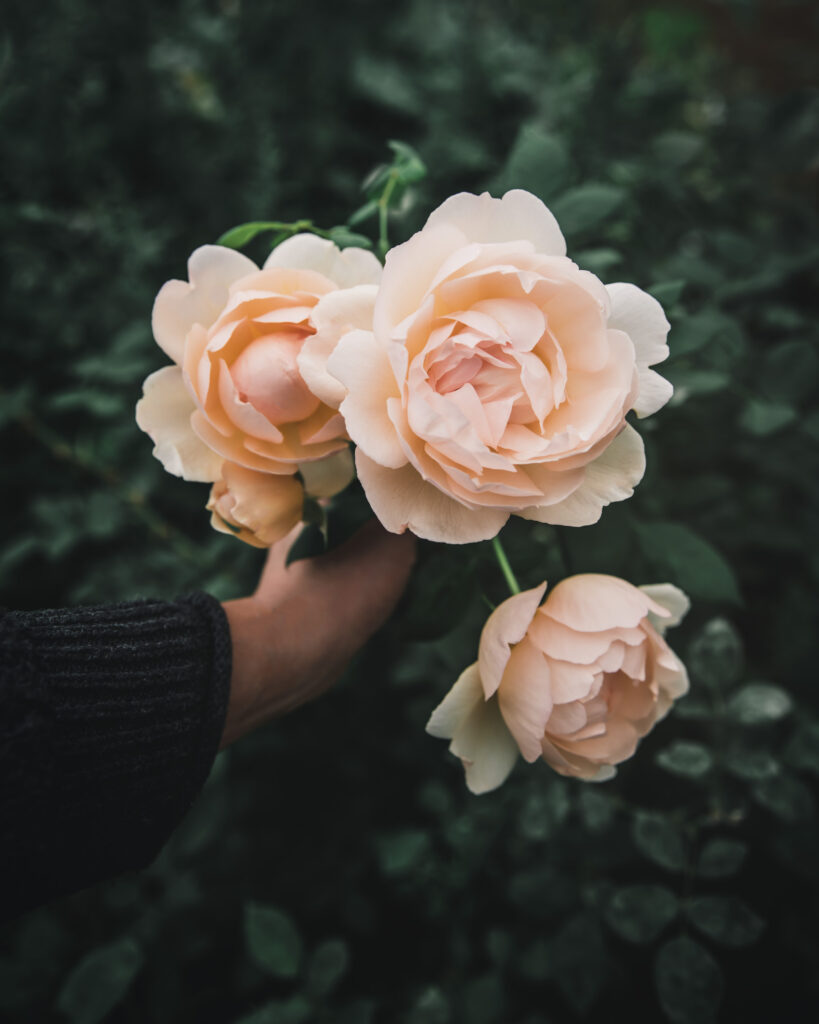
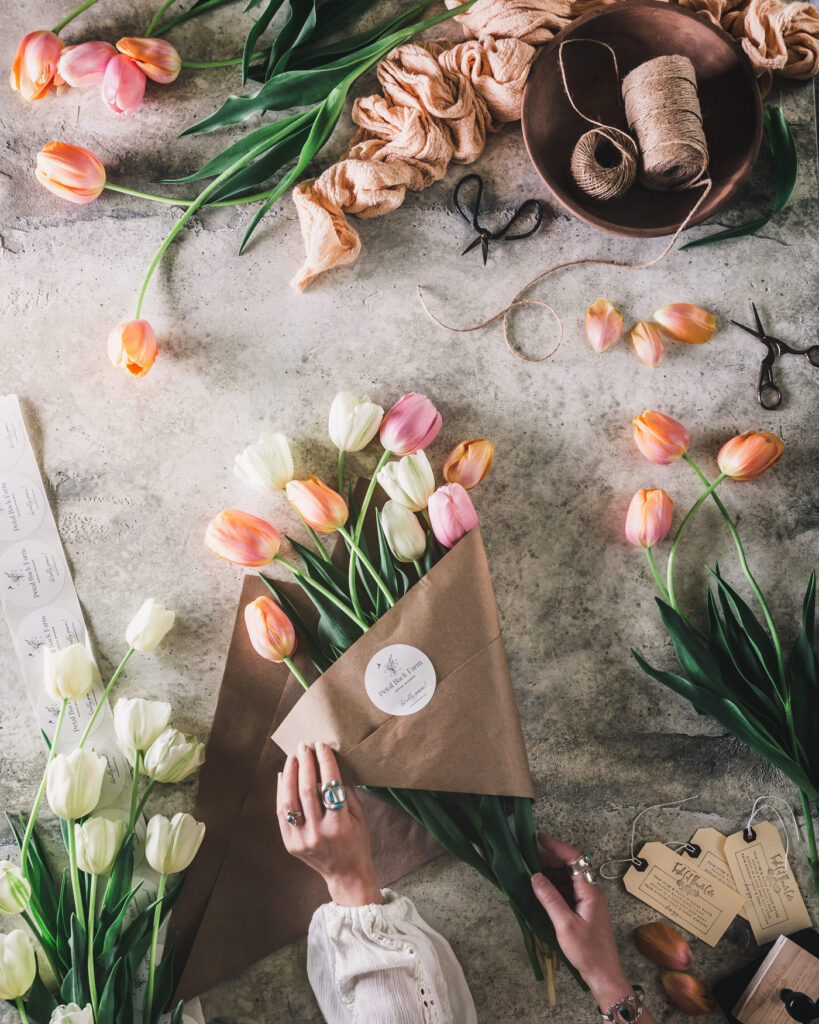
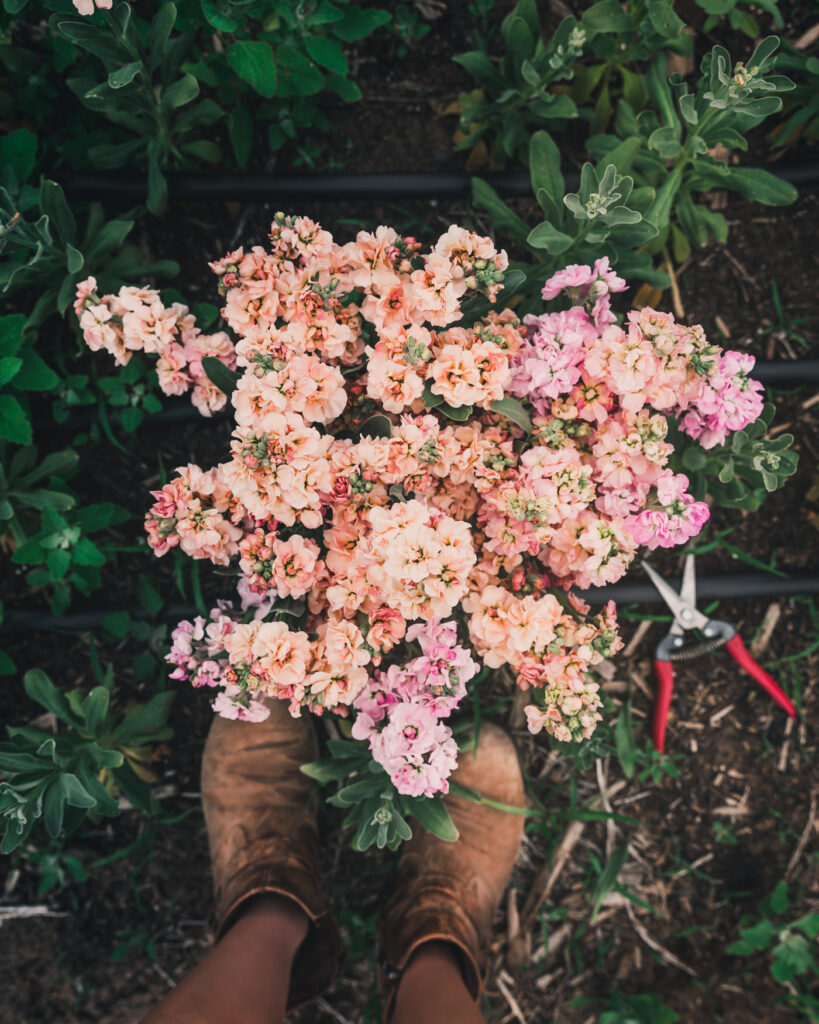
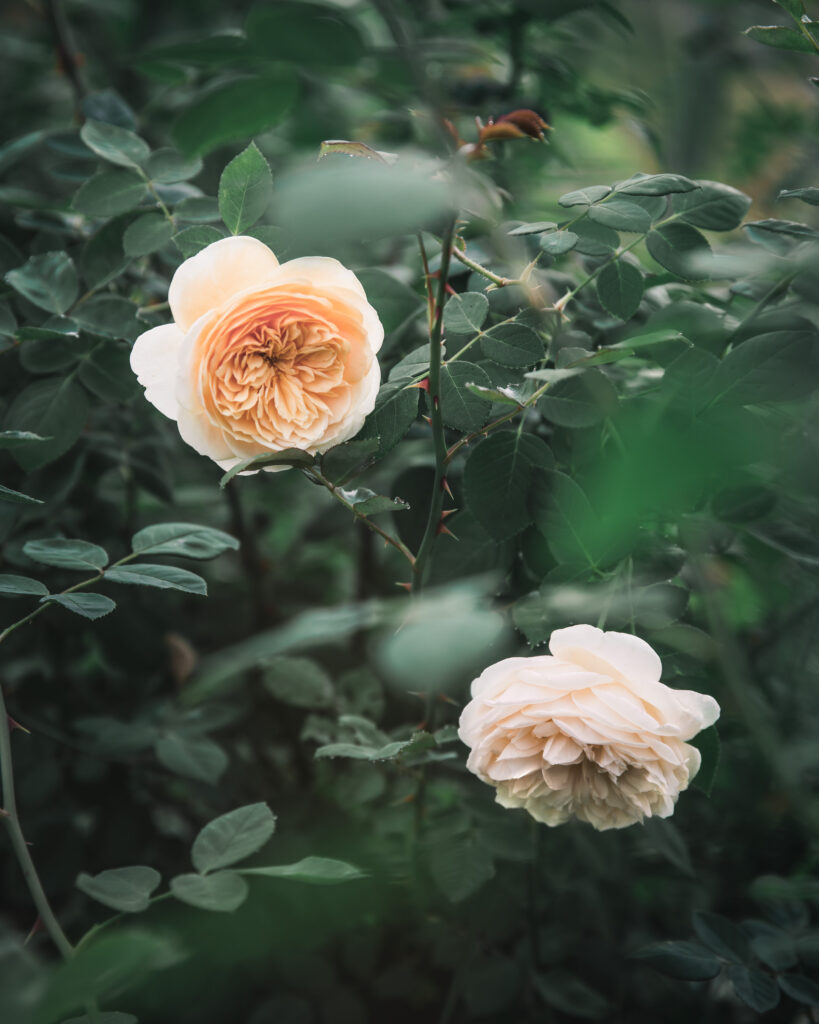
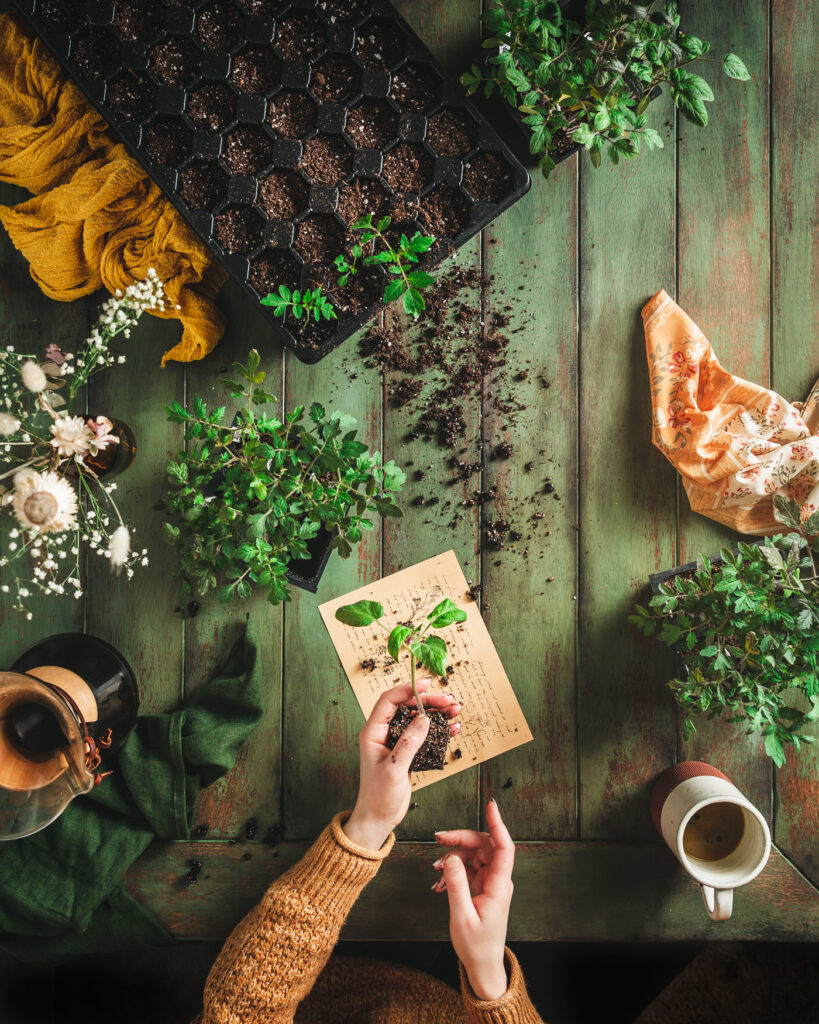
3. Tell A Story
Compelling images evoke emotions in the viewer. When you capture an image how can you create more emotional connection? Can you add a small prop or detail that tells a story? Can you photograph your subject from a unique perspective? I love overhead or bird’s eye view images, because I think it gives the viewer a unique perspective, almost like they’re there. I also love including human elements like hands or boots, as if the viewer is getting to just peek into this subject’s world. I also think the slight glimpse of a person (limited to hands or a boot, etc.) leaves enough room for the viewer to imagine themselves there. Another favorite is having props that help tell the story, but also make the scene more lived in. I also love photographing my subject “through” items in the foreground (like leaves) that are not necessarily even in focus, but create more of that peeking in affect.
Wrap Up
OK, my friend, that is IT for April. What do you think? Did you find some useful nuggets? Is there anything that’s unclear or you wish I would have covered?
This link will be live until the end of May, at which point you’ll get a PDF copy, so you can always refer back it. You can also use the buttons below to save this as a PDF or print at any time.
Tip: use the find shortcut (Ctrl+F on a PC or Command+F on a Mac to search for any word or term either online or in PDF format).
Have any questions or something you want to share with me or others? I know I say this ad nauseam, but I truly believe in the power of the collective and that we all have something unique and powerful to share, so please leave a question or share a comment below. We’re all better for it, and I thank you in advance!
Cheers pal!


Do you have a favorite camera you use? I am looking to purchase a camera to capture more of my flower farm. I am currently using iPhone 14pro which can only do so much! Thanks in advance!
Hi, Shannon:
I upgraded to the Canon 5d mkiv last year (found a steal on an open box camera body). Before that I was using the Canon 5d mikiii and before that a Nikon d90. I’ve always purchased older camera bodies. The older versions usually have lower prices than the newest ones, but reputable places like Canon, Nikon, Adorama, B&H all have really good used programs where they rate cameras and lenses (I am a fan of open box because they are basically brand new and come with warranty). All of the cameras I listed are DSLR bodies, so they need camera lenses. Many places will offer a camera body with a kit lens, however photographers usually recommend skipping the kit lens as these aren’t always the best bang for your buck. Most will say to invest in glass as you’ll purchase different bodies more often. Photography gear has some sticker shock (so be prepared), but if you plan to grow into it as a craft, it can be incredibly valuable for your business (especially if you consider paying a photographer for one session). Erin Benzakein is a perfect example of this. She credits learning photography and being able to tell their story as a huge reason for their success (I believe she and Chris both use Canon, I know if you search her blog or FAQ, she lists the exact models somewhere). And I agree with this (we use photos for all of our social media, website, shop, marketing material, etc…it’s worth investing in so bravo to you for considering it). When I started, I researched lenses forever and ended up going with a highly-recommended budget starter lens to invest a little more in my first camera. That one is a 50mm f1.8 prime (both canon and nikon make a version of this, and it’s almost unbeatable for value . . . great lens for $150 or less). It was and still is a great lens (I have both the canon and nikon versions)! My favorite lens of all time, though, is the Canon 24-70mm f2.8 because the focal length gives me more flexibility. It’s pricier, but it’s almost always on my mkiv. One last thing I will mention is that DSLRs have dominated the professional camera market for years. However, mirrorless cameras have caught up and in many cases surpassed DSLRs. While most of the new mirrorless cameras have adapter to use DSLR lenses, it’s worth considering a mirrorless if you are investing in a whole new setup. The canon R5 and R6 have seriously piqued my interest! I hope that helps but don’t hesitate if you have any other questions!!