Sharing a floral recipe for this spring arrangement. I’ve always loved seeing the behind-the-scenes steps of other creators’ processes, so I thought I’d take you BTS with me 🙂 Check out the short video time lapse below and then jump to the step-by-step instructions at the bottom.
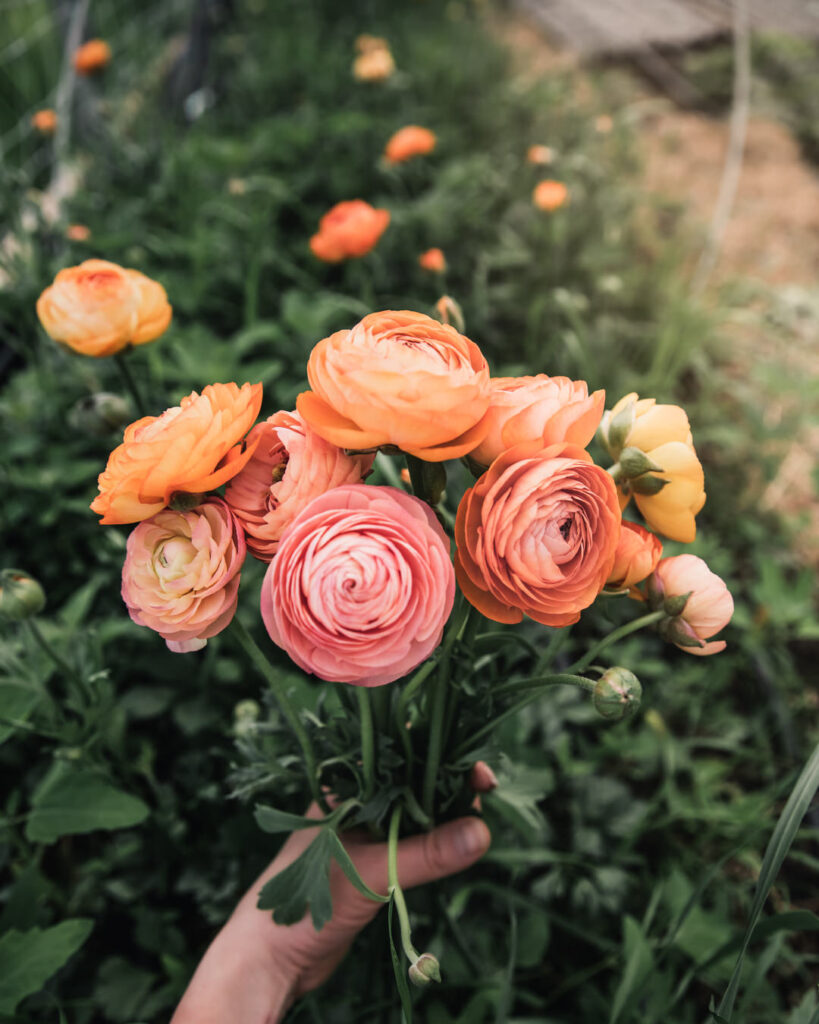
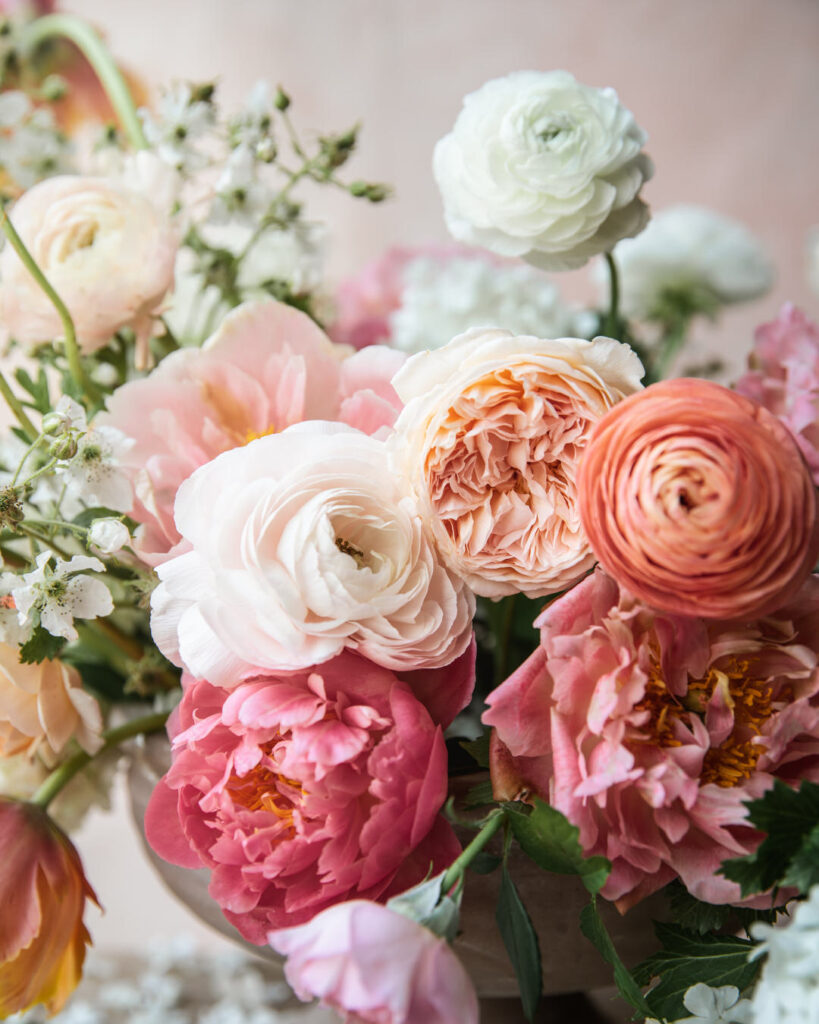
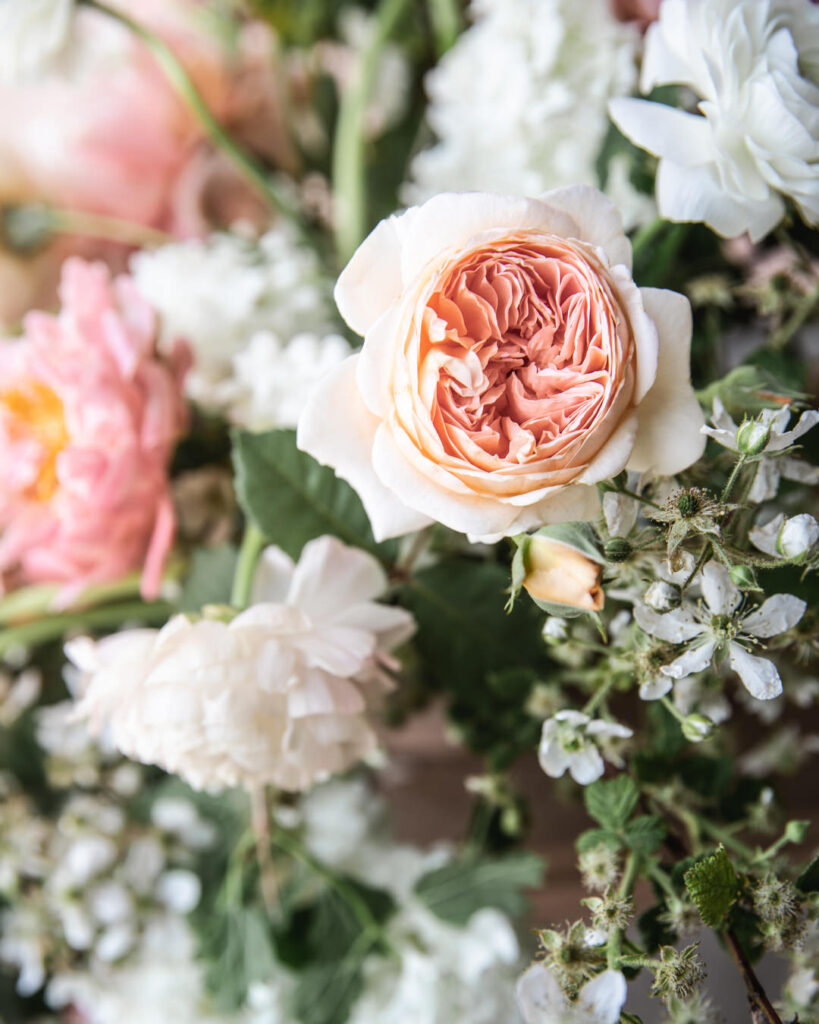
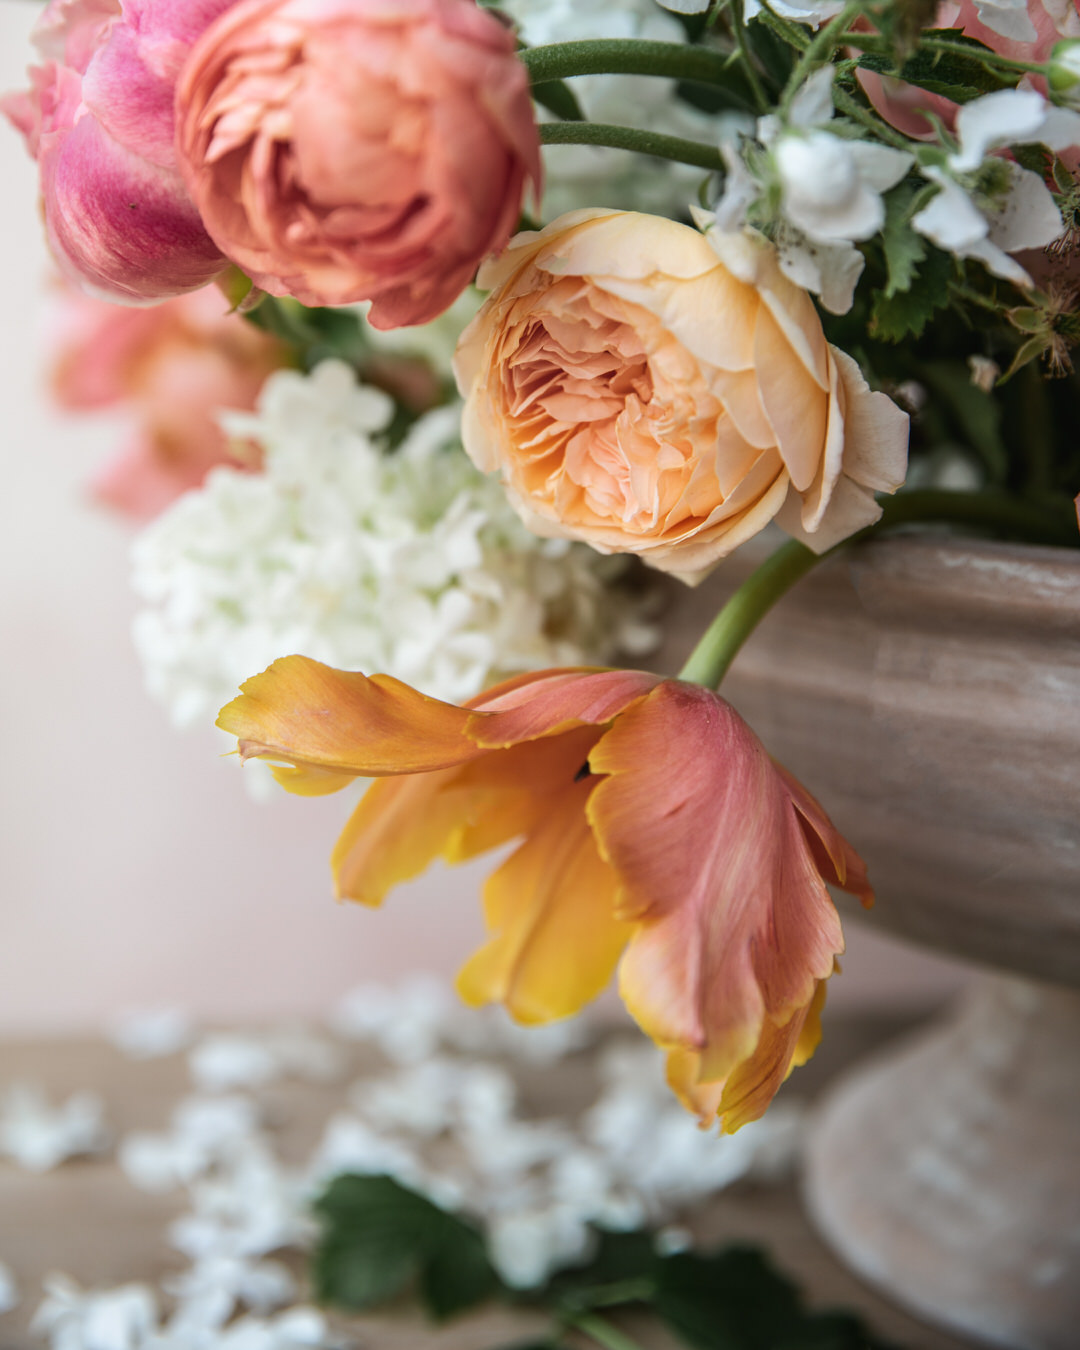
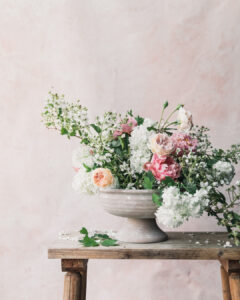
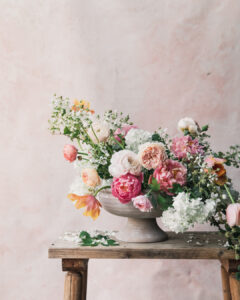
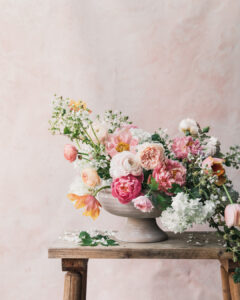
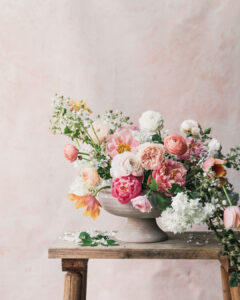
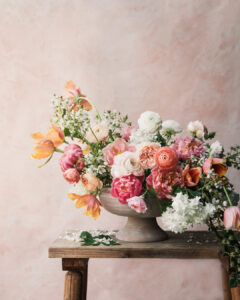
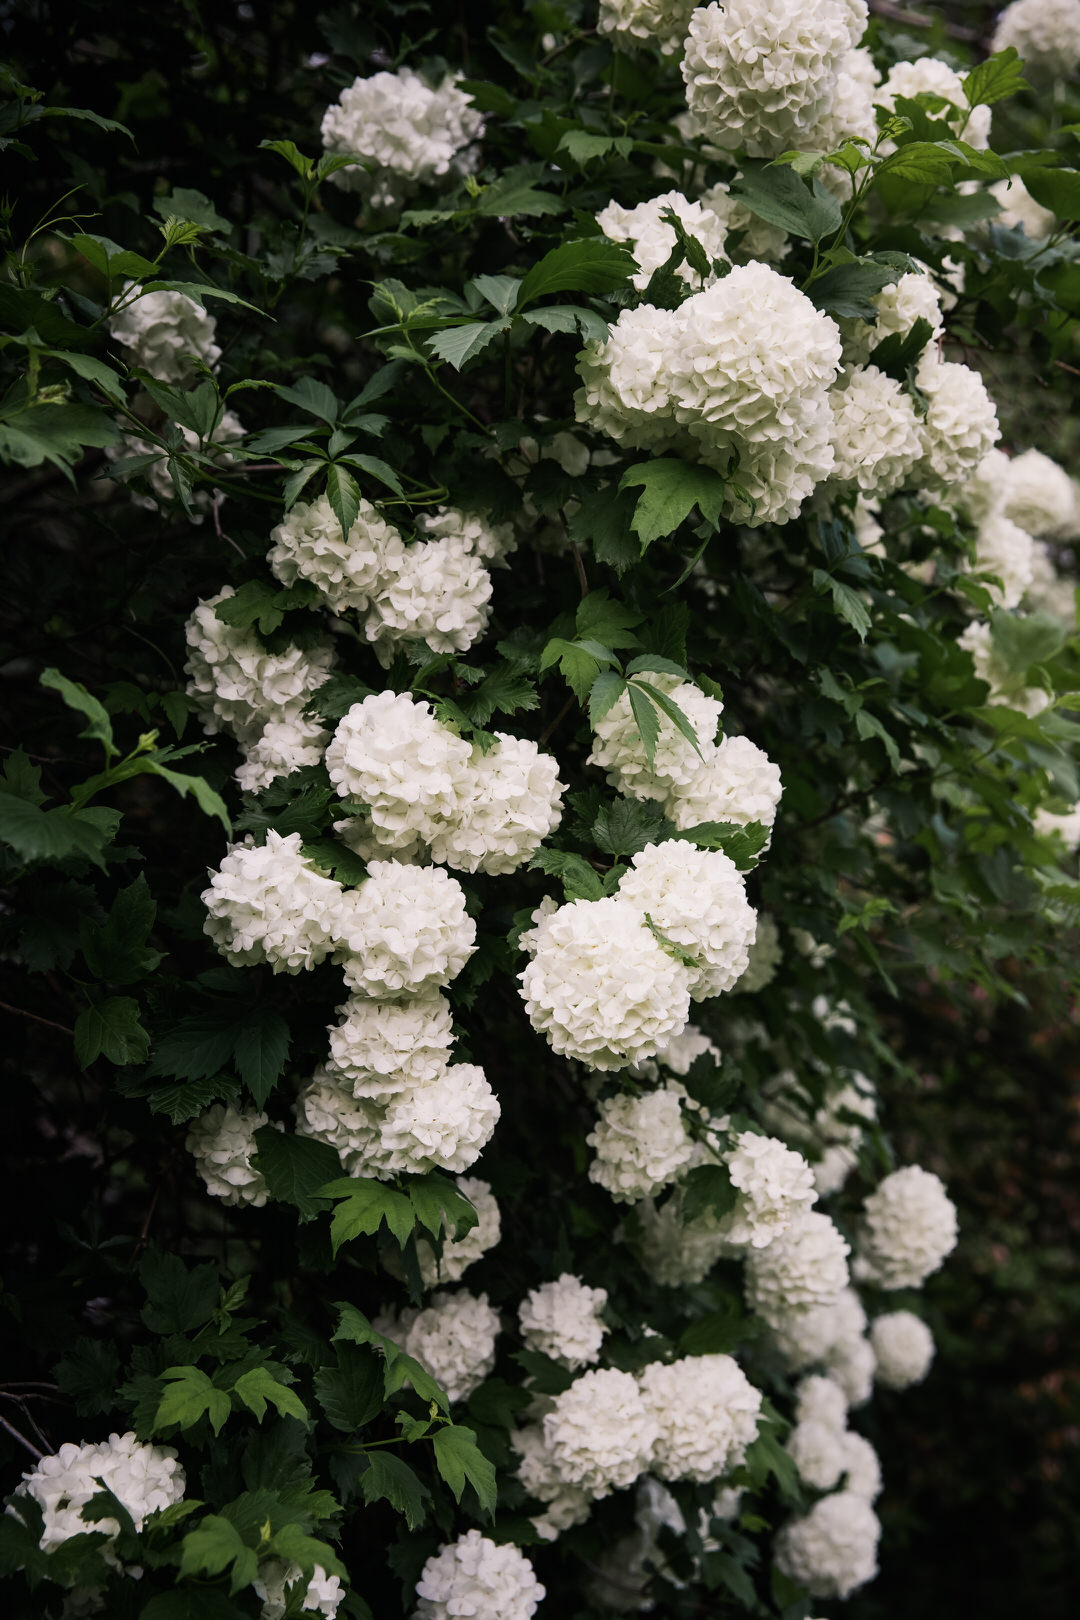
This floral recipe includes some of my all-time favorite spring flowers: Peonies, ranunculus, garden roses, ‘Amazing Parrot’ tulips, snowball viburnum and berry brambles. The brambles add a lot of structure, while the viburnum creates pillows of flowers throughout. I always want my arrangements to have a flow and movement to them. Let’s dive in!

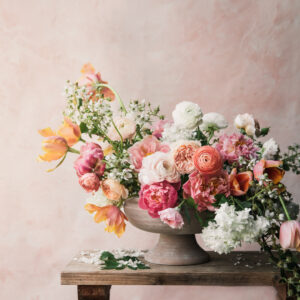
Floral Recipe: Spring Arrangement
A statement piece with the best that spring season has to offer on the farm.
Materials
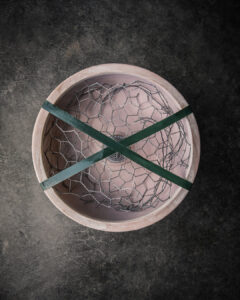
Mechanics
- 1 Vessel, Winnie Compote (7" x 4"), If you can't order wholesale and want to order this, let me know, I can get it for you 🙂
- Floral Frog, Optional, but helps with mechanics
- Chicken Wire, About as thick as vessel, I like to bend it in an S shape or ball
- Floral tape
- Snips
Botanicals
- 5 Berry brambles
- 6–7 Viburnum branches, depending on size
- 7 Coral Charm peonies
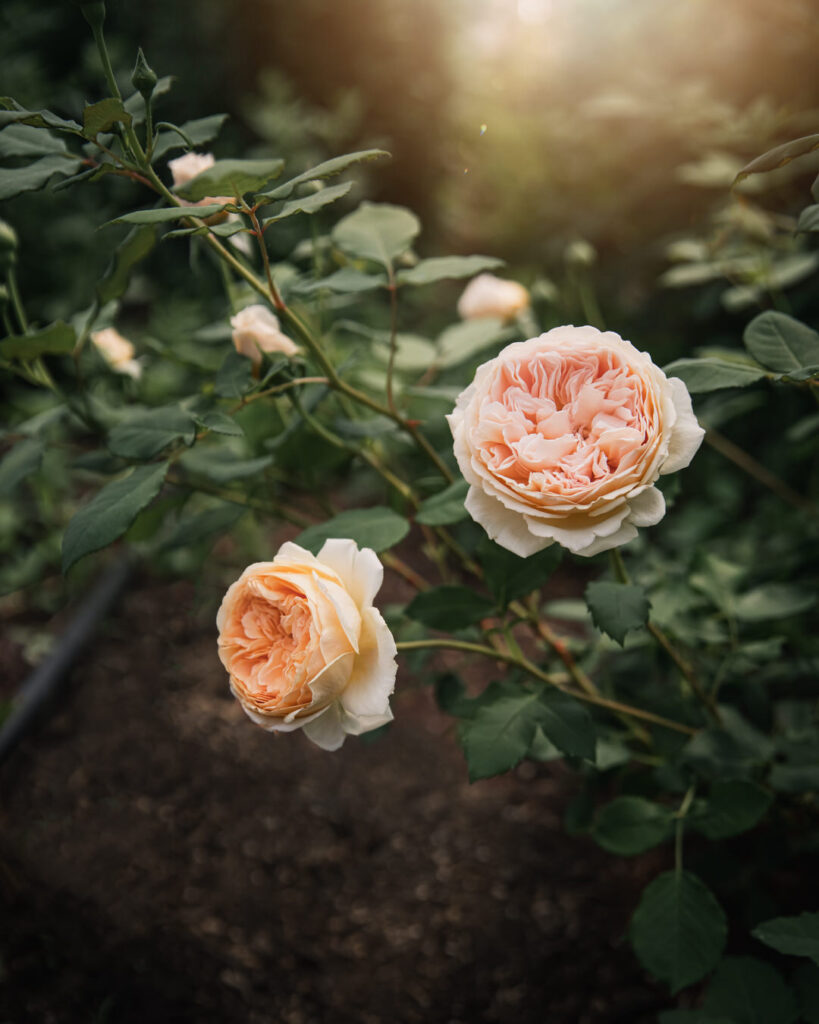
- 6 Garden roses (I had 4 Crown Princess Margareta and 2 James Galway)
- 7 Ranunculus (I had 3 Salmone, 2 Chamallow, 2 Bianco)
- 9 Amazing Parrot tulips
Instructions
- Prepare vessel. Attach floral frog with floral clay/putty. Add ball of chicken wire as wide as vessel. Tape an X over the top.
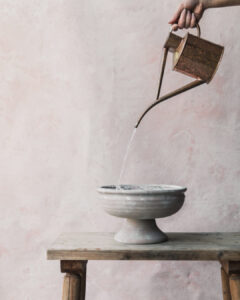
- Fill with water. I like it pretty full, as you want to make sure all stems can drink (and they will drink after being freshly cut).
- Add berry bramble branches. Take your time here, this will determine the shape of your arrangement. I usually like a higher side and a lower side. For this arrangement, I wanted it to flow high on the left and swing below on the right.
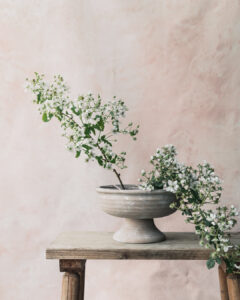
- Continue to develop your shape with bramble branches. I ended up bringing the left side down slightly.
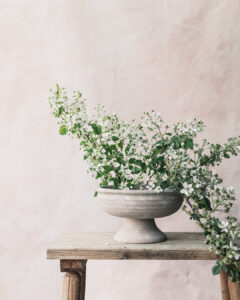
- Start to fill in with snowball viburnum. I like to add flowers in a wave pattern. Generally, at this point, I am looking for filler flowers that can create little pillows in my arrangements. The viburnum was a little big, but it served the purpose well enough. I love yarrow for this, but it wasn't in season yet.
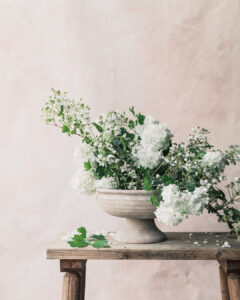
- Begin adding focal flowers. Instead of polka dotting them through, I like to focus on one side, usually aiming for a wave again, adding them at different heights or planes. Often, I had two together in different heights (this looks natural because nature often grows in twos) or three, creating a triangle, which is appealing to the eye (like can be seen here).
- Next, I added roses throughout in different heights.
- Next, I worked on the bottom middle to create more natural movement toward the drastic hanging bramble branch and viburnum on the right.
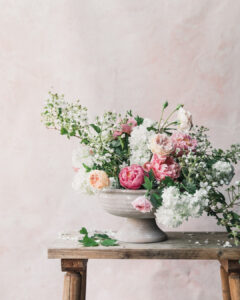
- On the bottom, I pulled the peony out even further, so it was hanging over the edge of the vase and creating a more-natural progression toward the right. Similarly, I added a tulip at the top to follow the natural curve. The tulips were aged a bit, so they were opening. I also adjusted the rose on the top right because I wanted it to stand more tall (I like an element sort of dancing tall, but I end up adjusting this and creating this with ranunculus instead later on–I love ranunculus for this purpose.
- Next, I added more tulips at the base on both the left and the right (I really want the flowers to feel like they are spilling out). I also adjusted the focal rose because it was really beautiful, so I wanted it to be prominently facing the front.
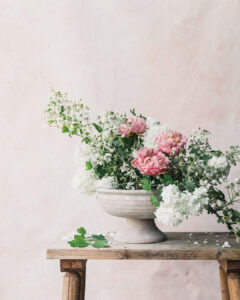
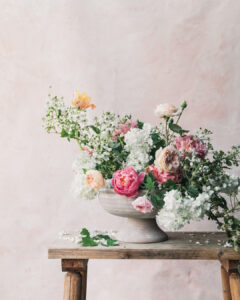
- Next, I add in ranunculus on the left, to start filling out the shape. The one on the far left is able to both fill in the strange gap and have it's own moment. I don't like flowers all facing one direction. I love that this guy is looking out toward the left. And then the one in the center is looking toward his rose friend 🙂
- I add in another peony on the left to work on filling in the shape.
- Next, I add a couple of dancing ranunculus in the gap. I like a gap in my arrangements, and I'll often add a floating element there. Sometimes, it's more prominent, while here it's less aggressive.
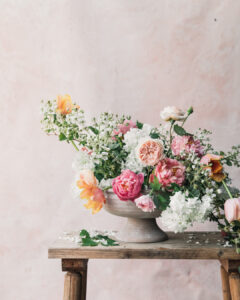
- Finally, I finish the left side with a few more tulips and a peony. Though, looking at it now, I wish I would have pushed that peony in a bit farther. This is also why I love photographing work. You see things you didn't see before!
Did You Try This?Tag us @petalbackfarm on Instagram or leave a comment below!


cLICK FOR Comments +