Understanding the Anatomy of a Dahlia Tuber—and Why It Matters
Understanding dahlia tuber anatomy is key—not only for inspecting tubers for viability but also for dividing and storing them successfully. Once you get familiar with the parts of a dahlia tuber, you’ll feel way more confident inspecting, dividing, selecting, and storing your tubers year after year.
So, What Is a Dahlia Tuber?
A dahlia tuber is a starchy, underground storage root (think: potato) that holds nutrients and water for the dahlia plant. This stored energy powers both the plant above ground and the formation of new tubers below ground.
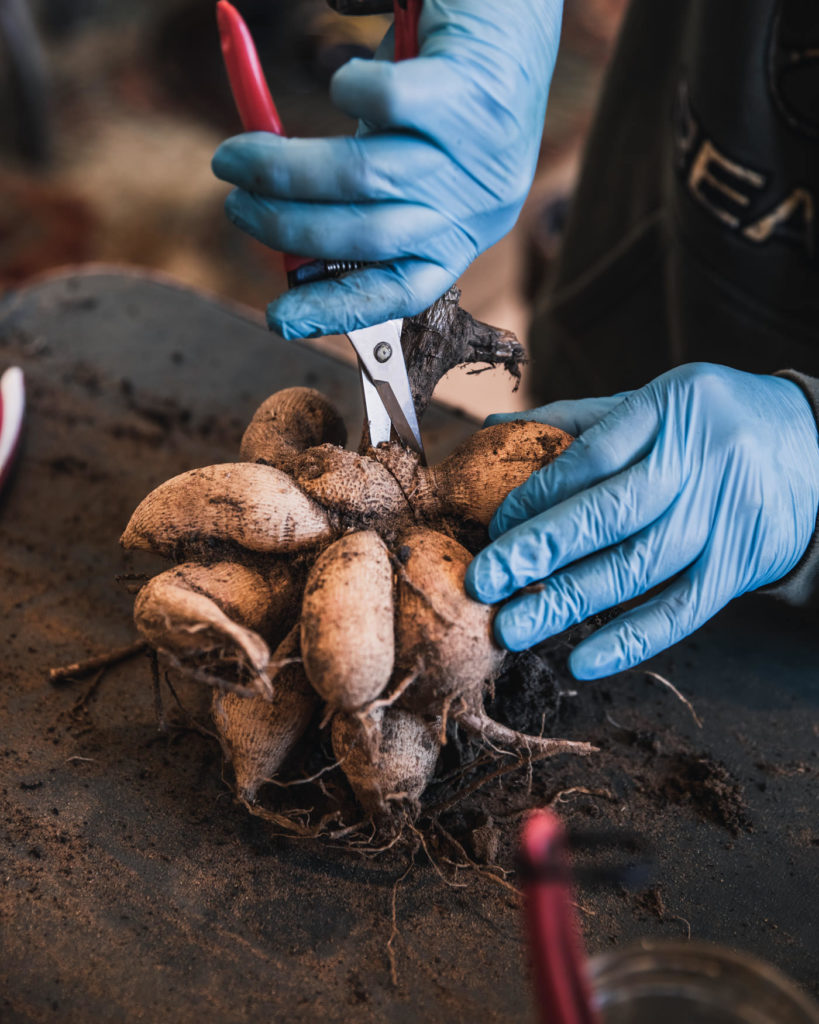
By season’s end, that one tuber will have multiplied into a clump of tubers—a little tuber family—that can be dug up and divided into multiple individual tubers for replanting or sharing. It’s basically flower magic.
And here’s the cool part: a dahlia tuber is a genetic clone of the original plant. That means if you plant a ‘Labyrinth’ tuber, it will produce ‘Labyrinth’ foliage, blooms, and tubers—every time. (Curious about how tubers differ from seeds and cuttings? I’ve got a post on that coming soon.)
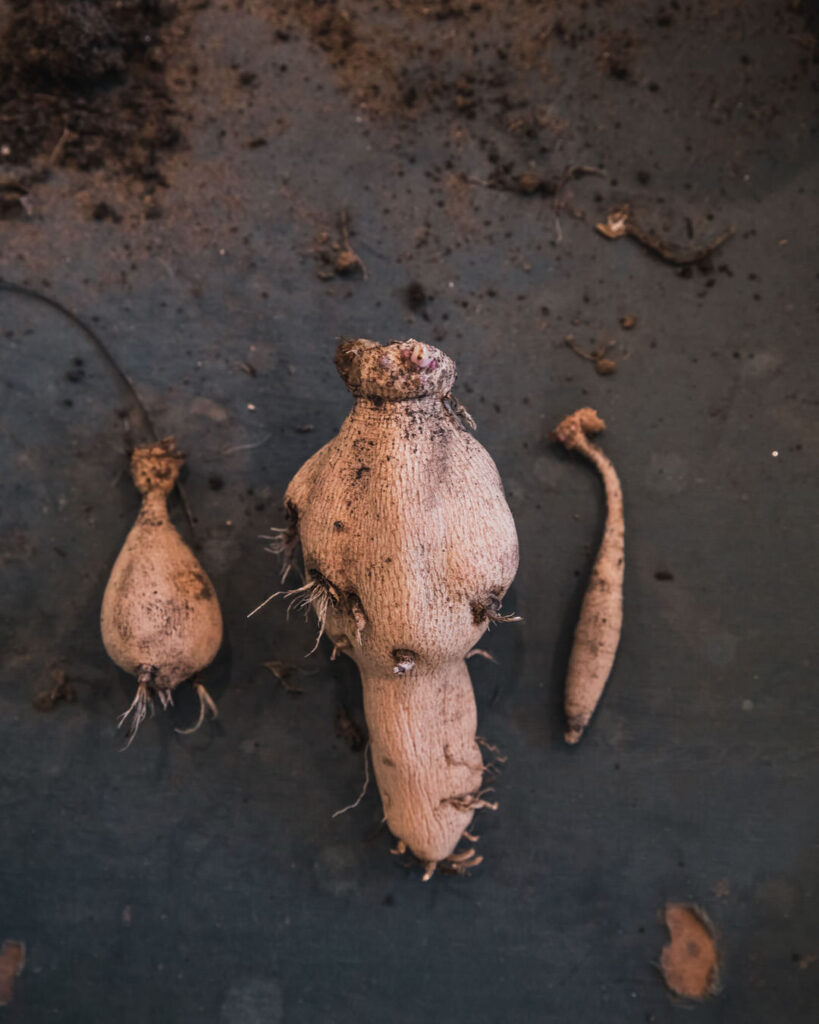
Dahlia Tubers: Does Shape or Size Matter?
Dahlia breeder Dr. Keith Hammett once said dahlias are the dogs of the flower world—like a Chihuahua is to a Great Dane, they come in all shapes and sizes. Same goes for their tubers.
Tubers can be:
- Long and skinny, or short and round
- Smooth or wrinkled
- Light or dark in color
- Hairy (with lots of feeder roots) or corky (with lenticels)
- Traditionally round and pretty or hilariously bizarre (our personal faves)
Here’s the thing: the outer appearance doesn’t really matter. They will produce the same beautiful flowers. Big or small, odd or perfect-looking—what matters most is viability. And for a tuber to be viable, it needs three key things:
- A viable eye
- An intact neck
- Enough tuber body to store energy (usually at least the size of a AAA battery)
Let’s break down what that all means.
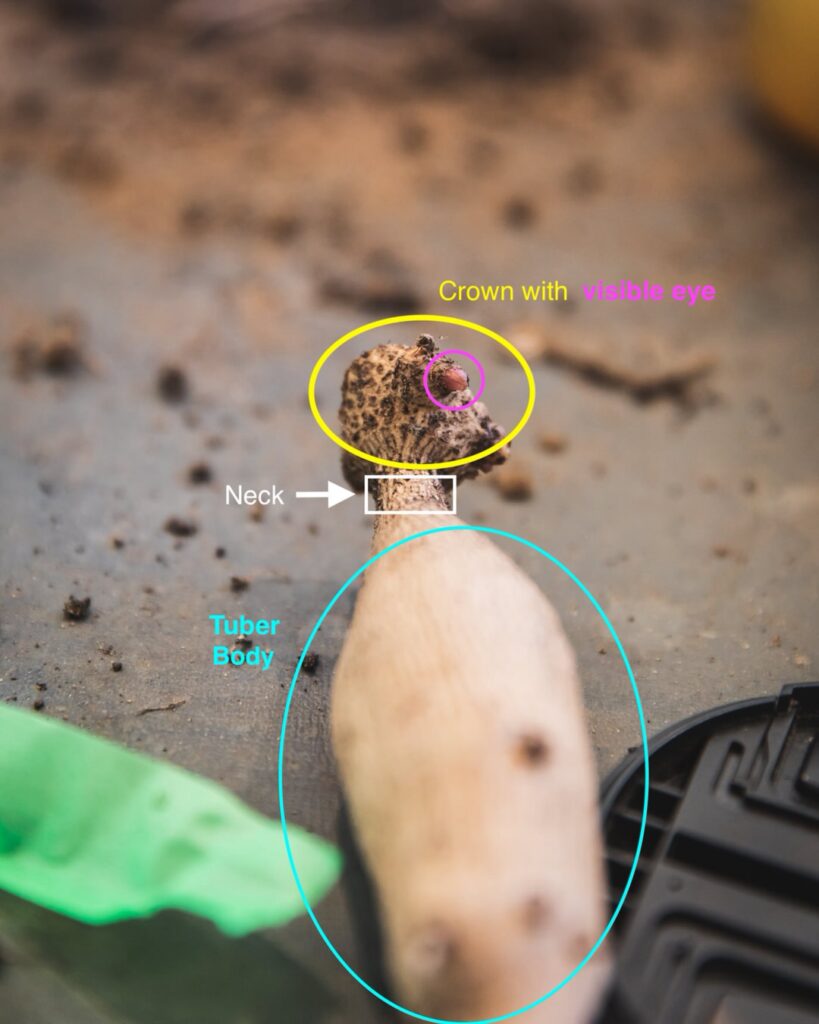
Dahlia Tuber Anatomy: The 3 Key Parts
Take a look at the photo above. Every tuber has three main parts:
- Tuber Body (circled in turquoise)
- Neck (indicated in white)
- Crown (circled in yellow) with a Viable Eye (circled in pink)
1. Tuber Body
The tuber body stores the energy the plant needs to grow. While there’s no “perfect” size, the general rule is that a tuber should be at least the size of a AAA battery. We’ve planted smaller—but too small means not enough stored energy to support the plant’s growth.
Common questions about tuber bodies:
- Small holes or blemishes? No problem—as long as they’re healed over.
- Bottom chopped off? Also fine. Many growers trim tails to save space in storage. In fact, a large portion of the body can be chopped off so long as it is healed over and there is an intact neck and viable eye. This is good to know if you ever experience rotting in storage. Cut it away, leaving only healthy tissue.
- A little soft and/or shriveled? No problem, some just store this way.
- Mushy or totally dried out? Not OK. Contact the supplier. You may want to wait to hear back from them before doing anything that could void a return, but personally, I’d take a picture then cut away anything mushy to see if there is still enough healthy tissue for it to be viable and stop the rotting (but that’s just me).
2. Neck
The neck connects the tuber body to the crown. It acts like a little energy pipeline.
- Intact neck? Great.
- Broken neck? No go. A broken neck cuts off the energy supply—no energy = no sprout.
- Peeling or blemished neck? Peeling is totally fine. Same with blemishes, so long as they are healed over. Some suppliers tape these, I’m not a huge fan of this, but it has never affected plant growth.
- Cracked neck hanging by a thread? Likely not viable.
- Barely-there neck? No prob, some tubers are so fat/round they appear to have no neck😂, but it’s there.
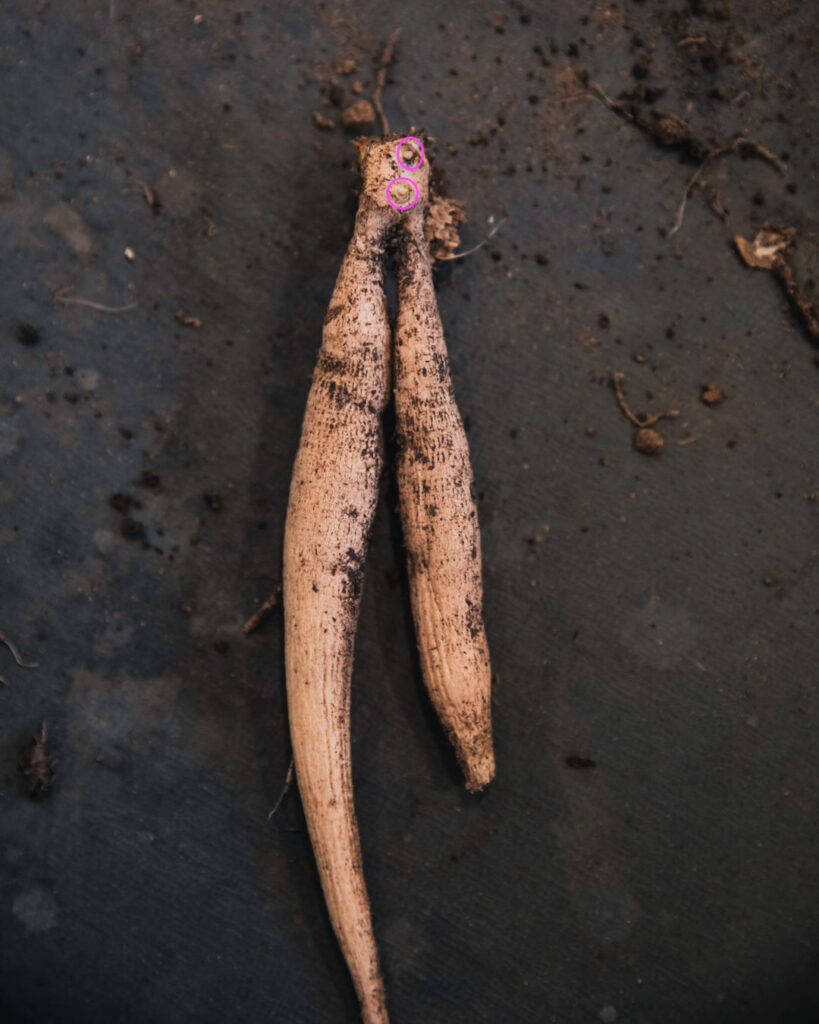
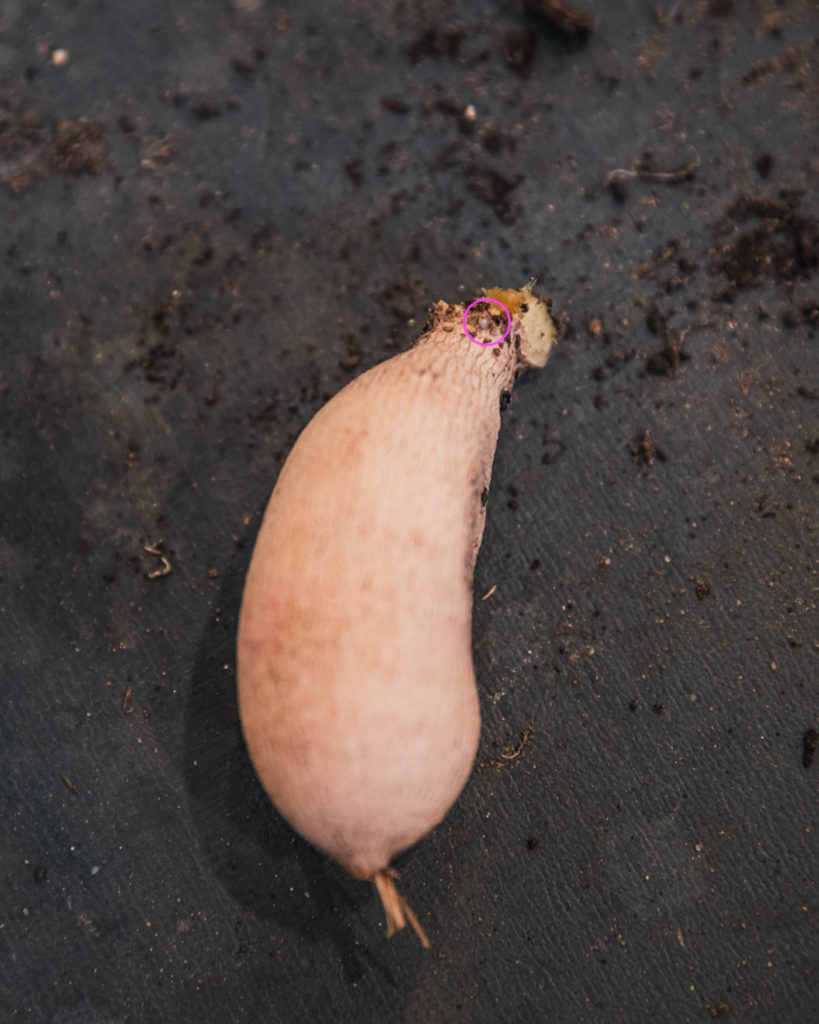
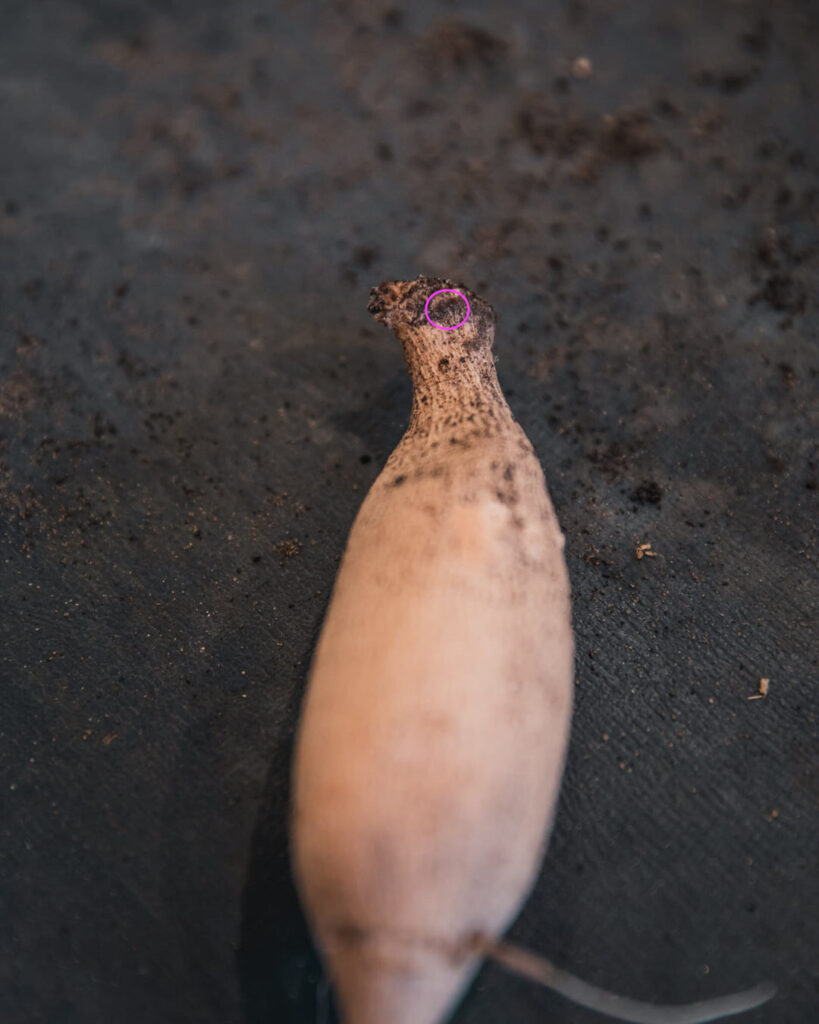
3. Crown + Eye(s)
Eyes are the growth points where new plants sprout. These form on the crown, but sometimes also on what appears to be the top of the neck (especially in short-necked tubers). Sometimes eyes sprout in the crack between the neck and crown and they can also sprout from the top of the crown where the tuber was divided. All A-OK.
Dormant tubers can be tricky—some eyes are obvious, wile others are like little mysterious dots or tiny cracks (I call them tuber zits 😂). Some tubers break dormancy quickly and sprout visibly; others take their sweet time. Below is a closer look at tubers with eyes of varying degrees of difficulty to see.
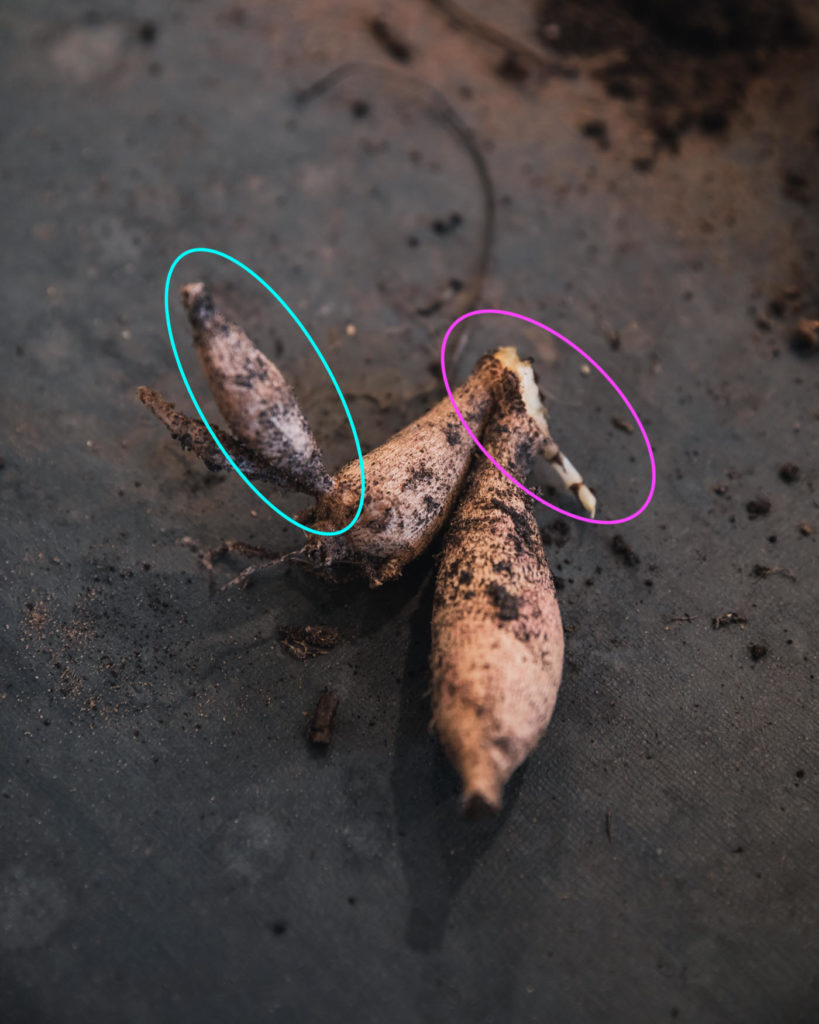
Big sprout popped off? No worries! That’s how cuttings are taken. A new sprout will form in its place. Some suppliers even remove these prior to shipping to minimize concerns. You can even try rooting the broken sprout and growing it as a cutting (I do this all the time).
Final Thoughts
Learning to recognize a viable tuber takes a little practice, but once you get the hang of it, it’s like second nature. When you understand the parts of a dahlia tuber—and what makes it viable—you’ll be more confident inspecting new tubers, as well as storing, dividing, and planting your own stock for future seasons.
Whether you’re inspecting a newly-purchased tuber or dividing your own clumps, just remember:
- Check for a healthy tuber body
- Make sure the neck is intact
- Look for a viable eye—even if it’s tiny and hard to spot
Soon, you’ll be seeing green shoots, gorgeous blooms, and brand-new tubers forming under the soil. It’s like magic.


cLICK FOR Comments +